-->

Sunday, August 18, 2019

Sculpting Tips - Nurgle Tentacles


The third and last small tutorial made around my Blood Bowl Bloaters - this time about the legs of the 'Stand Firm' guy, ones made out of tentacles and worms. I will show my process and the general principles that work here - which work both here and in general when sculpting out of greenstuff. At the end of it, there are also some more concrete tips.

I started by putting a pin in his leg and then mounting it on a base - it's much easier to do a single connection than try to coordinate both pins so that they both stay in the right position.. When the glue was dry I covered the pin roughly with milliput - to secure the pin in place, they tend to rotate after applying too much force. While I was at it, I added a similar piece of milliput on the other leg - it would be much easier to sculpt the tentacles around something firm as the 'foundation'.


I started by adding two tentacles per leg, one in the front and one in the back. This way they were separated - I didn't want them to stick to each other before they were ready. The one on the right is a normal smooth tentacle rolled on an even surface - smoothened carefully with a big, round clay shaper after I set it up in its position.

The one on the left, the segmented, 'wormy' one started the same as the other one - only after I secured it to its position I added the grooves with a small, round clay shaper. The underside of the tentacle can get flattened through all the pressing while sculpting the grooves, so when everything else was done, I refined that from underneath using the pointy sculpting tool - raising the flattened part a bit and deepening the grooves there.
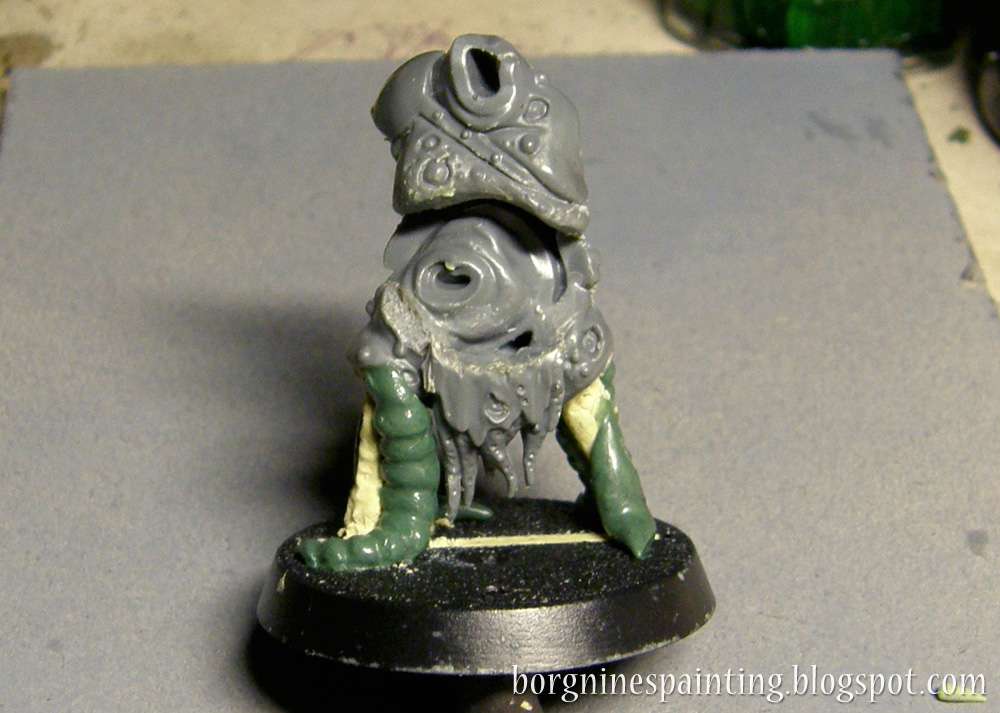

The same story on the backside. Now it has to cure completely before moving on.
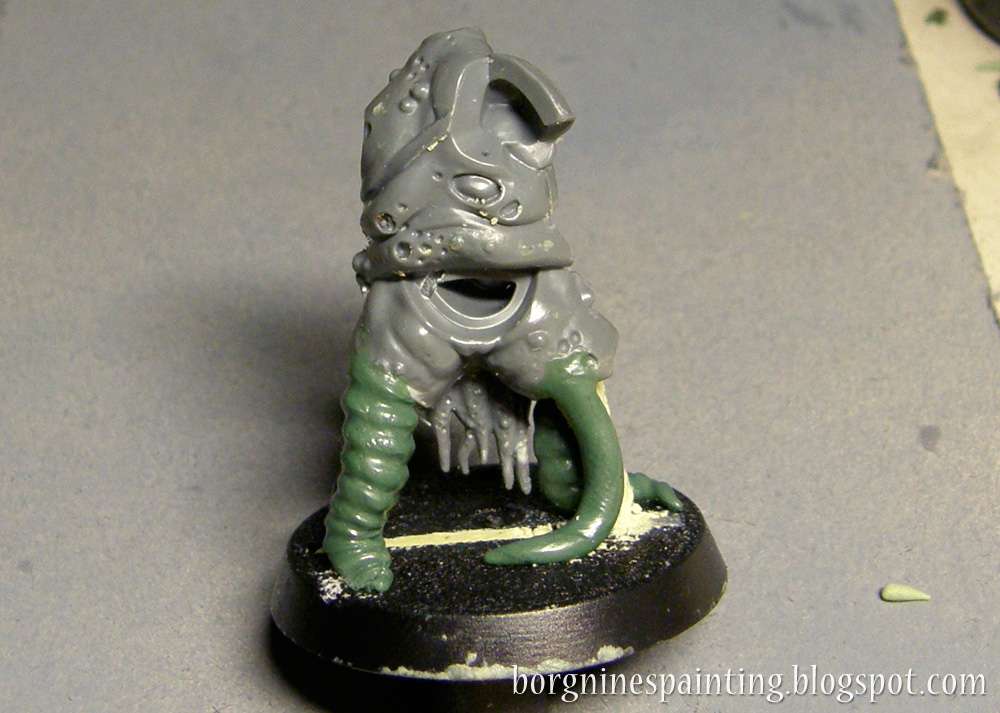

Then it's time for more tentacles. The one on the far left is a variation on the segmented tentacle showed up earlier - only this time I used only the side of the pointy sculpting tool to add many thin ridges close to each other - all the other principles remain.

The one on the left is a fleshy, nurgly tentacle - made similar to the arm that I presented in the previous tutorial. I made a normal, smooth tentacle on an even surface, connected it to the main body, pressed various indentations and pits with the small, round clay shaper and smoothened it out a bit afterward. While it was still soft I pressed a ball of hard greenstuff into it, to create this 'egg lodged in the flesh' kind of effect. It can be a boil, a botfly egg or an eye.

When that was all cured, I added an extra tentacle between two existing ones - seen on the left. I prepared a round tentacle out of greenstuff, stick it between the existing ones and secured it to the ground by reaching into the crevice with the pointy tool, pressing the new tentacle into the ground. Then I just laid the new tentacle on top of the other appendage.
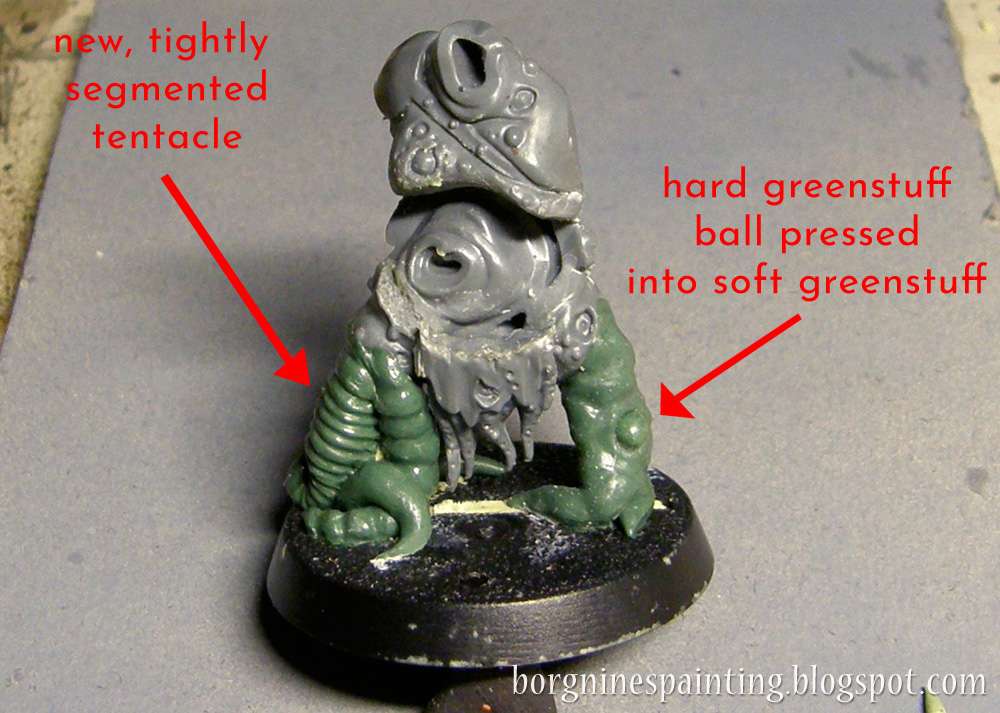

How it looks like from behind.
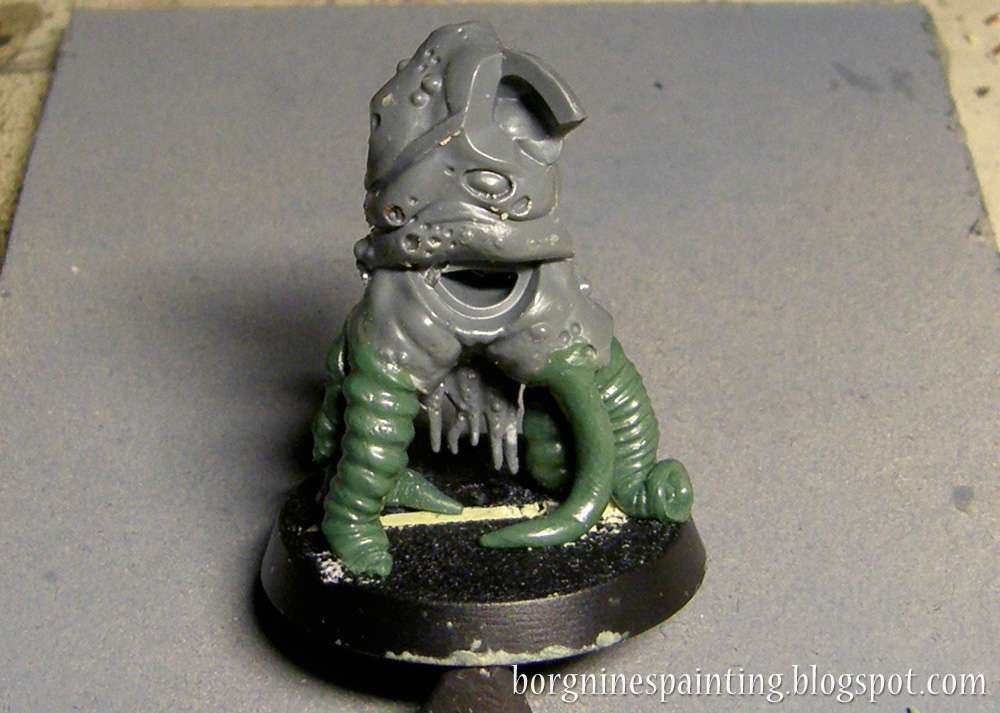

Now, even more tentacles. On the left, there's a new smooth tentacle with some additional flesh above (to make it mesh with the rest of the body a little better) and a slug tentacle on the right. To get this effect I prepared a tentacle with a triangular section - I made a normal, round one first and then pressed it to the table (with a piece of foil to unstick it easily) with two pinching fingers. Then I glued it between the legs and added many longish indentations on it, using the small, round clay shaper. I pressed it a little bit more close to the edge, spreading it around more, to create this 'skirt'-like effect slugs have, for a lack of a better word.
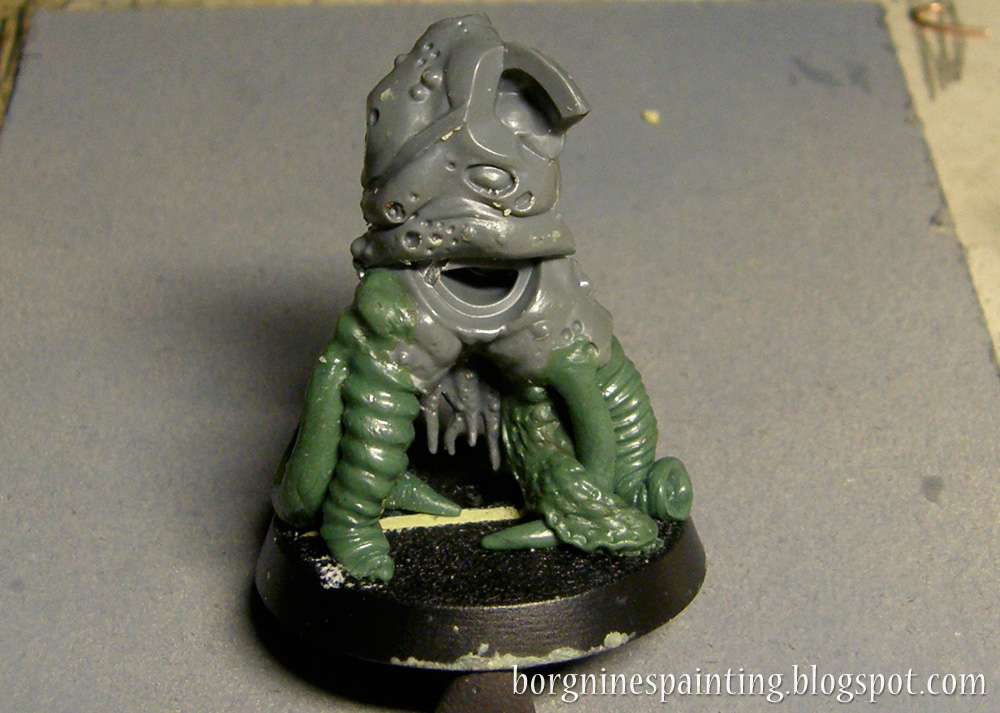

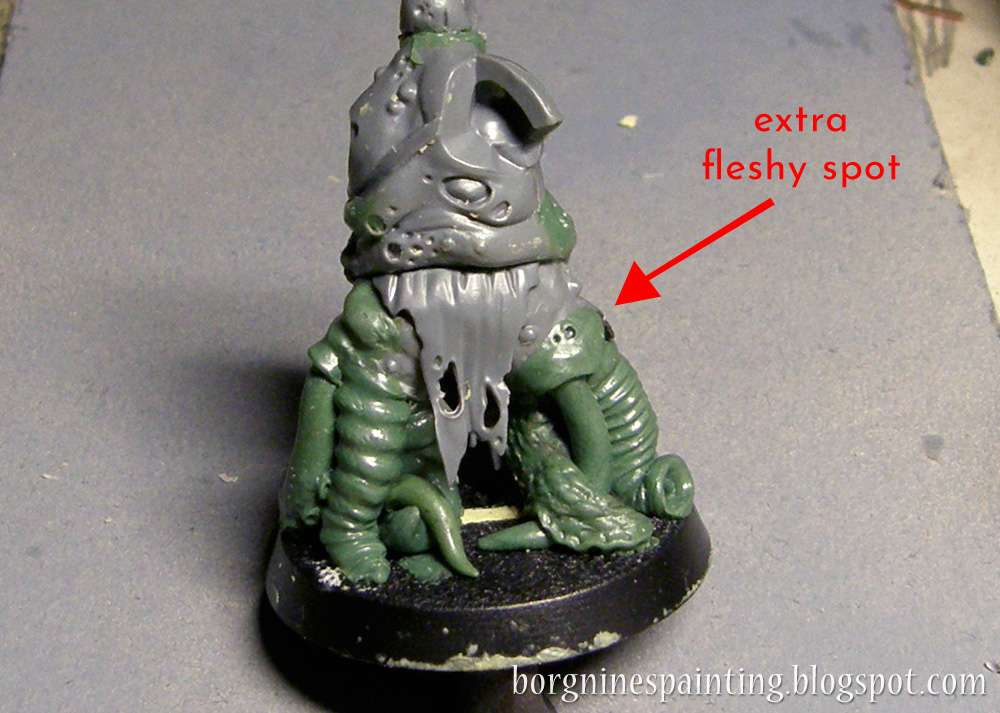
Now, when that has all cured, I added even more thin tentacles in every crack and crevice that I managed to find, to create this effect that it's a writhing mass of flesh. On the right, I added an extra fleshy fold at the spot where a tentacle joins with the body - I just pressed a blob of greenstuff over there and smoothened the connection with the body, but not with the tentacle. Now it's not yet another smooth tentacle, but one that comes from inside the body - it will stand out even more after it will get painted all slimy.

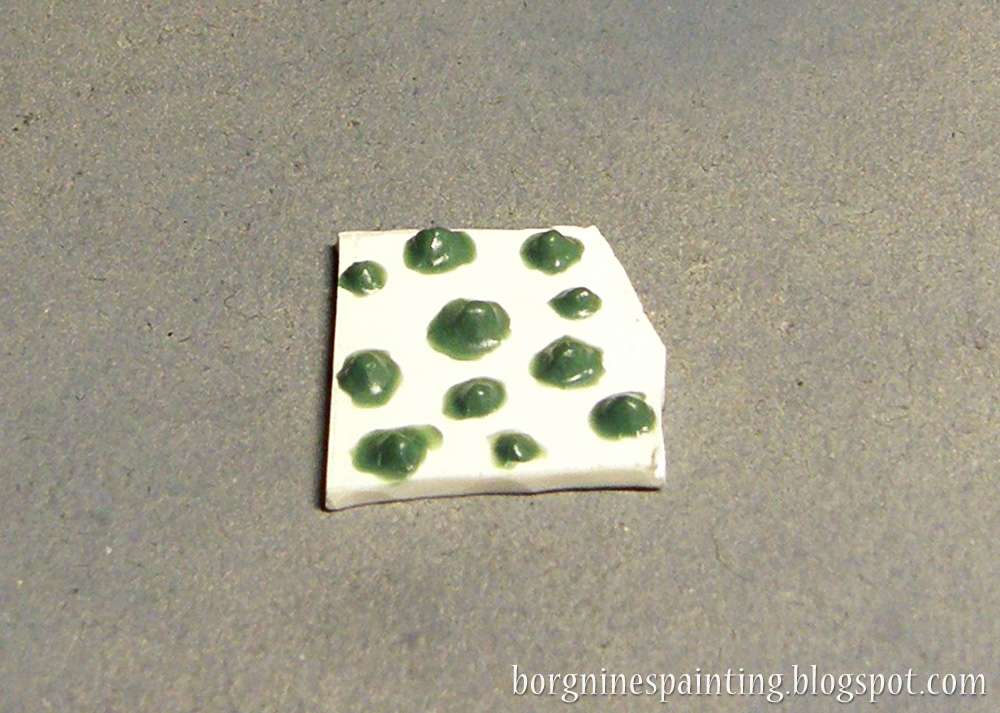
And now a small addition - short instruction how to easily make suction cups out of greenstuff, always useful when sculpting tentacles. They're not hard to do and improve the tentacles immensely. This guy here also has them, but quite underneath and hard to photo. Because of that, I did some of them separately.

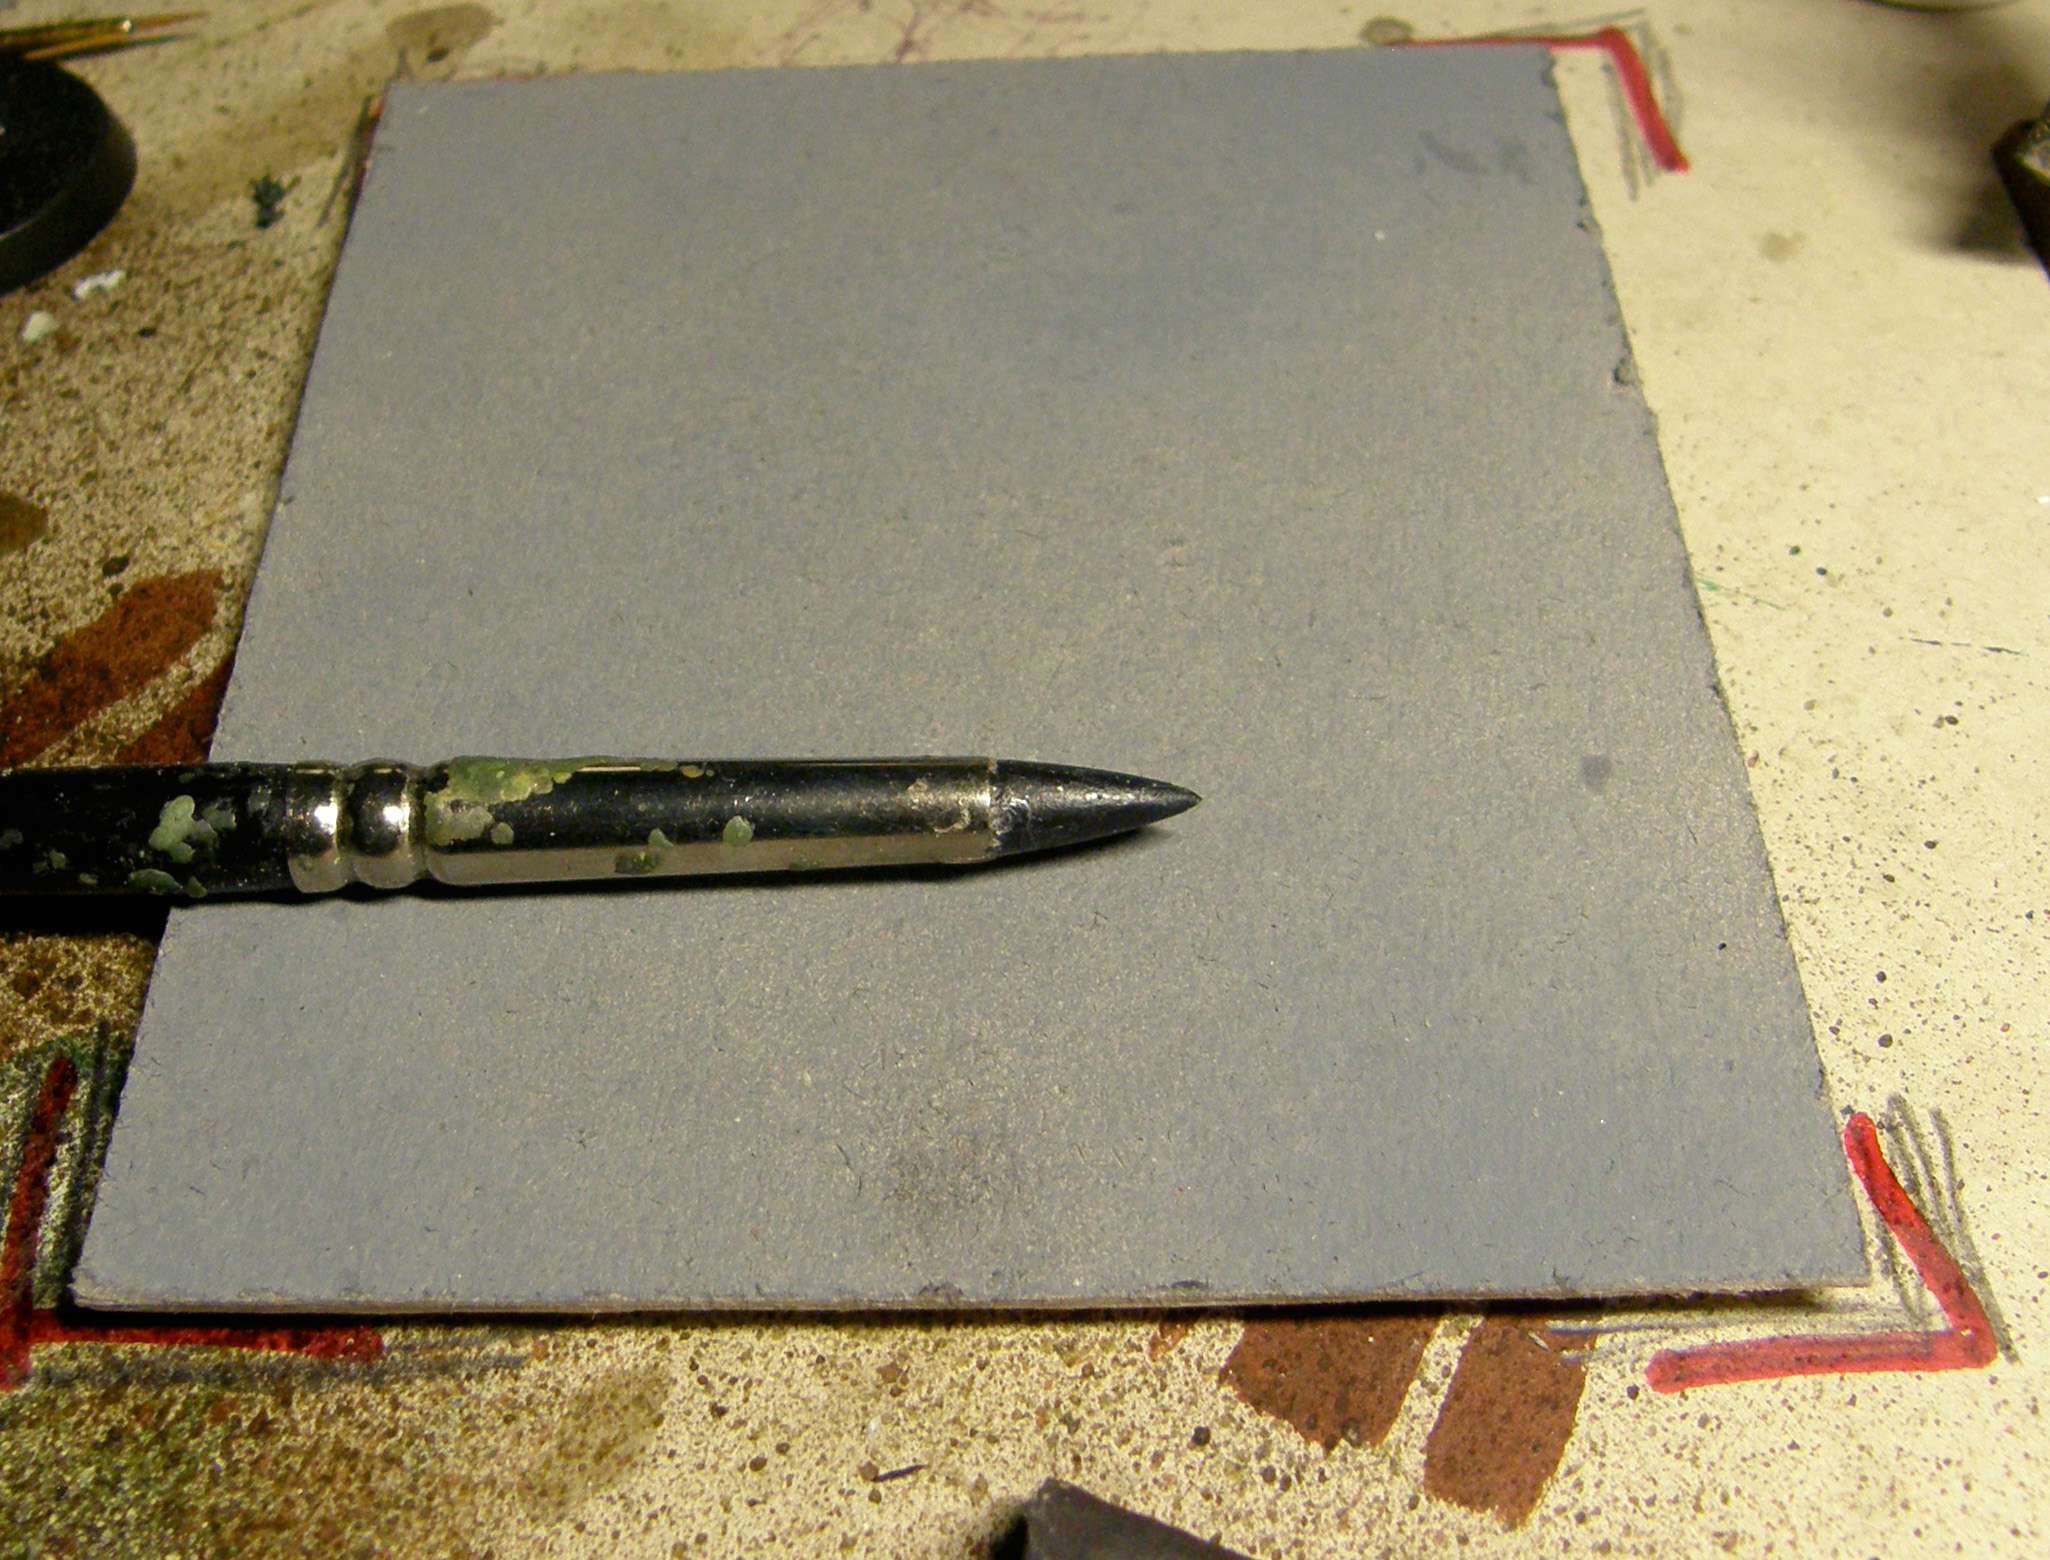
The important thing to do is to sculpt them on a hard surface - I used a piece of plasticard here but cured greenstuff and the resin/plastic/metal miniature surface work well too. When I have that, I just roll some small balls of greenstuff (in whatever sizes I need them) and place them on the hard surface.


Then, using the big, round clay shaper, I pressed their sides into the hard surface and smoothened them out, merging them with the 'ground'. They look like pimples now - which can also be useful when doing Nurgle work!

And when that's done, all that's left is to use the same big, round clay shaper to press every pimple vertically with the point of the tool to create the hole. Small clay shaper will work just as well here, as well as the non-hairy end of the brush. And that's it, ready to disgust your opponents.

Sunday, August 11, 2019

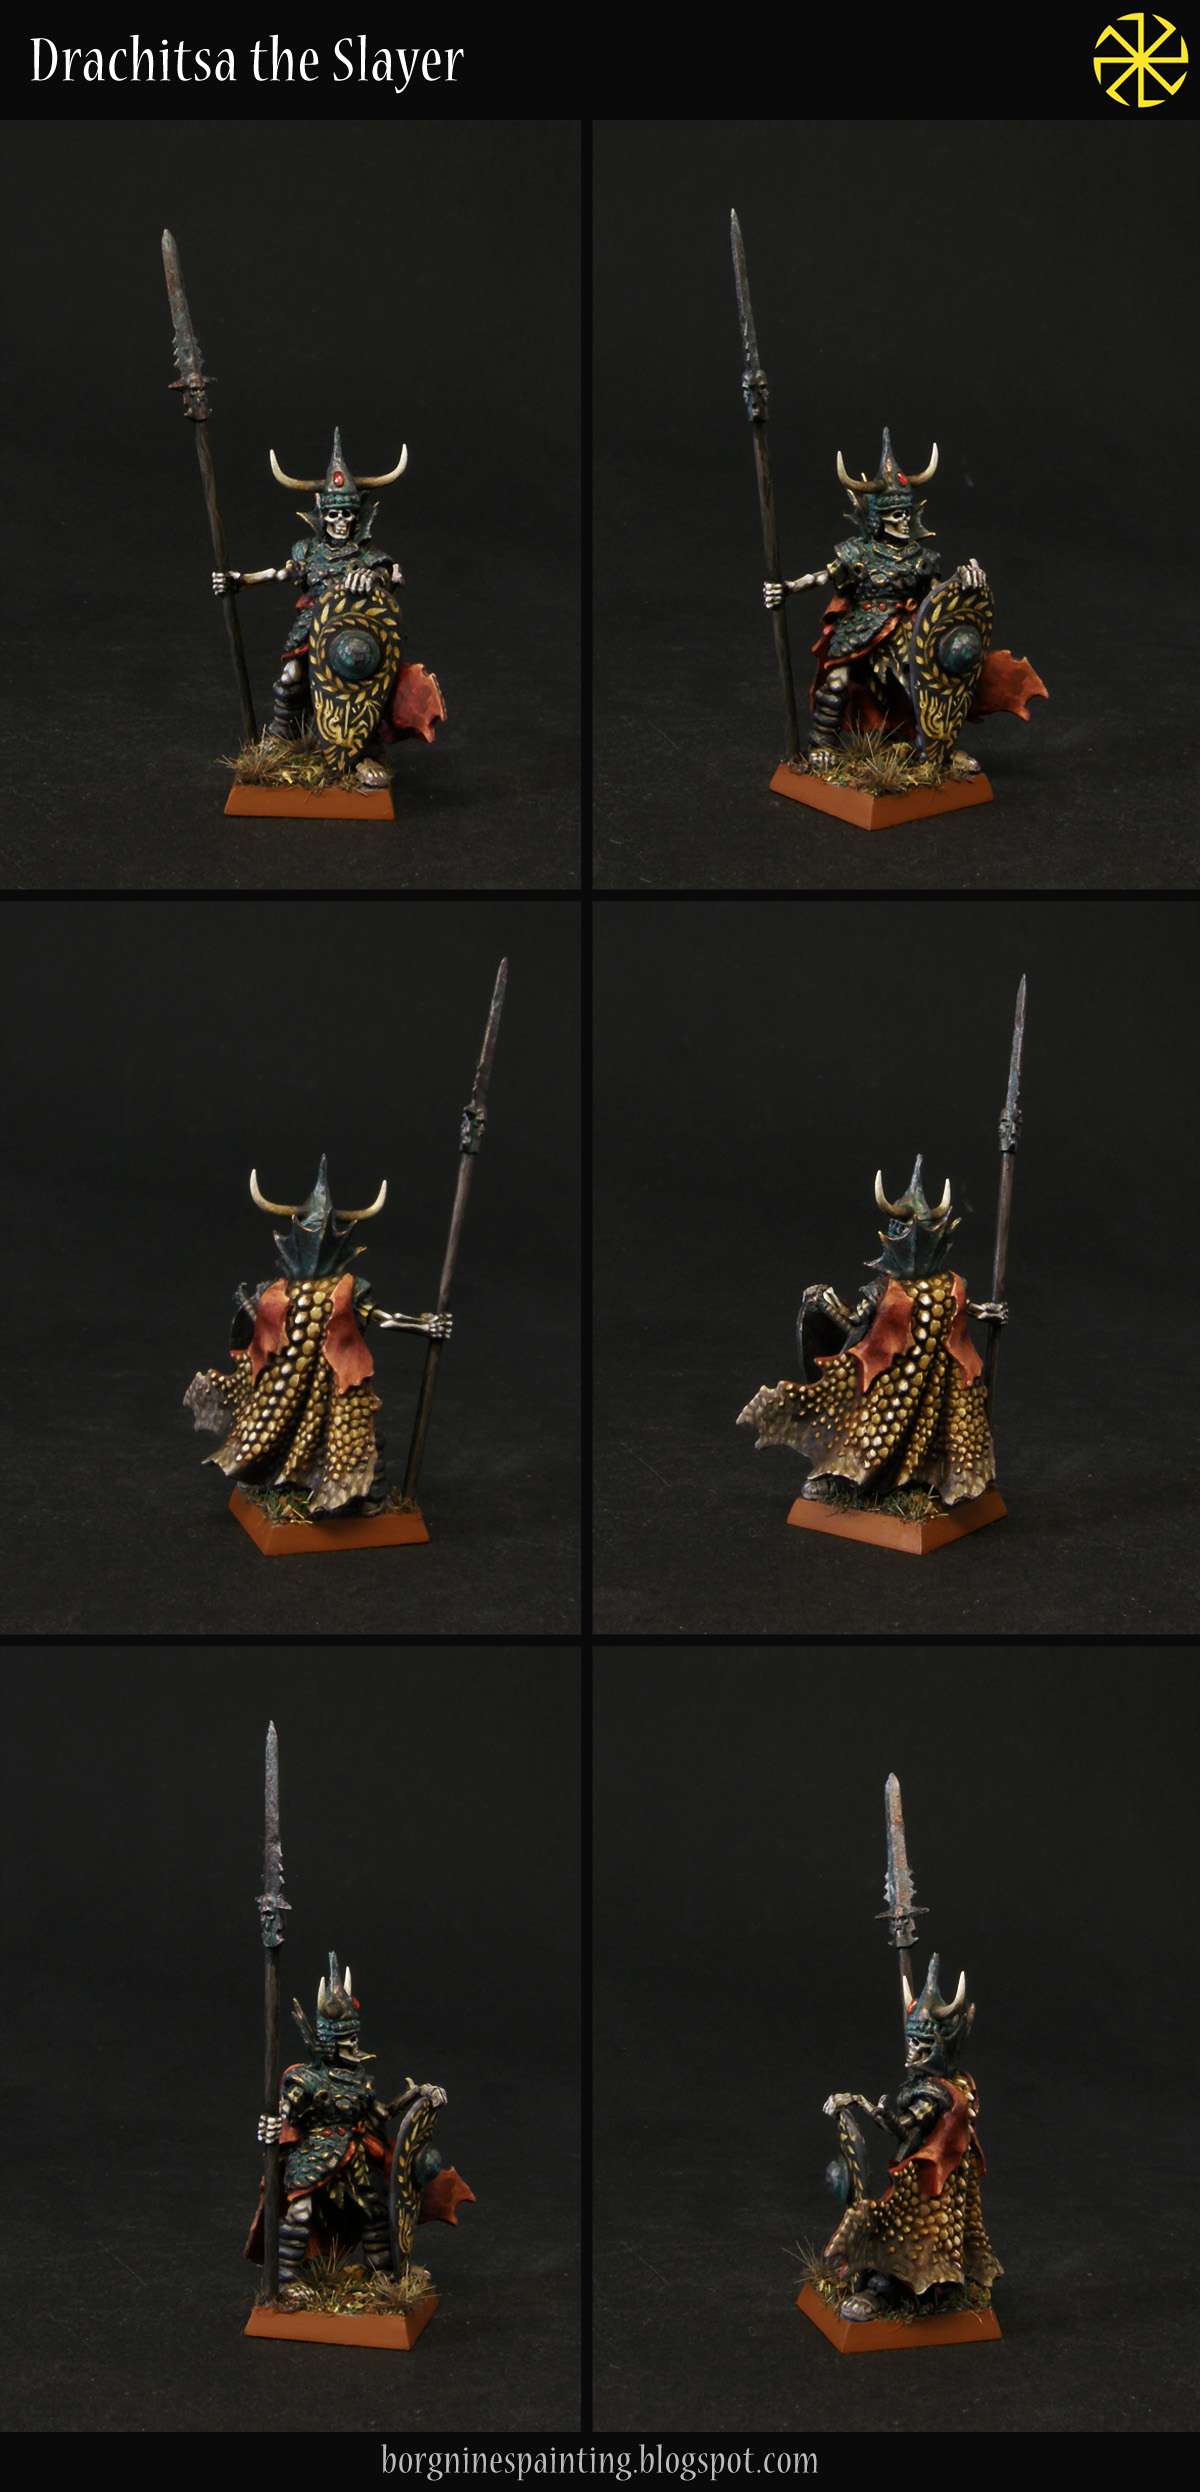
Drachitsa the Slayer

After Yarema I have yet another wight hero painted - or a heroine to be precise - Drachitsa the Slayer, the Fearless Maiden and the Killer of Dragons.

After all the wights that are basically the same with their patinated armor and patterned cloaks, this one has something special - a dragonskin cloak. Still, I didn't want her to stand out too much so I kept her in the same color palette, with only a slight tint of green added to the scales. Other than that, she was a rather standard fare for me.


Every society has its heroes. One such in Varsavia was Kiril the Woodsman, another one was Drachitsa the Slayer. From her earliest days thought to be without any fear, she was the only one to undergo a quest to find the legendary Oakspear and slay the terrible dragon Zmey that was terrorizing his countryside. She killed the beast, took it’s skin as a cloak and returned as a heroine. Since then she was slaying beasts and other enemies of Varsavia and the Death God and made many, many more tales about her, until finally succumbing to old age and a bitter rival. After an excavation under one of the mountains, ahe was found by the wights and subsequently raised. Thanks to the powerful enchantments on her tomb, she retained all of her memories, skills and famed weapons - and like Kiril, she joined her undead brethren to do what she did best - slaying.

Painted, kitbashed model of a Wight

Sunday, August 4, 2019

Blood Bowl Dark Elf Staff - Mallerion the Team Owner + WIP

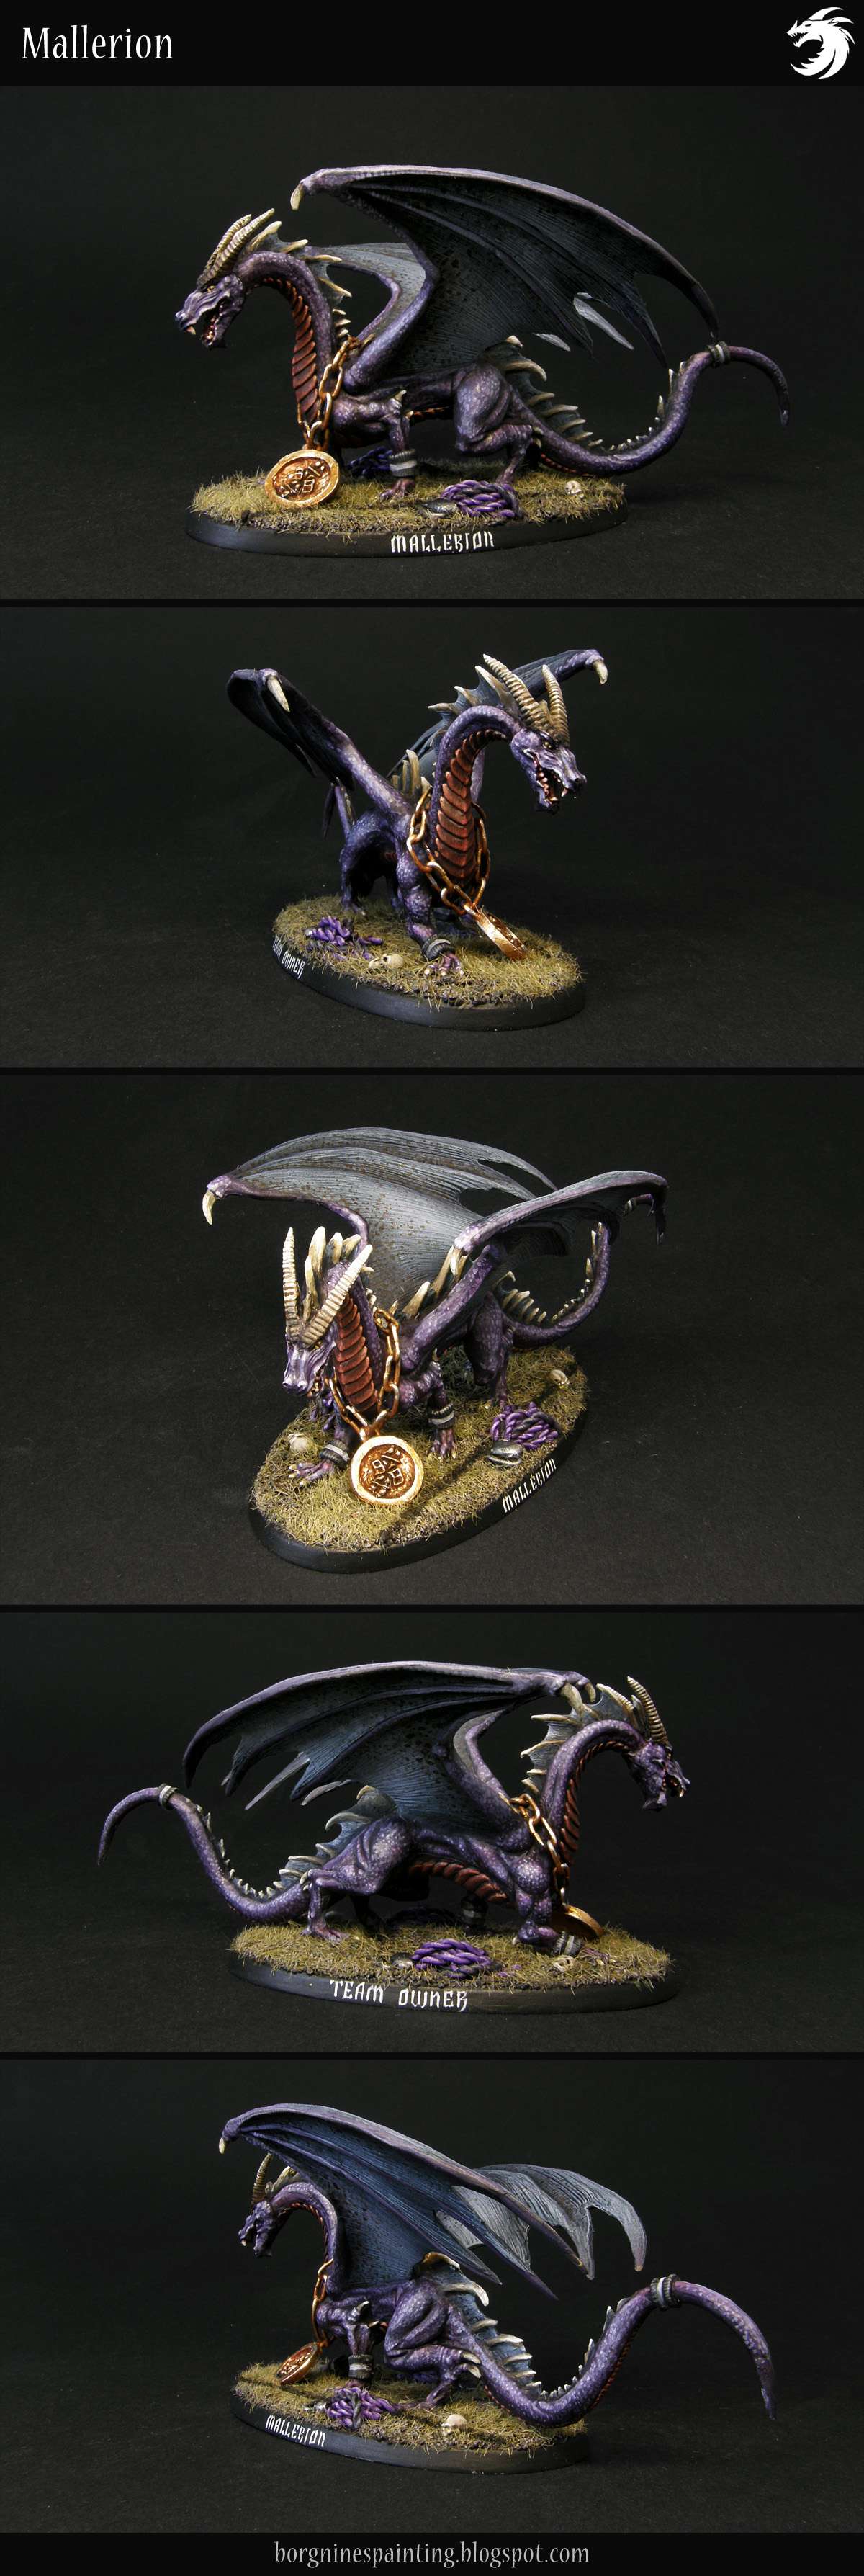
Back when I gave a name for my Dark Elf Blood Bowl team, the Dreadspear Dragons, I came up with the idea that due to some legal shenanigans, the team is officially owned by a real dragon, becoming a gimmick that makes them famous. This was just to give some more meaning to their name and make the whole backstory a bit more interesting but it would be waste if I didn't represent it somehow! So I digged through various dragon miniatures and decided on using a Shadow Dragon from Reaper Miniatures - it had the good style, pose and size for me.

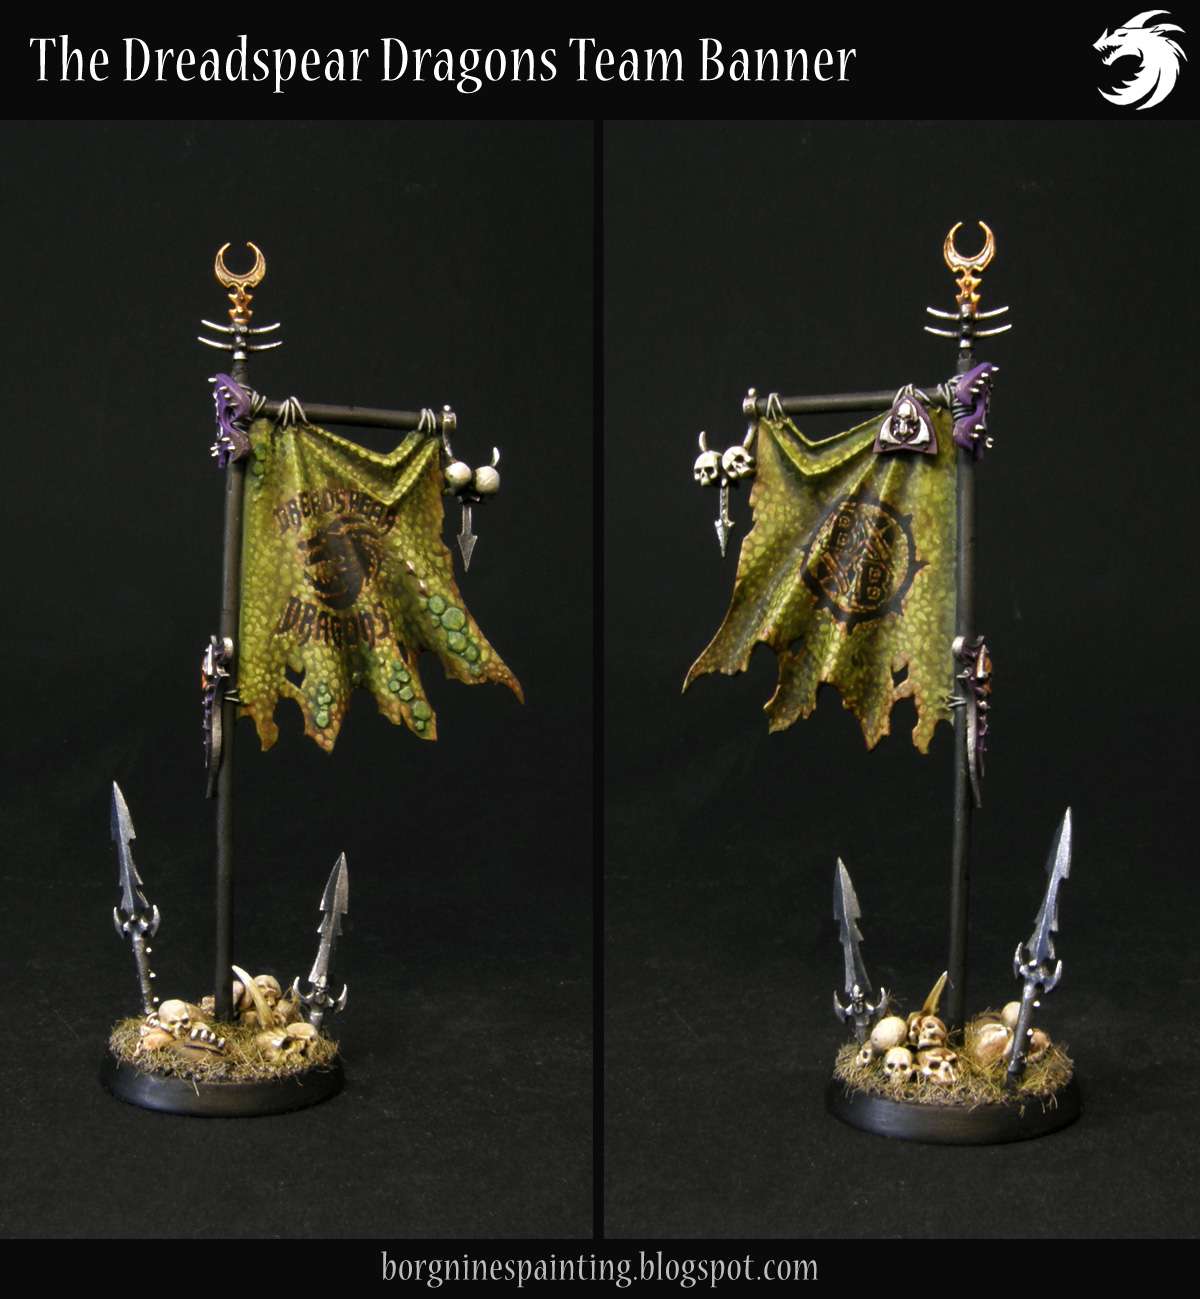
Besides that, I also thought that I could do banners for my teams (because I love banners) - which could be then paired with cheerleaders and/or mascots. Thankfully I had a dragonskin (?) banner in my bits collection, one from Mournfang Riders, so I mounted it on a base, covered in various Dark Elf bits and added several skulls for the evil factor. Now the Dragon can stay with the flag on the sidelines and represent the team better than ever!

The painting scheme was chosen to reference the players' colors - purple, dark red and blue, pale green, with silver/bright accents. I used numerous points for shading and highlights on both instances of dragonskin to simulate the scales - and I think it was actually easier to pull off than trying to go for smooth blending. The wing membranes also got a lot of dots to make them more visually interesting.
I plan to use him in the game as the equivalent of 4-5 cheerleaders - and that's why there are two giant pompoms laying on the ground, just in case someone had doubts what is the dragon's role on the pitch. Maybe I'll come up with some additional rules for him - if so, I'll post them here of course.


The Blood-Bowl-enthusiastic dragon Mallerion, a mascot of the Dreadspear Dragons was a known oddity in on the pitch, but he became especially noteworthy only after becoming the actual, official owner of the team (due to some desperate legal maneuvering on the part of the previous one). Being a dragon, he was neither interested nor capable of all the bureaucratic work needed, so there’s a wide array of assistants and representatives who do all the legwork for him. They may even set their own salaries and working conditions as long as the owner is happy. Thankfully, Mallerion is perfectly content with having enough food, being able to cheer from the sidelines (heightened statistical amount of deaths correlating with him being on the stadium is a coincidence!) and taking part in photo sessions. Not only he makes the press more interested in the team, but his presence on the sidelines can also motivate the players and the fans into a glorious rage much better than a whole team of cheerleaders! The only problem is that he personally terminates the staff who’s he displeased with - after which the unfortunates often don’t find a new job. Well, this isn’t strange, since it involves fire breath and being eaten alive by the dragon, but nobody gets into the Blood Bowl business expecting a long life and nice retirement!

First, the scaly lad himself:

Picture showing a dragon tabletop miniature, a Shadow Dragon from Reaper - with purple scales, reddish underbelly and dark blue wing membranes, standing on an oval base. The dragon has a golden medallion on its neck, bearing the Blood Bowl logo. The miniature is used as a team owner for a Blood Bowl Dark Elf team.

And the banner that I prepared to accompany him:

A compilation of two pictures showing both sides of a miniature banner - it is painted to look like a green dragon skin and has both the team's and Blood Bowl's logo freehanded on it. Skulls and spearheads are scattered around the base.

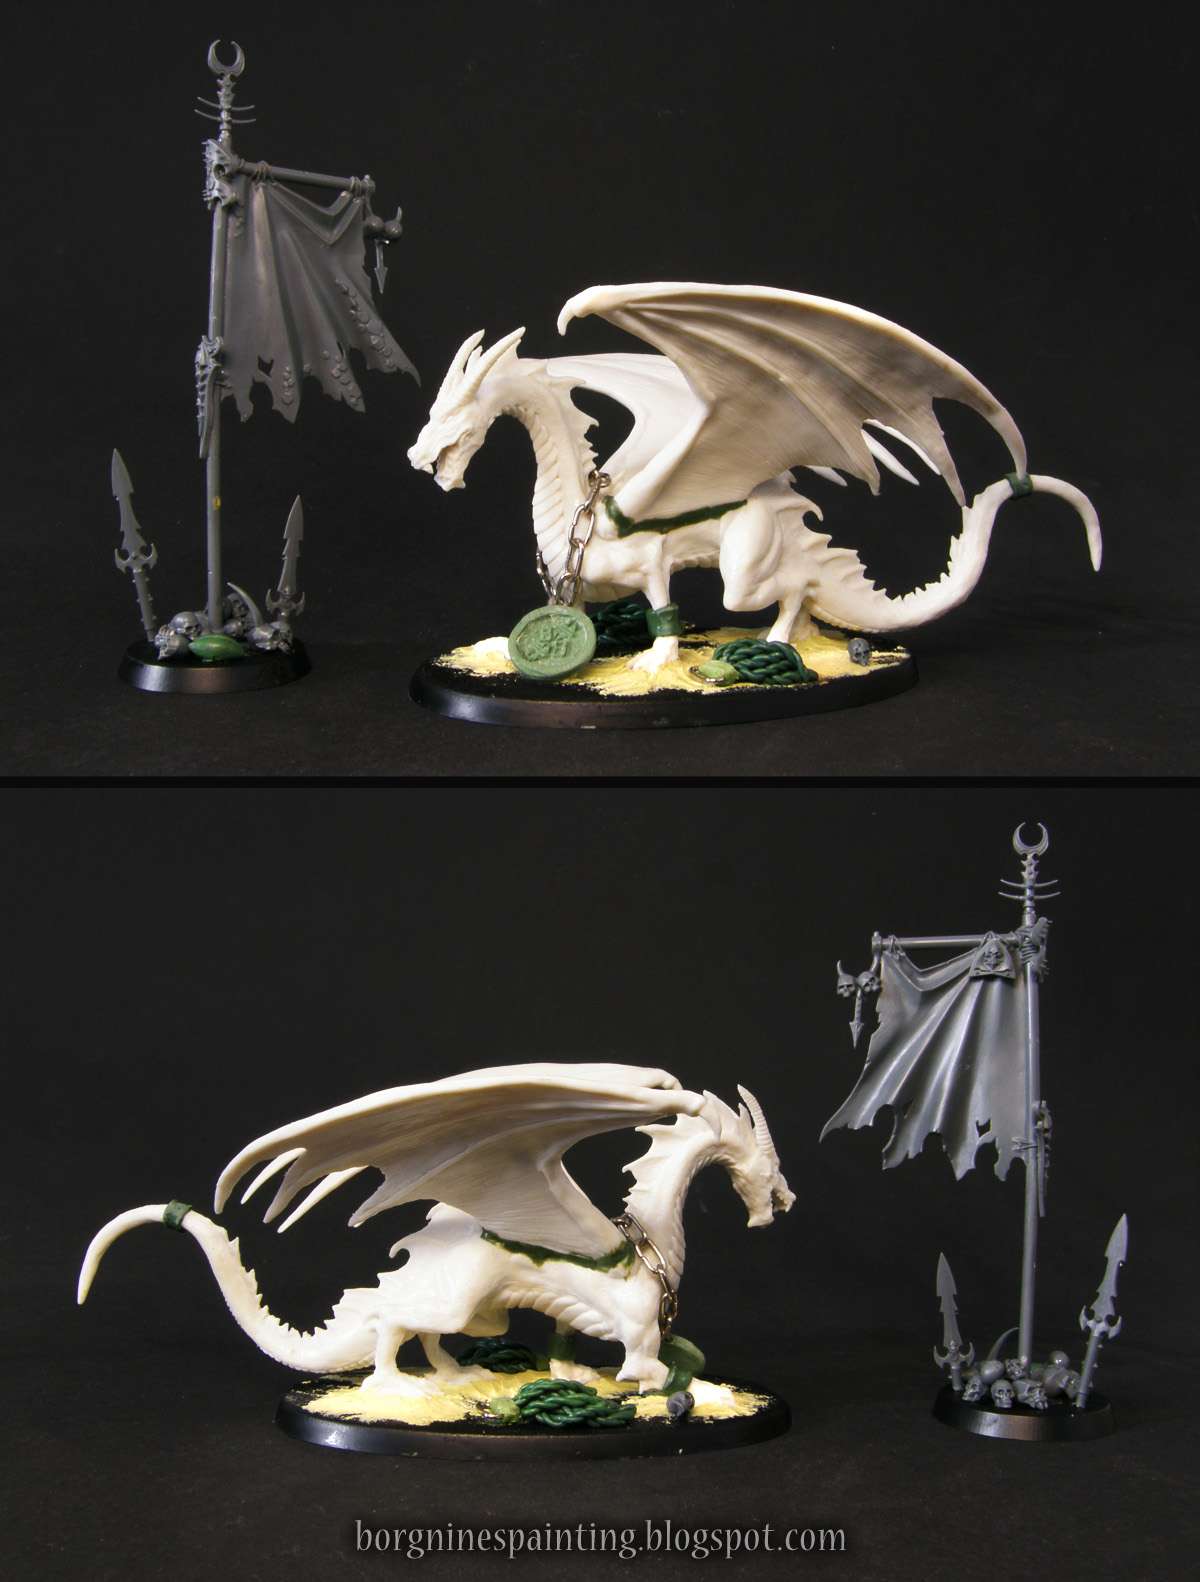
The conversion work that I did here was really minimal, but I've made a photo nontheless:

Unpainted versions of the miniatures shown above, showing the conversions done to both miniatures.

Sunday, July 28, 2019

Sculpting Tips - Nurgle arms

Title picture showing a converted Nurgle Putrid Blightking with fists on brass wires, with red line-drawings overlaying them, showing the planned conversion work around the wires.

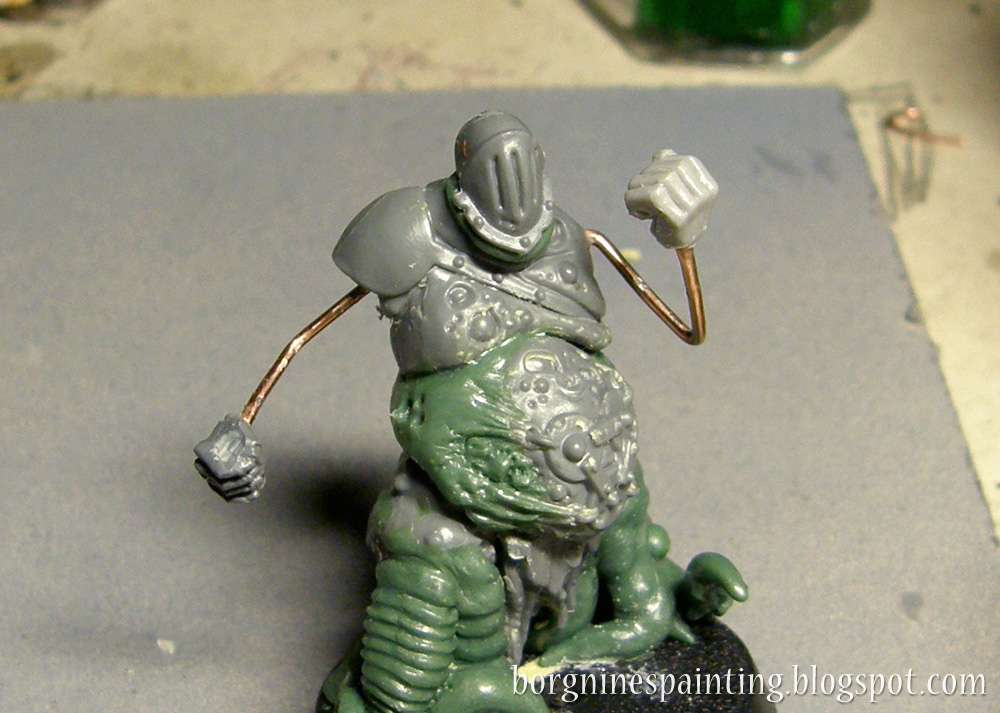
In yet another short tutorial I will show how I am going about sculpting arms for all my Nurgle followers - on the example of a Bloater I converted for Blood Bowl. I had a specific pose in mind for this guy and no bits were good for it, so I decided to make them on my own. Thankfully, the nature of those rotting meat sacks gives some leeway when it comes to anatomy, so doing things like this is both easy and a good opportunity to practice some sculpting. I started with some paperclips that I bent in the desired shape with fists glued at the ends - hands are a completely different story when it comes to sculpting, so I prefer to use existing bits when possible.

Unpainted, converted Putrid Blightking miniature with hands being made out of copper wires - the starting point for the greenstuff sculpting.

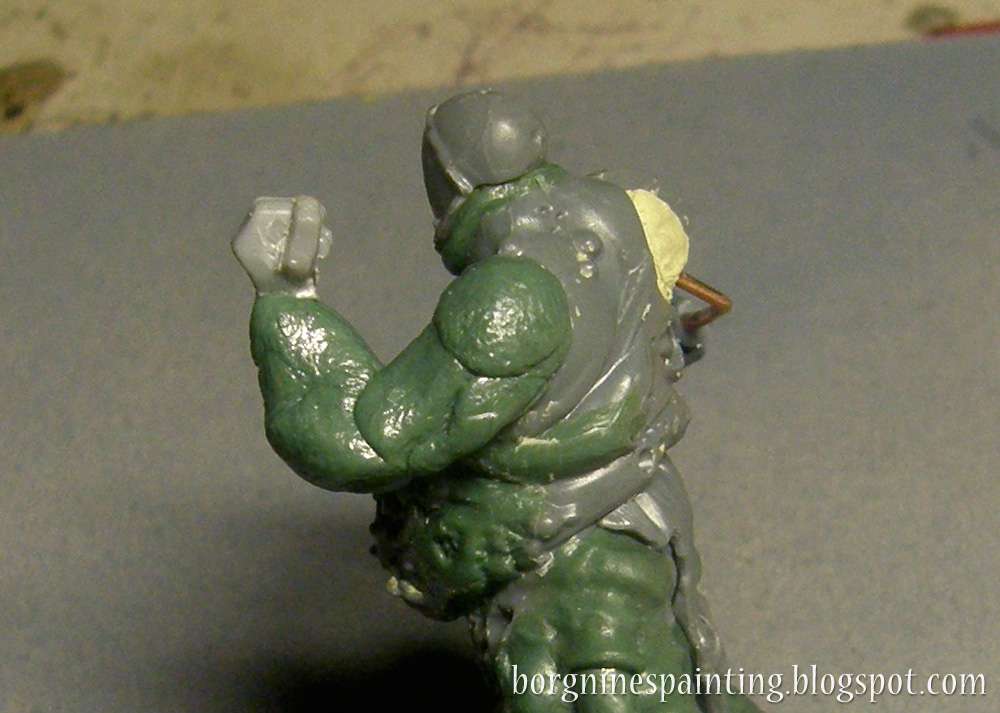
The next step is to cover the paper clip with blobs of greenstuff - just adding more and more until I was satisfied with the amount. It's okay to use fingers at this point.

Several pieces of greenstuff roughly placed on the wire on the Putrid Blightkings arm, showing the first shape of it.

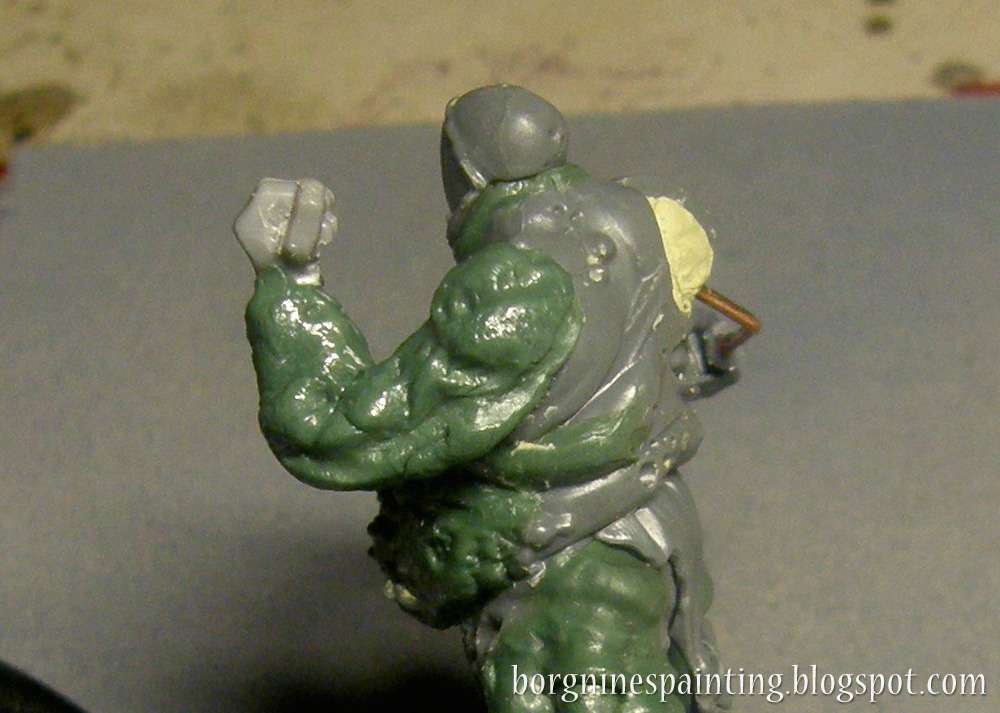
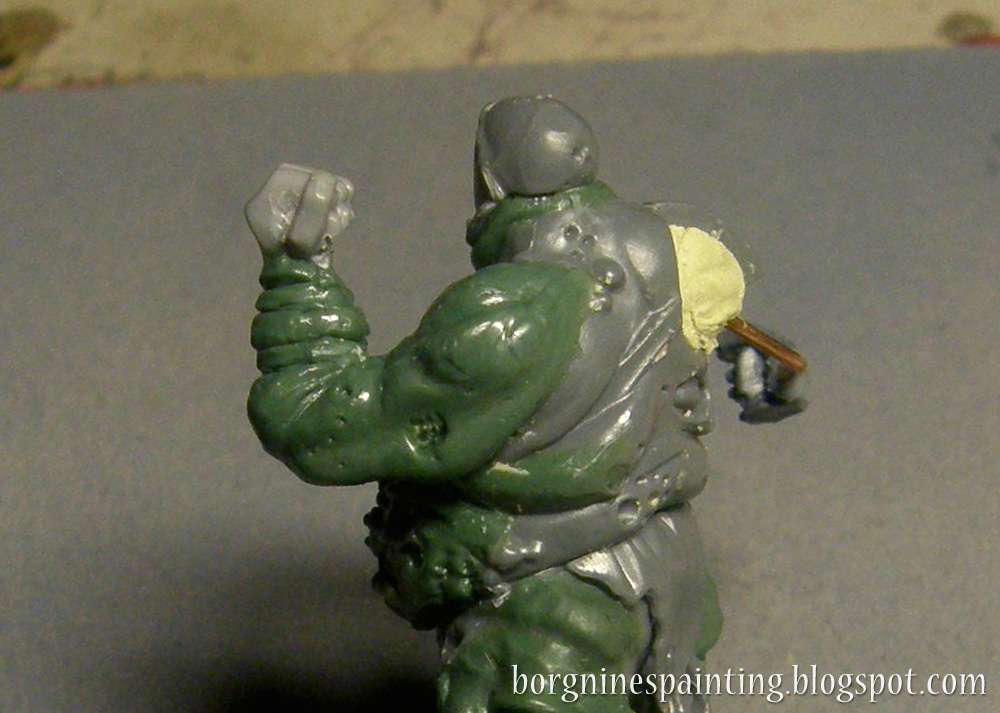
Now is the time to apply the rough structure to the arm. Here I was using a small, round clay shaper to define the musculature like the deltoid, the biceps and the forearm. I wanted the flesh to sag a little here, to show that it's not all nice and healthy, so I also roughly sculpted that on the underside.

The same view as before, only now the greenstuff parts were pressed and shaped into a rough composition of forms and muscles, with a clay shaper.

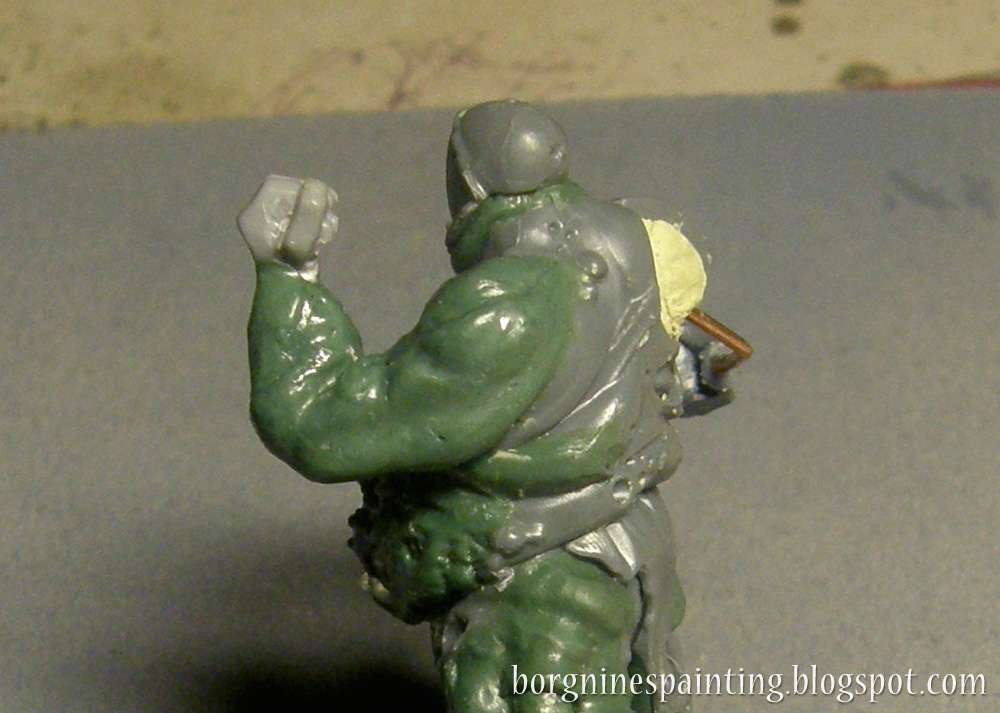
When I was satisfied with the general form, it was time to smooth it out. For that I used a big, round clay shaper and round, flat clay shaper, moving them carefully over the ridges and blobs, smoothening them out gradually. It's important to make it wet here, both the tool and the greenstuff - water, oil or saliva works just fine. Some places may need a sharper detail at this point, like the crease on the 'elbow pit' - I used the side of the pointy sculpting tool for that here.

The greenstuffed arm is now smooth, after application of a flat clay shaper.

When that is done, it's time for textures and other special effects. First, I used the pointy sculpting tool to make the open wound - by making small holes tightly around a circle and then adding similar dots inside the circle until it looks messed up enough. Then I used the scalpel (or an Exacto knife) to add ridges on the forearm, to simulate straps that go together with an armor plate that he will have there. I also made several small holes with the pointy tool, randomly in small groups - it enhances the rotting effect I was going for here.

The greenstuffed arm now has details sculpted in - small cuts, holes and wounds.

At this point, the whole thing is ready to cure. If I want to add some boils on the skin here, then I like to use Liquid Green Stuff for that (mixed with varnish for added sturdiness) applying them on the cured greenstuff in the same spot in several layers. An alternative would be using small blobs of normal greenstuff - being extra careful about smoothening out its connection to the rest of the flesh. Here I have the other arm, already finished - it was created in a similar way, only during the first step I used several greenstuff balls to create the structure, rather than trying to emulate any kind of musculature. Then I smoothened the connections between them with the clay shapers and added some holes and texture.

Another arm of the Putrid Blightking miniature is visible here, bloated and out-of-proportions, made out of many round blobs of greenstuff.

And here is the right arm seen from the front in all of its bubbly, disgusting glory. Here you can also see another kind of trick that I often use on my Nurgle miniatures - a ball pressed into the soft greenstuff. Every time I sculpt something and I'm left with extra greenstuff, I roll it into balls of several sizes precisely for this reason. By pressing such a ball into the soft putty, you can create a boil with a clear border between it and the rest of the body. It can be an eye, a boil, or a botfly egg - and the greenstuff that is raised during the pressing can represent swollen, inflamed tissue around the thing.

Picture showing the finished conversion, with a red arrow pointing to the small greenstuff ball that was pressed into the arm before it cured, creating a simple boil.

Sunday, July 21, 2019

Matthias Schwarzfeuer

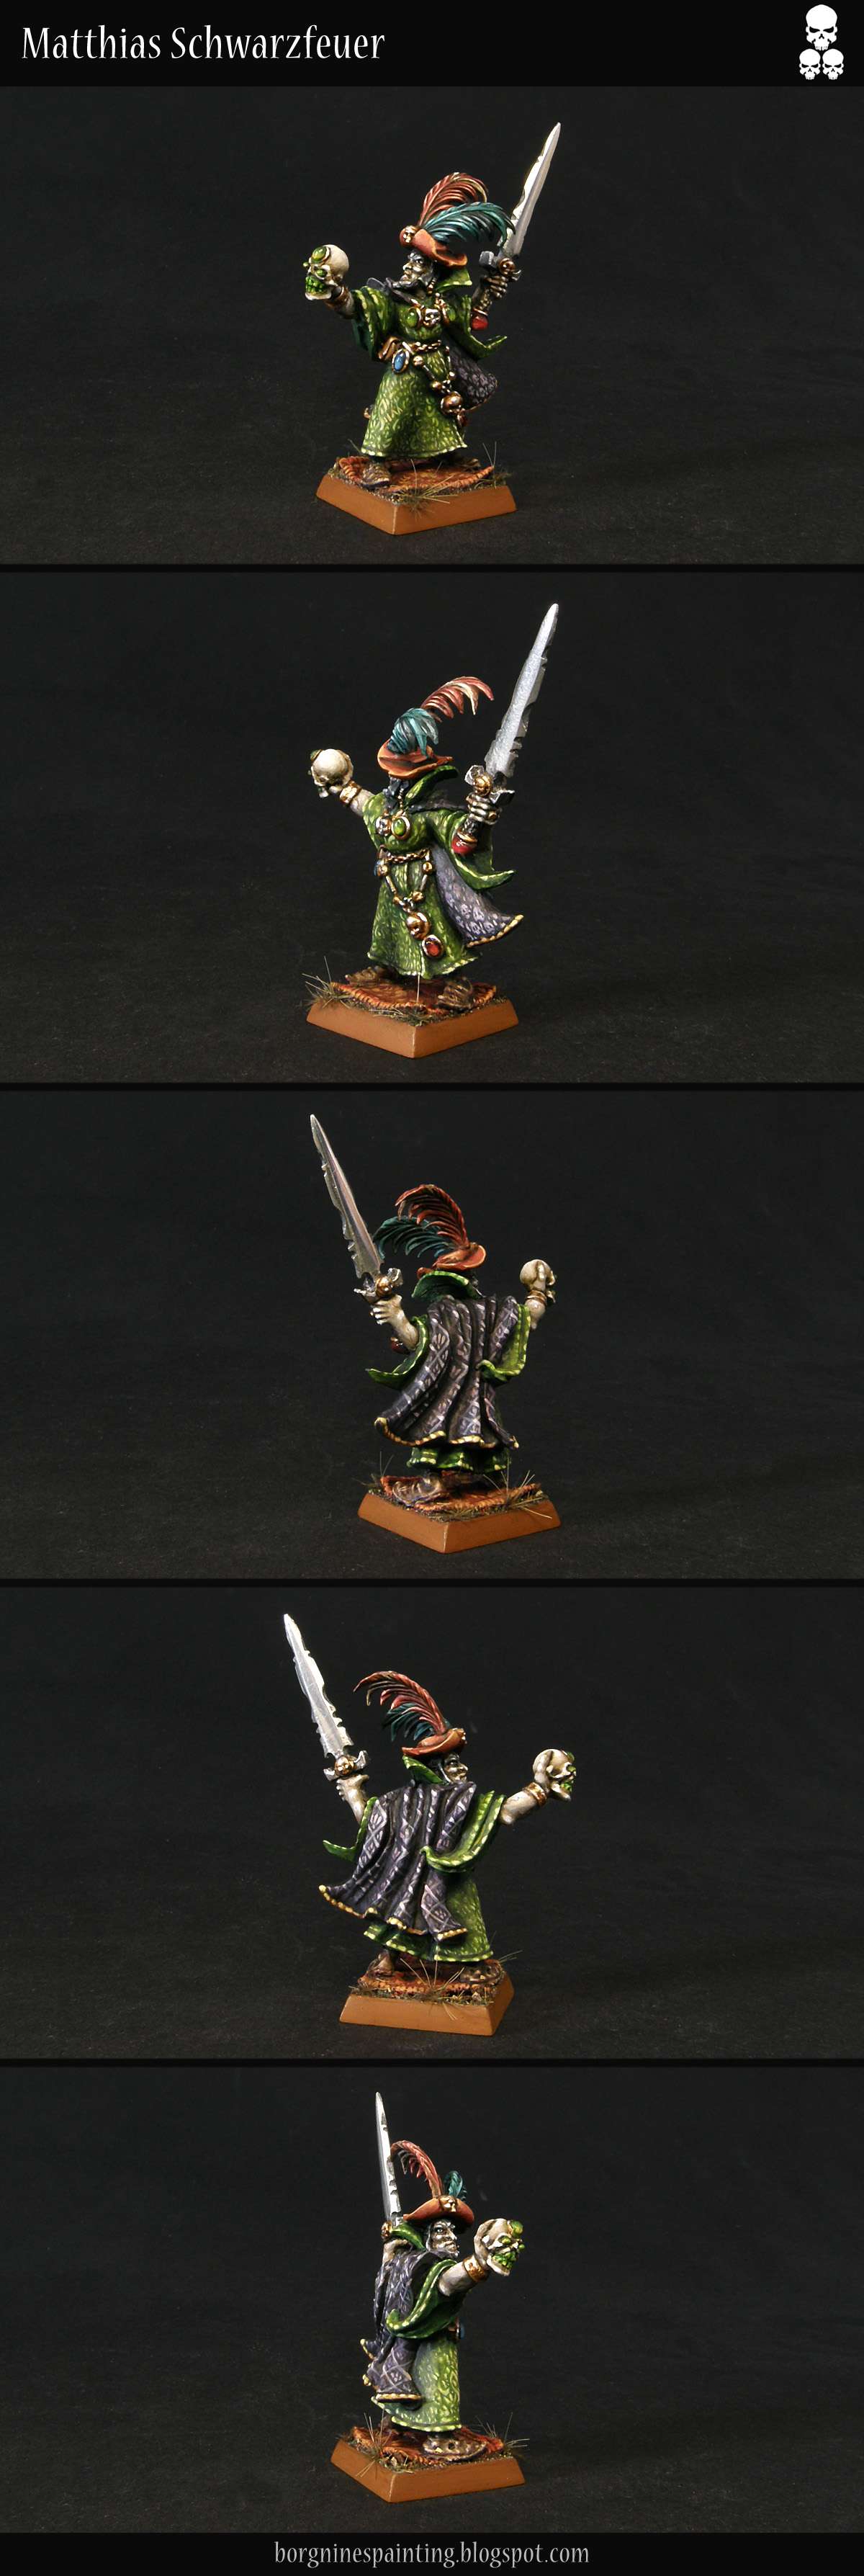
It's been some time since the last odd necromancer, now it's time for the second one - Matthias, the fancy necromancer who's living under the delusion that all the death and decay around him is actually a pristine elegance. The unpainted conversion of this miniature can be seen HERE.

While Alarich was kinda complicated to convert and straightforward to paint, this one was the opposite. There's barely any conversions on him and an overabundance of freehands. It was challenging a bit, especially keeping the patterns visible while giving them some depth, but also a nice change from other, dirty necromancers in my collection. It was also a good opportunity to do the trick with just polishing the sword on a metal miniature instead of painting it - this guy sure looks like someone who uses a very shiny, clean weapon.

As a piece of trivia - I took his name from an old, old Vampire: the Masquerade character I played, from my edgy teenager phase ;)


Yet another necromancer shown to Hautfell during his search for allies was Matthias Schwarzfeuer. He was sitting alone in a dilapidated palace in the Varsavian wilderness, being tended to by undead servants. Despite all of that, his manners were overwhelmingly noble and royal, his clothes clean, ornate and impeccable. He was indeed a necromancer, quite powerful at that, but he thought, that his profession wasn’t an excuse to stop caring about looking and acting as a noble should. Schwarzfeuer addressed his undead minions with Empire military ranks and still considered himself an important Empire citizen. It was unknown if he was so elitist that he refused to acknowledge the reality around him or he was just stark raving mad. Nevertheless, he acted as a competent ally and necromancer, as long it was an old nobleman Hautfell talking to him - he wouldn’t debase himself taking orders or advice from those beneath him.

Old metal Necromancer miniature from Games Workshop, seen from several angles, converted and painted to be really extravagant and flamboyant, with a feathered hat and intricate, freehanded designs on his robes and cloak. He is usable in Warhammer Fantasy Battle (WFB) or Age of Sigmar (AoS).

Sunday, July 14, 2019

Sculpting Tips - Roman-style headcrest

Title picture showing a converted Nurgle Putrid Blightking with a Roman-style headcrest on his helmet.

In this short tutorial of sorts I will show how I tackled this topic, on example of a Nurgle Bloater I converted for Blood Bowl.

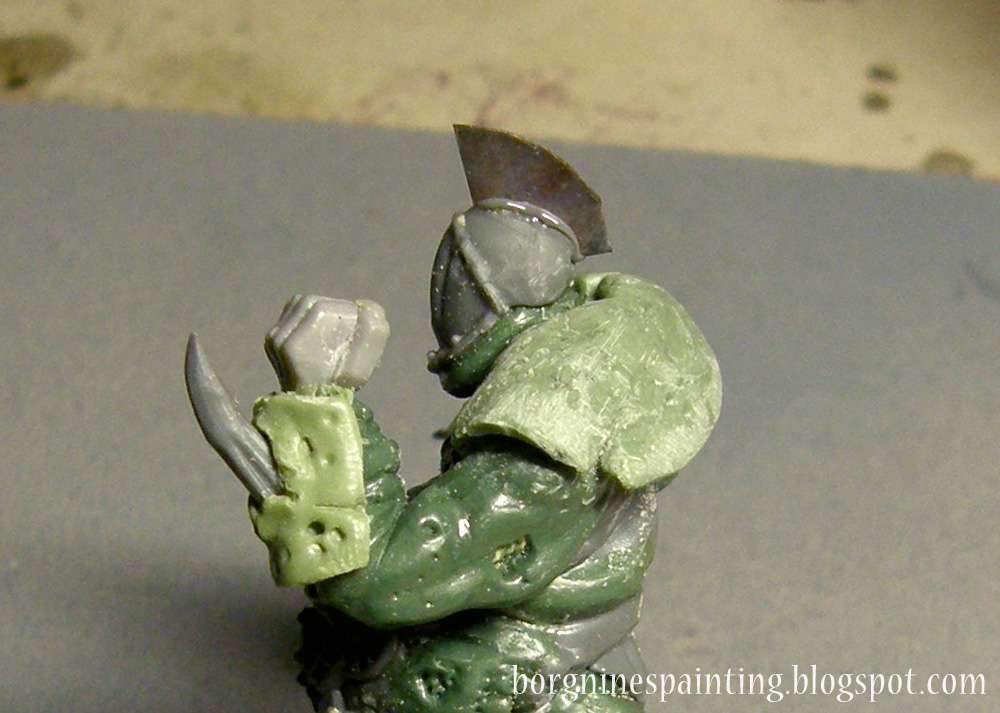
I started with making some kind of 'foundation' on which I would be sculpting - so I cut tiny quarter-circles out of a metal can lid, heated it up on the stove while holding it with tweezers and stuck it in the plastic helmets of the warriors while it was still hot. The melting of plastic around this piece of metal both creates a hole for it and secures it very firmly after cooling. It could be done with a tiny saw and glue too, but this option was faster for me. Still, I had to be extra careful!

First step of the process, a small piece of metal is inserted into the plastic helmet, roughly in the shape of the future headcrest.

When that was done, I sculpted the metal 'base' of the crest over the lower part of the metal, using an even mix of greenstuff and milliput. This mix is good for anything that's supposed to be metal, as it makes filing and creating sharp edges much easier. For that reason, it doesn't have to be especially tidy at this point - except for the connection with the helmet itself - that will be difficult to file, so it was better to make it right from the start.

I sculpted it using the side of the pointy sculpting tool to sculpt the recessed part underneath and flat, sharp clay shaper to flatten it from above.

The beforementioned piece of metal is now surrounded at the base with a roughly sculpted mix of Greenstuff and Milliput.

After it has hardened, I filed the ridges of the thing to create sharp edges and generally make it smoother.

The beforementioned mix of Greenstuff and Milliput after sanding, being smoothened out into the desired shape.

Now it's time for the crest itself. I used a blob of greenstuff (this time without milliput) and put it over the piece of tin that was sticking out.

The remaining piece of metal has now a rough blob of greenstuff placed onto it.

When the greenstuff was still fresh I used the 'scythe' sculpting tool to press the greenstuff to the tin at the base and create the first impression of the crest's hair. The general shape of it is also created at this step - thinner at the bottom and wider at the top. Give it now about 40 to 60 minutes to cure a bit.

The blob of greenstuff has now grooves pressed into it near the base of the crest.

After it's hardened a little more it's time for the detail work. This time, using a scalpel (or an Exacto blade) I sculpted the rest of the hair, trying to be tidier at the base and allowing myself for more messiness at the top.

Additional, finer grooves are added on the whole Greenstuff part of the crest.

At the same time I used the pointy sculpting tool to texture the top surface of the crest - by pointing and jabbing it vertically.

The head is now seen from above, showing the expected texture on the top part of the crest.

And again, after another 30-40 minutes, when the overall structure should be pretty rigid, I went back with the scalpel to refine the details, to deepen the crevices that didn't look pronounced enough. The top edge needed special attention, because it was difficult earlier to make grooves there without flattening the whole form too much - now it should be easier. I also randomly widened some of the grooves to make the whole thing look messier - he is a Nurgle guy after all - but it can be omitted in other cases.

Completed crest, with additional, deeper and wider grooves added to the whole composition.

That's it for now, the crest is ready to be painted. It's no masterwork, but it should work for now.

Sunday, July 7, 2019

Blood Bowl Nurgle Team - Bloaters WIP

I converted the Rotters and then some Pestigors for my Nurgle Blood Bowl team, now it's finally time for the Warriors, or how they are now called - the Bloaters. Those big, slow and bulky roadblocks are the core of the team and my favorite positionals in the team, the stars that crush the opposition with their mutated fists.

Ones available in the current GW kit are fine models, but in no way how I envision those players. After playing Blood Bowl 2 video game, I imagine them more similar to stereotypical Chaos Warrior, with armor and spikes. The most obvious choice in this situation was to revisit the delightful kit of Putrid Blightkings. I choose 4 of them, leaving one to serve as a Head Coach later and went crazy with the conversions representing their skills, just like my other players from this team.

Wanting to justify their heavy armor, atypical for modern Bloaters, I came up with a backstory that they were displaced through time by Nurgle, many, many years forward, making them living (?) relicts of the old ways. To go extra ancient I gave them roman-themed names and crests on the heads. This brings them all together as the special players and strengthens the effect of how ancient and out-of-touch with the modern Blood Bowl fashion they are.

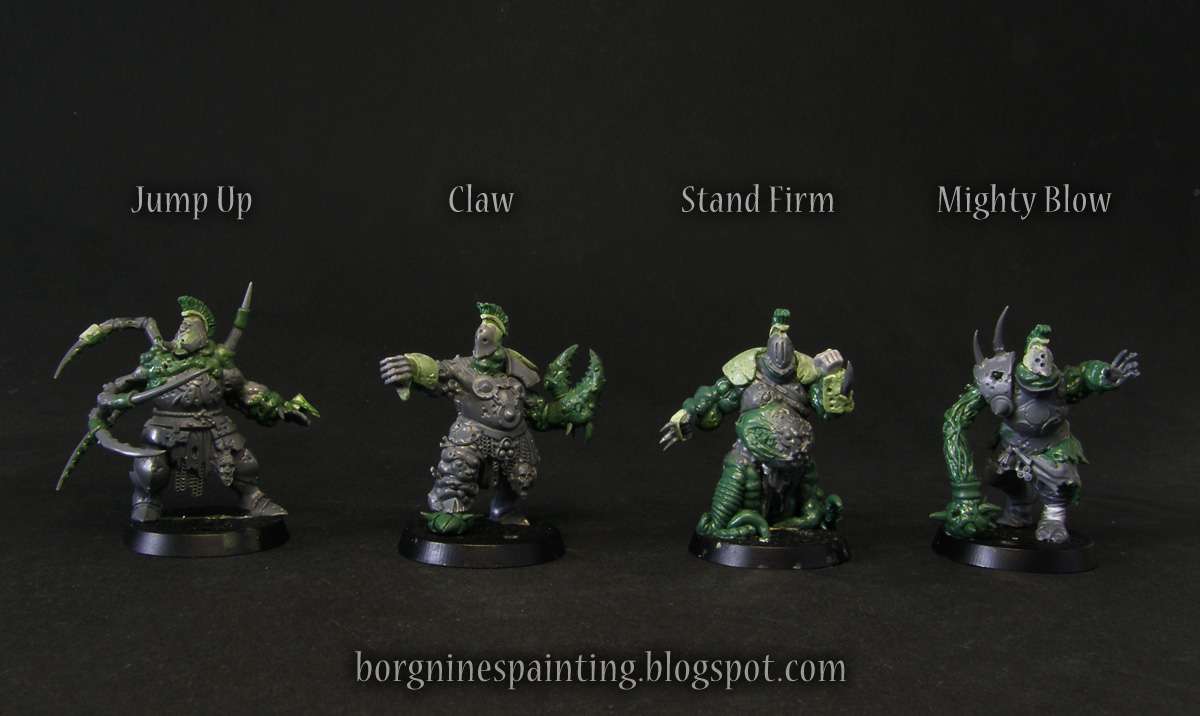
Here are they all together:

4 unpainted Bloaters of Nurgle miniatures for use in Blood Bowl, converted out of Putrid Blightkings using greenstuff. They are standing in a row and there's a text informing what kind of skills in the game they have.

And some closer photos.

Captain on the left was the first that I made and which gave me the least problems when deciding what to do. This is easily my favorite pose out of the Blightkings kit and came together beautifully with what I had in mind - the stone under the foot got changed into a ball, left hand was in great position to sculpt a scary pincer there (instead of some variation on Wolverine claws, I went with the classic interpretation of the 'Claw' mutation) and the outstretched hand was perfect for a 'thumbs down' gesture, bringing even more Roman themes into the whole mess.

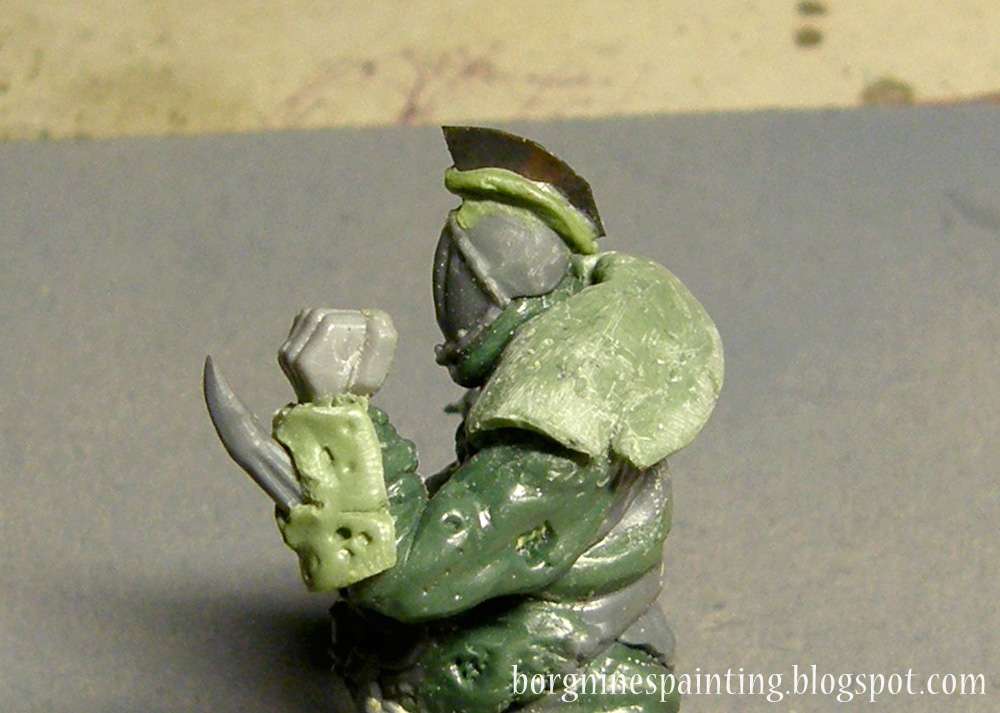
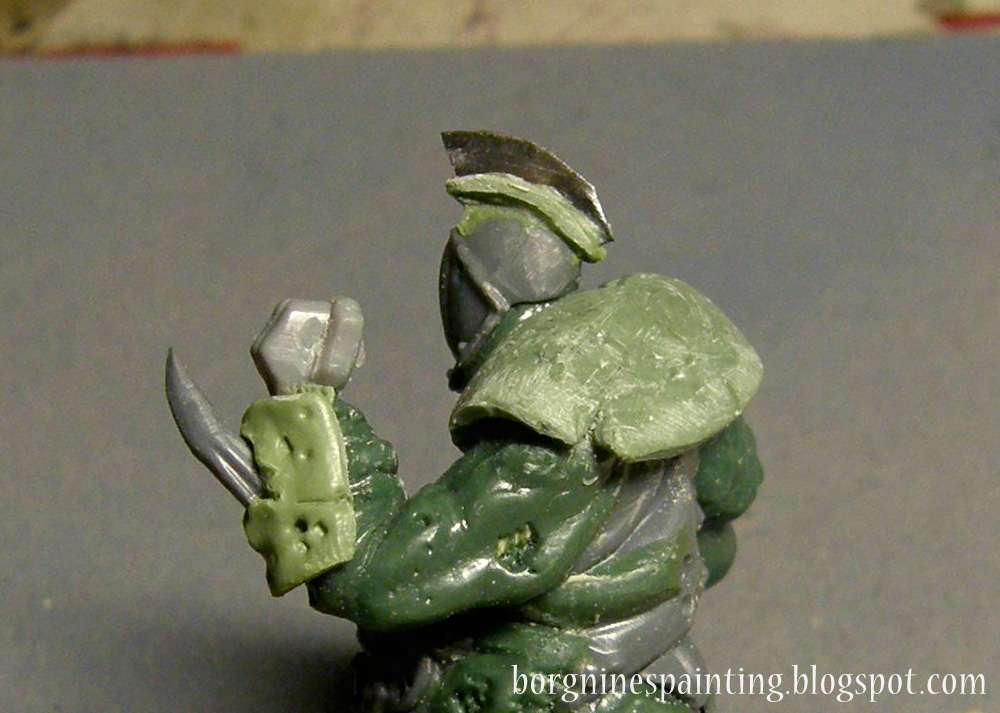
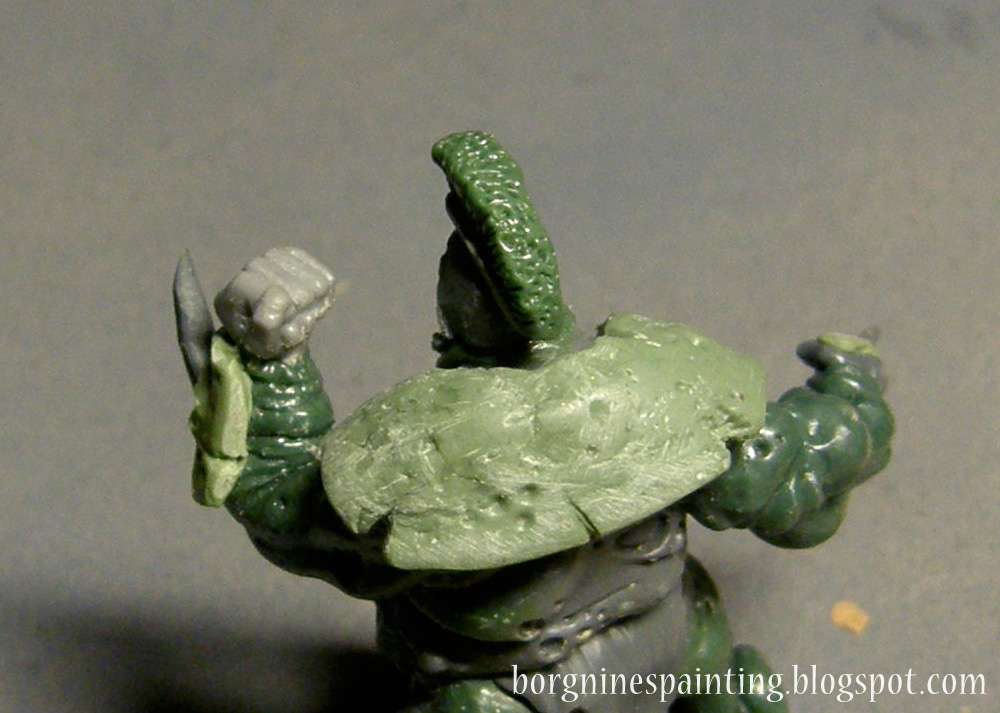
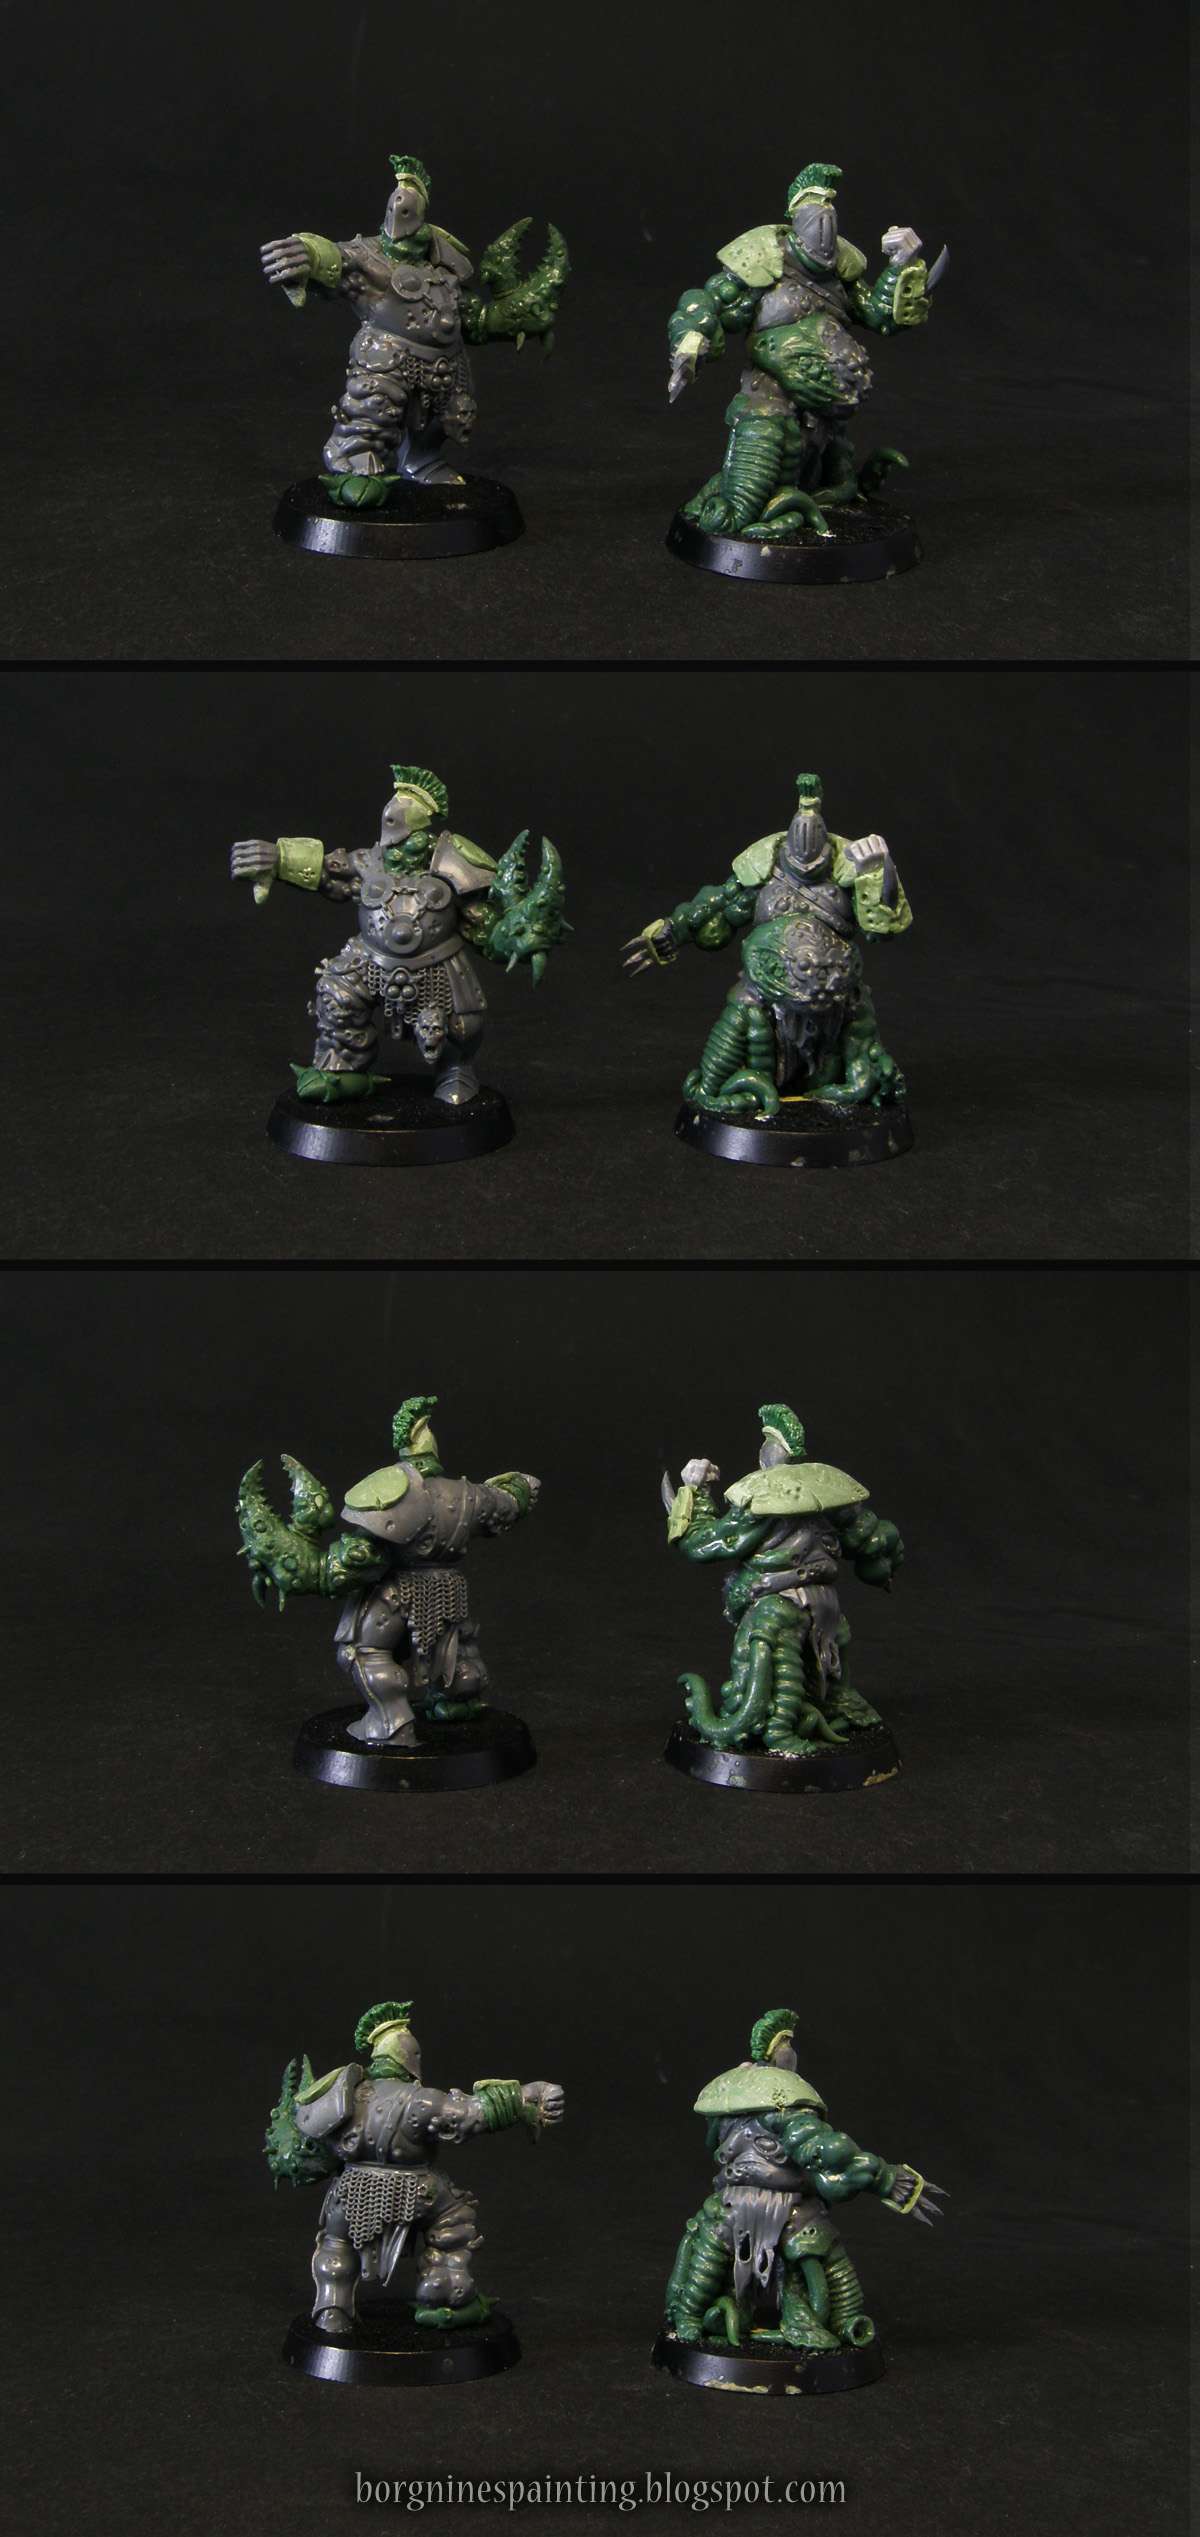
The second one has 'Stand Firm' as his upgrade and this one took the longest to design. At first, I wanted to give him thick and bloated legs, but then it would be too similar to the captain's right leg - so I left this topic for a while. Only later I decided to turn his legs into a mass of swarming tentacles and worms - which both greatly illustrates how well is he glued to the ground but also fits Grandfather Nurgle perfectly.

2 unpainted Bloaters of Nurgle miniatures for use in Blood Bowl, converted out of Putrid Blightkings using greenstuff, visible from different angles. One on the left has a giant picer for his hand, representing the 'Claw' mutation. One on the right has tentacles for legs, representing the 'Stand Firm' skill.

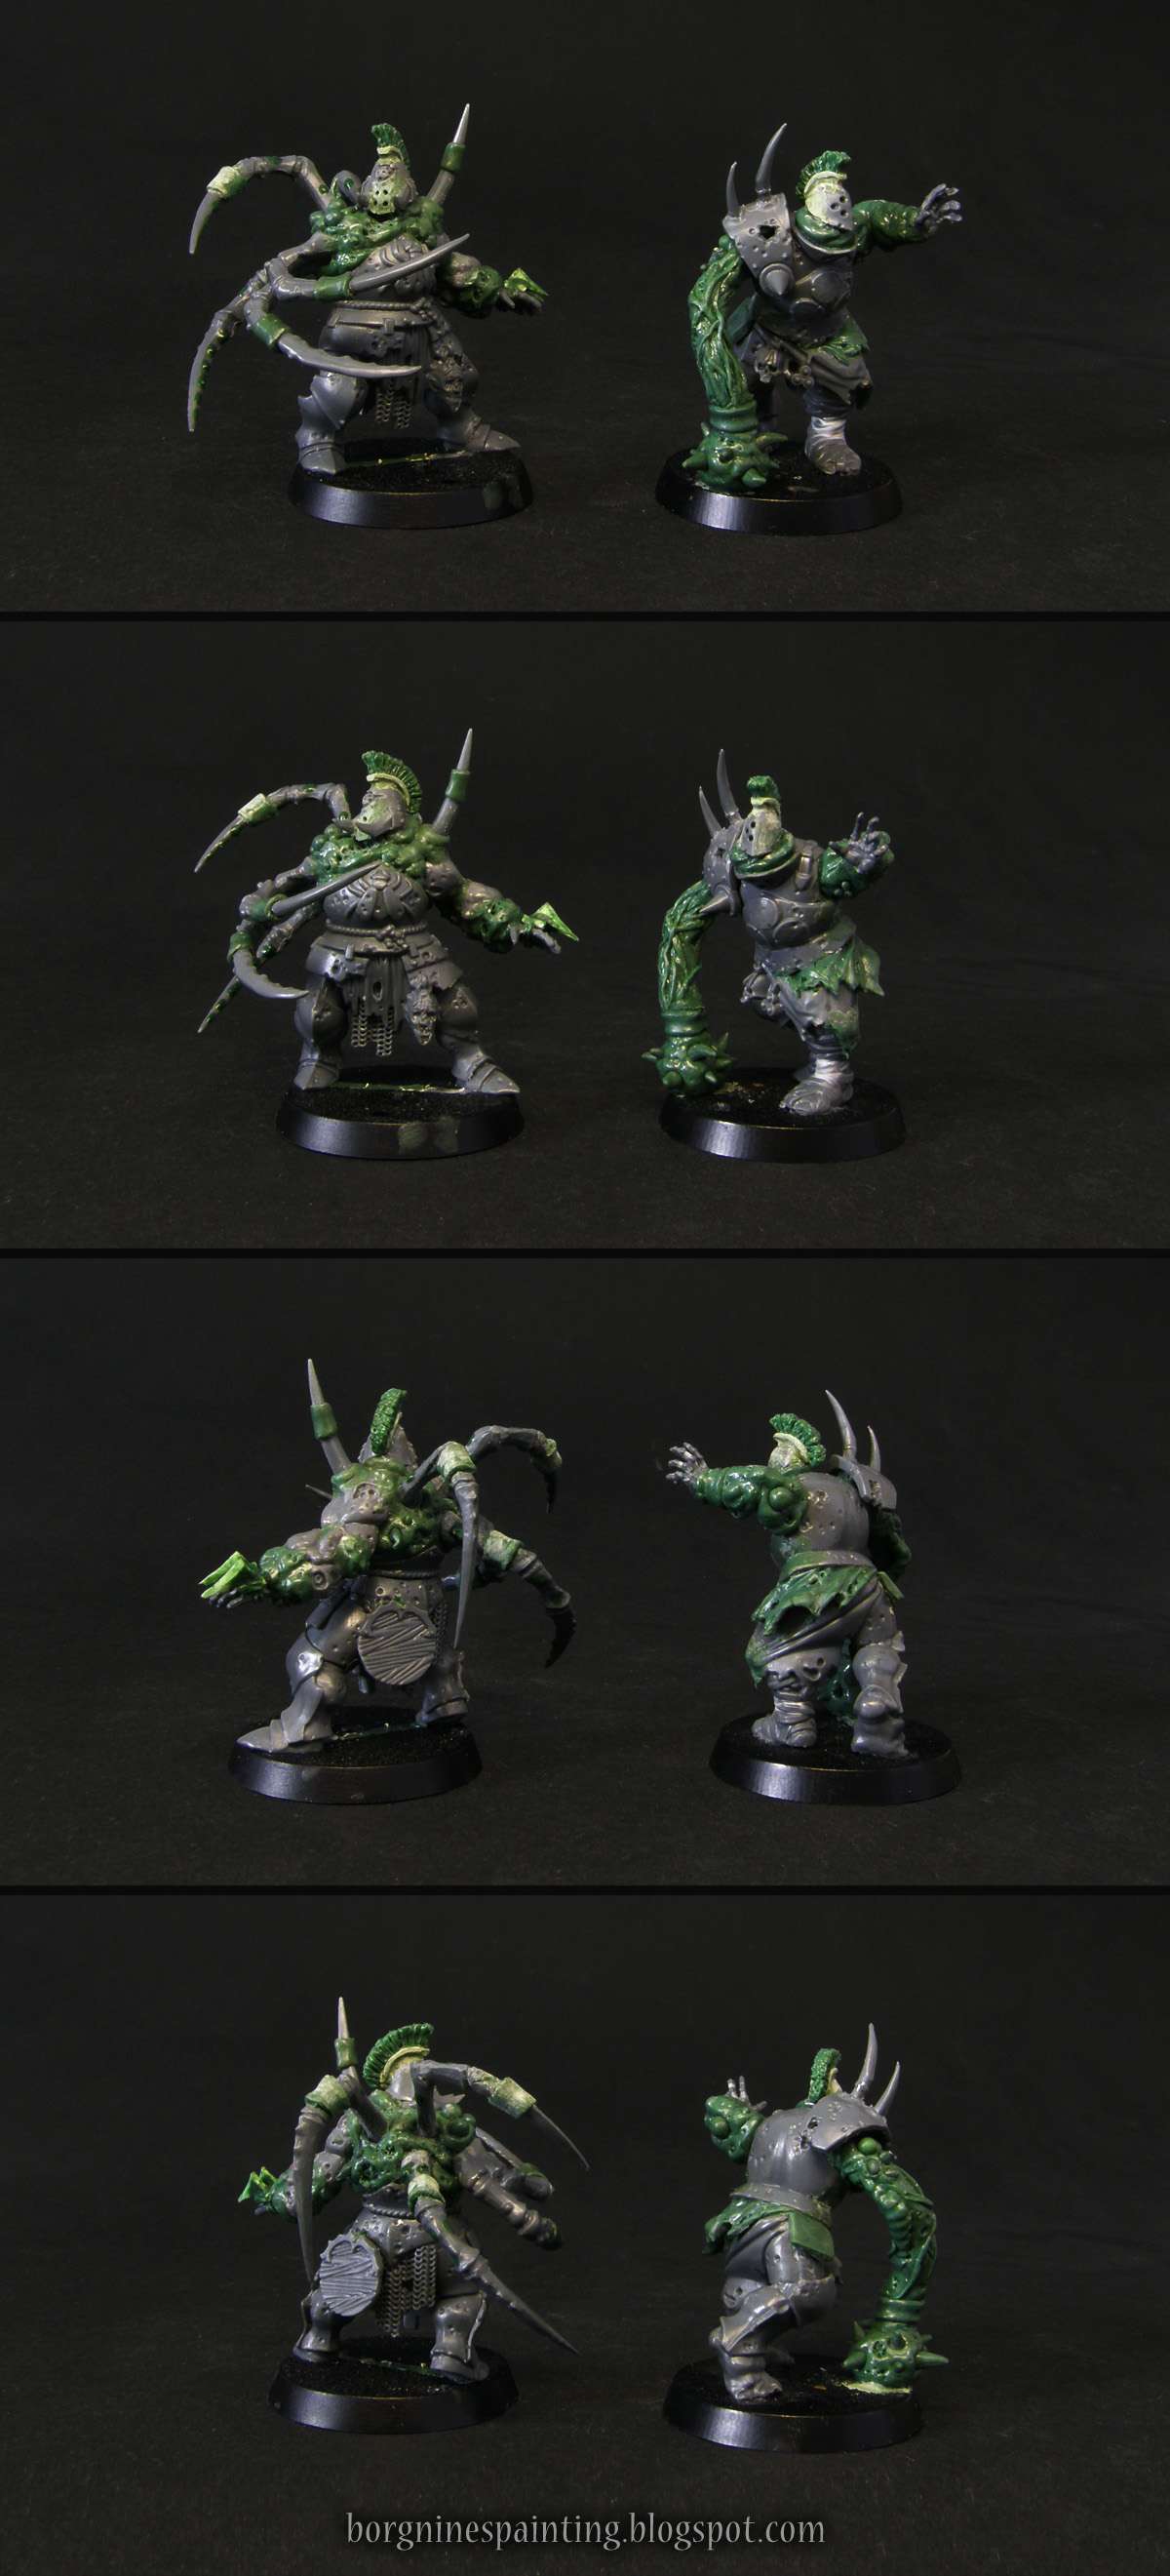
Here below, the guy on the left is the one that rolled doubles when leveling - and he got 'Jump Up' which helps players get up quickly after being knocked down. To represent that, I decided to give him a lot of spider legs sticking from his back - which would prop him back easily after he falls down. His body was the most armored of all the Blightkings, so to retain some balance I decided to make him completely unarmored from the breastplate up - like rotting meat rupturing a metal can.

And the last one is the Bloater with 'Mighty Blow'. I thought about representing it quite a lot and many options were just not good - giving him a large fist could be confused with 'Big Hand' while adding a lot of spikes on it could be confused with 'Claw'. I considered giving him a heavy hand made out of stone, but in the end, I decided on giving him a thick, flexible appendage ending with a spiked ball - like a fleshy flail of sorts - with a sporty armband to keep him properly themed. Hopefully, it's heavy- and slow-looking enough not to be confused with a 'Tentacles' mutation.

2 unpainted Bloaters of Nurgle miniatures for use in Blood Bowl, converted out of Putrid Blightkings using greenstuff, visible from different angles. One on the left has lots of spider legs growing out of his back, representing the 'Jump Up' skill. One on the right has a fleshy wrecking ball instead of an arm, representing the 'Might Blow' skill.

There were many different topics here, so once again I did some photos of the actual building progress, to show some of the 'behind the scenes' stuff. They turned out rather long though, so to avoid extending this post to infinity and to get some a post buffer (which I could use for personal reasons right now), I will post them as separate posts in the upcoming weeks, I hope they'll be interesting enough.

I will update this post accordingly to have all those little sculpting tips together with the miniatures they are related to.

First one is about sculpting the Roman-style headcrests that all of them sport:


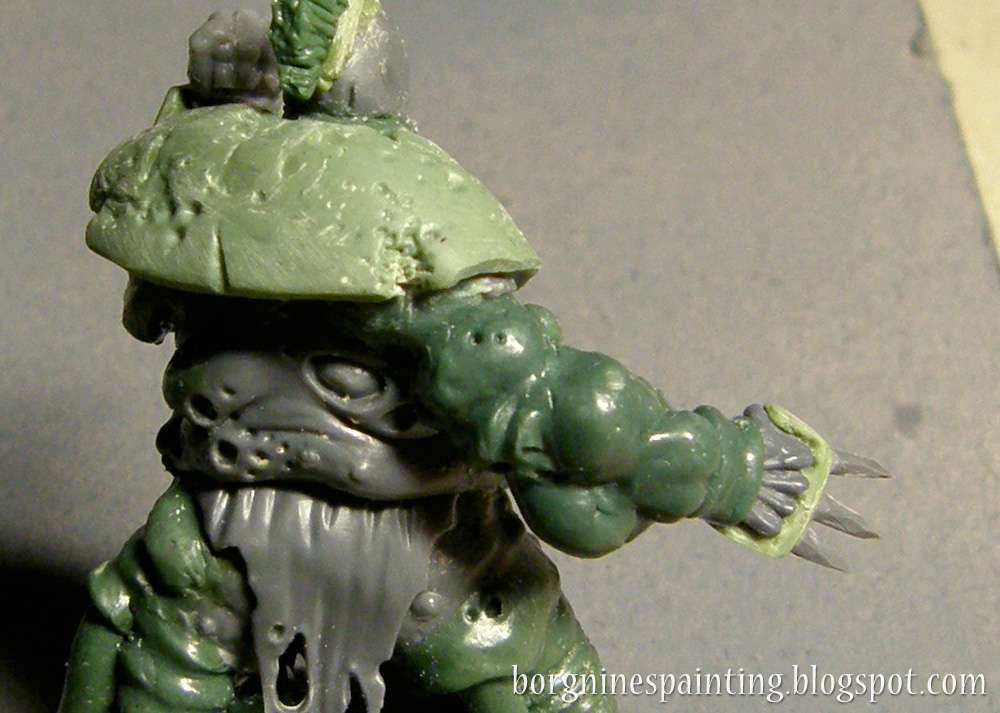
The second one is about sculpting sick, disproportionate, bloated arms that I did for the 'Stand Firm' guy. Followers of Nurgle allow for some leeway when it comes to anatomy, so it's both quite easy to do and a good place to practice greenstuffing.


The third and the last one is about the wriggling, tentacle legs of the 'Stand-Firm' guy. It explains the principles of doing a similar composition of tentacles, how to sculpt different kinds of slimy appendages, together with instruction on how to quickly make suction cups for those tentacles.