

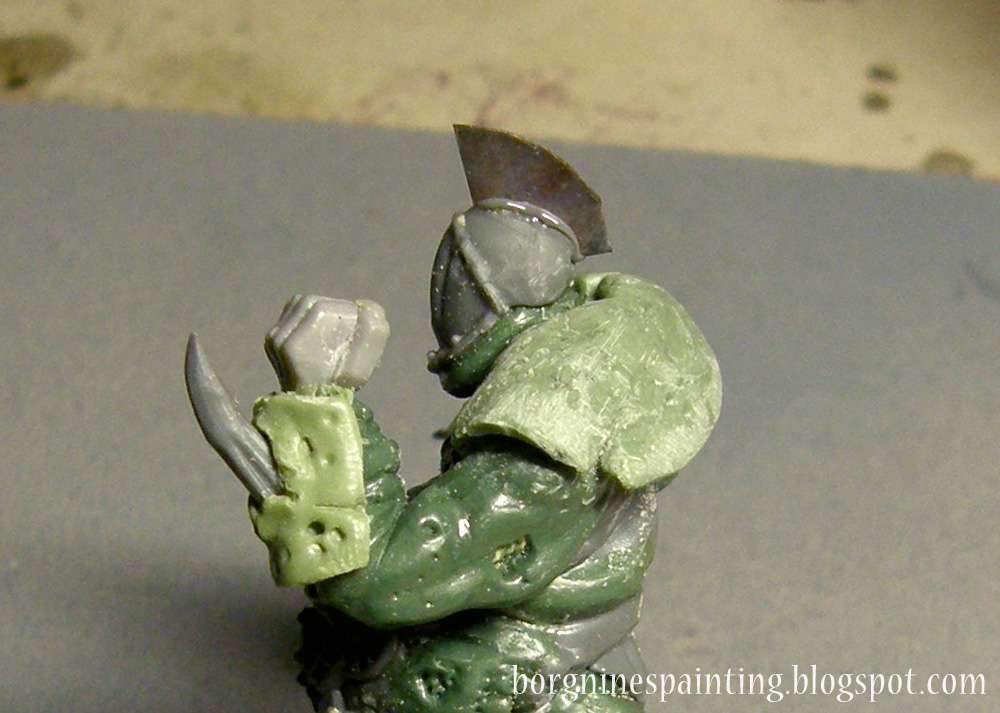
In this short tutorial of sorts I will show how I tackled this topic, on example of a Nurgle Bloater I converted for Blood Bowl.
I started with making some kind of 'foundation' on which I would be sculpting - so I cut tiny quarter-circles out of a metal can lid, heated it up on the stove while holding it with tweezers and stuck it in the plastic helmets of the warriors while it was still hot. The melting of plastic around this piece of metal both creates a hole for it and secures it very firmly after cooling. It could be done with a tiny saw and glue too, but this option was faster for me. Still, I had to be extra careful!
I started with making some kind of 'foundation' on which I would be sculpting - so I cut tiny quarter-circles out of a metal can lid, heated it up on the stove while holding it with tweezers and stuck it in the plastic helmets of the warriors while it was still hot. The melting of plastic around this piece of metal both creates a hole for it and secures it very firmly after cooling. It could be done with a tiny saw and glue too, but this option was faster for me. Still, I had to be extra careful!
When that was done, I sculpted the metal 'base' of the crest over the lower part of the metal, using an even mix of greenstuff and milliput. This mix is good for anything that's supposed to be metal, as it makes filing and creating sharp edges much easier. For that reason, it doesn't have to be especially tidy at this point - except for the connection with the helmet itself - that will be difficult to file, so it was better to make it right from the start.
I sculpted it using the side of the pointy sculpting tool to sculpt the recessed part underneath and flat, sharp clay shaper to flatten it from above.
I sculpted it using the side of the pointy sculpting tool to sculpt the recessed part underneath and flat, sharp clay shaper to flatten it from above.
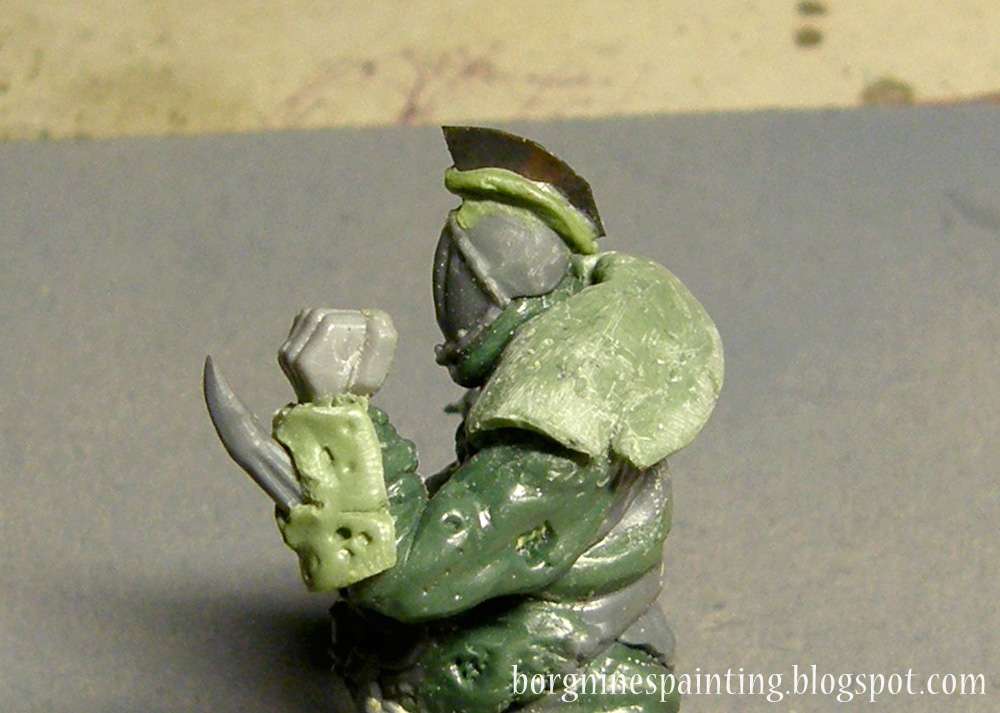
After it has hardened, I filed the ridges of the thing to create sharp edges and generally make it smoother.
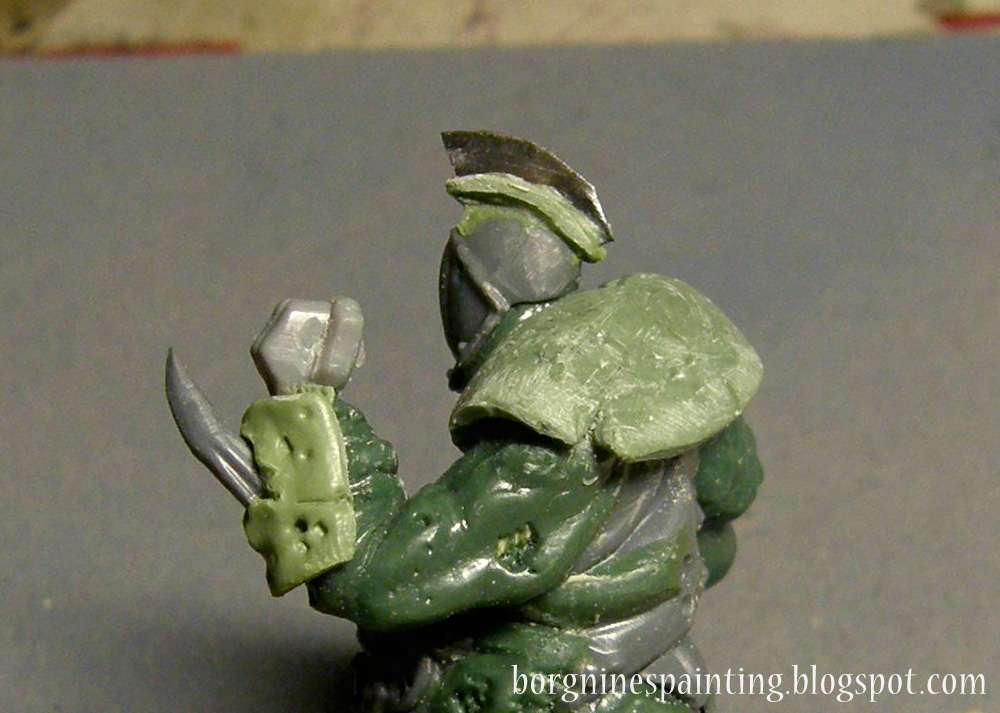
Now it's time for the crest itself. I used a blob of greenstuff (this time without milliput) and put it over the piece of tin that was sticking out.

When the greenstuff was still fresh I used the 'scythe' sculpting tool to press the greenstuff to the tin at the base and create the first impression of the crest's hair. The general shape of it is also created at this step - thinner at the bottom and wider at the top. Give it now about 40 to 60 minutes to cure a bit.

After it's hardened a little more it's time for the detail work. This time, using a scalpel (or an Exacto blade) I sculpted the rest of the hair, trying to be tidier at the base and allowing myself for more messiness at the top.

At the same time I used the pointy sculpting tool to texture the top surface of the crest - by pointing and jabbing it vertically.
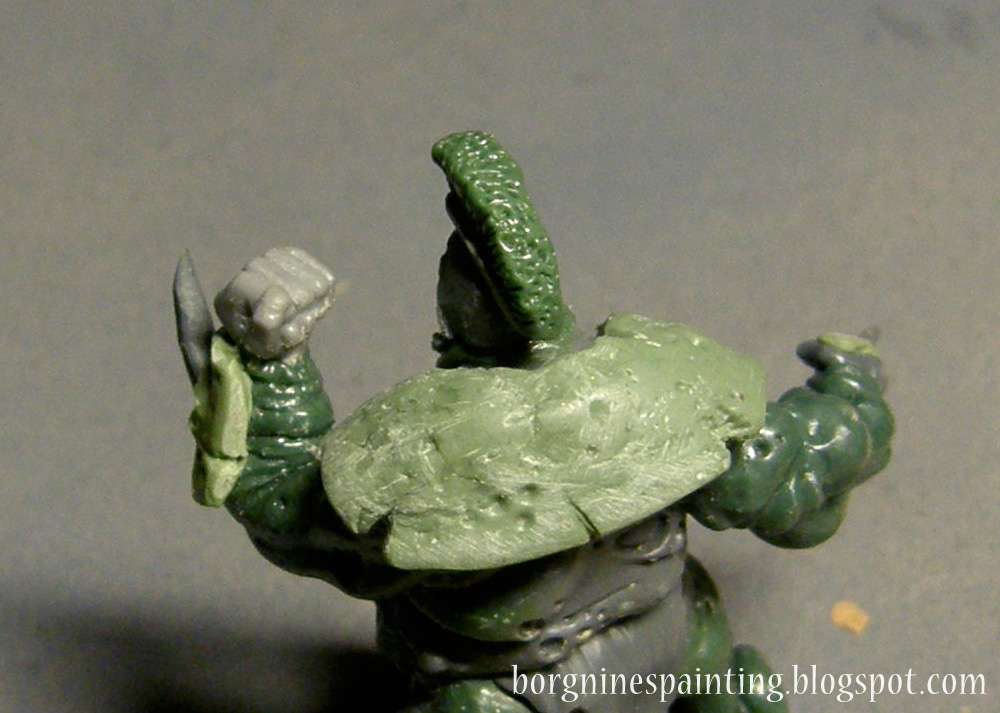
And again, after another 30-40 minutes, when the overall structure should be pretty rigid, I went back with the scalpel to refine the details, to deepen the crevices that didn't look pronounced enough. The top edge needed special attention, because it was difficult earlier to make grooves there without flattening the whole form too much - now it should be easier. I also randomly widened some of the grooves to make the whole thing look messier - he is a Nurgle guy after all - but it can be omitted in other cases.

That's it for now, the crest is ready to be painted. It's no masterwork, but it should work for now.
No comments:
Post a Comment