

Two weeks ago I presented you a mounted vampire, Viktor von Greifen - he is a kitbashed model sitting on a horse from a Chaos Lord and I wanted to give him a very similar cape. It took me some time to think out the whole process, but in the end, it wasn't that difficult, so I decided to record and share the process.
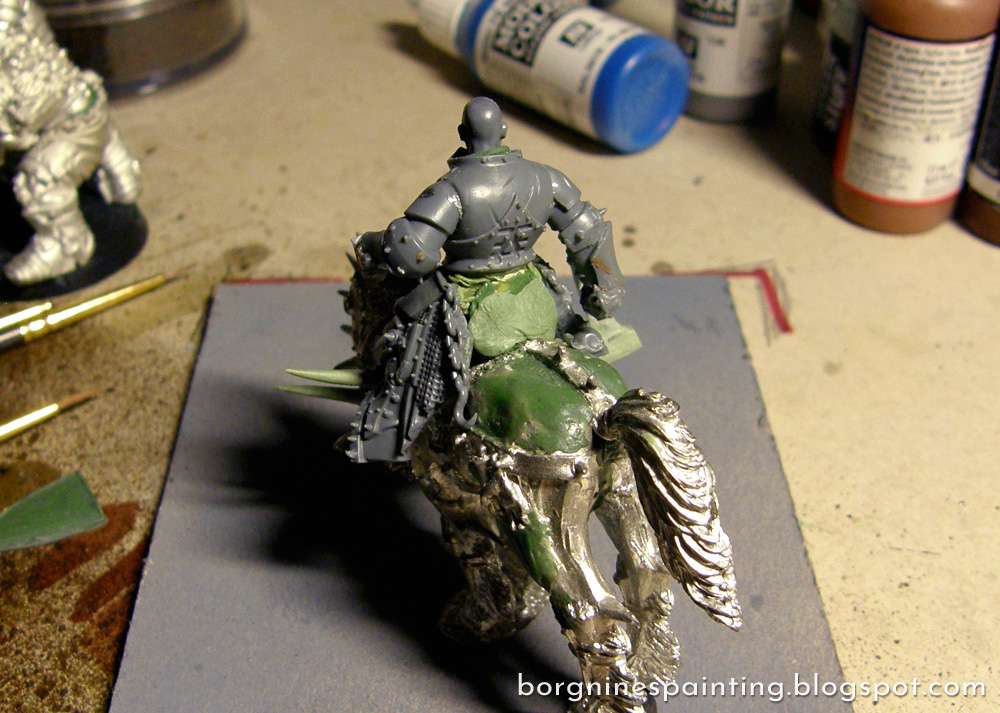
I started with the cavalryman completely ready, only without any cape or pauldrons.
I started with the cavalryman completely ready, only without any cape or pauldrons.
A long time ago I thought that sculpting capes is easy - just make a flat shape and let physics do its job. Unfortunately, the physics work a bit differently at this scale and that's not even counting the fact that greenstuff is not a free-flowing fabric. To do it properly, we'll have to cheat and simulate the physics on our own.
I started with creating a flat shape out of greenstuff in the shape that you can see below, with the top part having roughly the same width as the model's shoulders:
I started with creating a flat shape out of greenstuff in the shape that you can see below, with the top part having roughly the same width as the model's shoulders:

Which is then placed on the model like this. You can use some super glue to secure it in place, but with so much area of connection, greenstuff should work fine on its own.
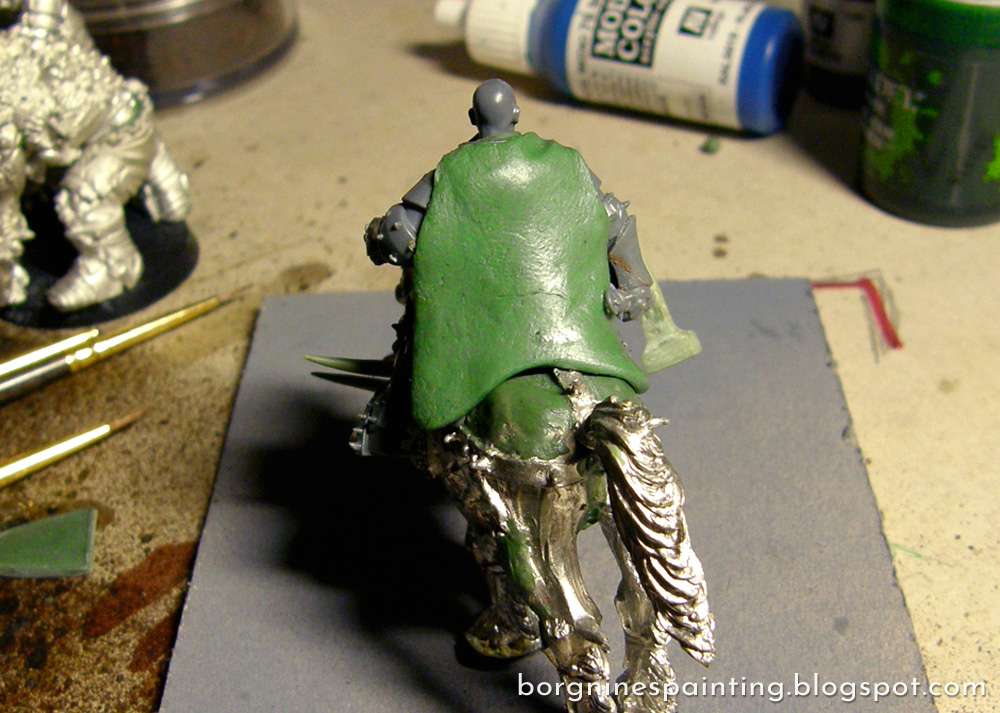
Now it's time for the proper sculpting. Here I was using the big, round clay shaper and the small, round clay shaper, depending on which could fit better. First, I smoothened out the cape along the middle part and made it fall almost completely vertically on the horse - this is the part mostly affected by gravity. When that was done, I took some flat tweezers and stretched the side parts a little - those have a place to flow down a bit. The wind would also move the edges the most, so I flanged them to the back. When the shape was done, I smoothened out any weird wrinkles with the round clay shapers. I also added some extra greenstuff to the left side to make it stand out even more - it was difficult to stretch it even more back then.
If someone wants it quick-and-dirty, this could be a possible step to call it a day and be happy with it.
If someone wants it quick-and-dirty, this could be a possible step to call it a day and be happy with it.
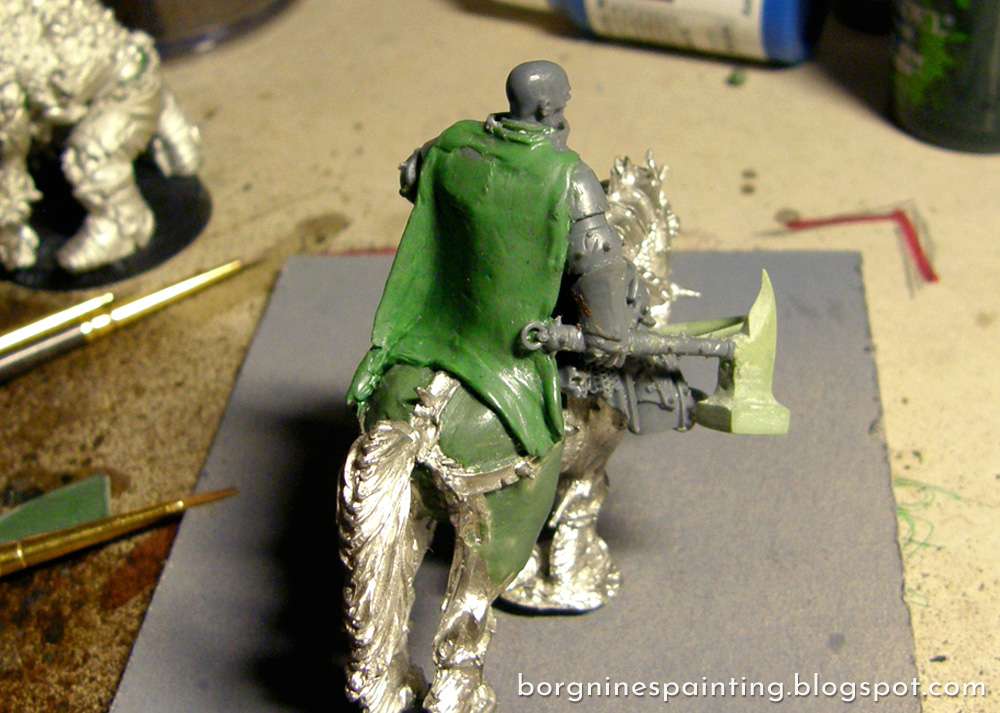
For anyone wanting something more, it's time to add the parts of the cape that 'pile-up' in the middle (after the previous phase has already cured that is!). I start this step by rolling a long blob of greenstuff and placing it a little to the left, on the arch created by the cape resting on the horse's back.

Then I took the sharp, pointy clay shaper, together with
flat, sharp clay shaper and started smoothing the blob out - pressing it against the surface of the cape and bringing out a sharp edge in the 'front'. You can see it illustrated on that section drawing on the right.
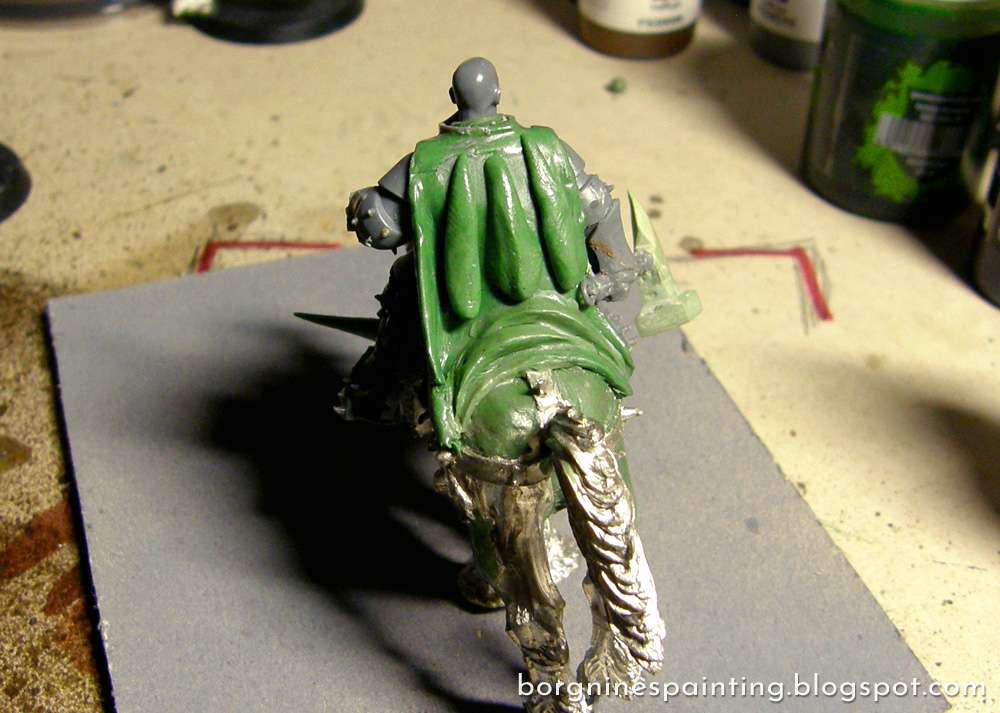
When the previous step is done and cured, it's time to do the same thing, only adding the blob a little to the right, overlapping slightly over the middle part with the previous crease and bringing it out to the point too.
This is also a step when I thought to myself that it looks pretty nice already and could work as is it too.
This is also a step when I thought to myself that it looks pretty nice already and could work as is it too.

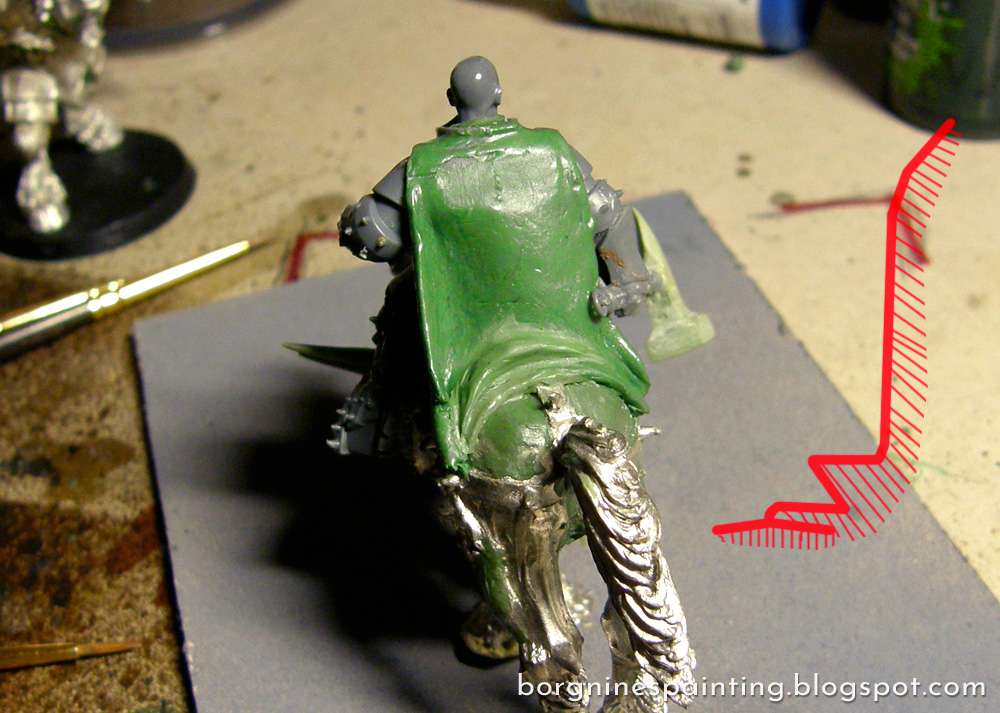
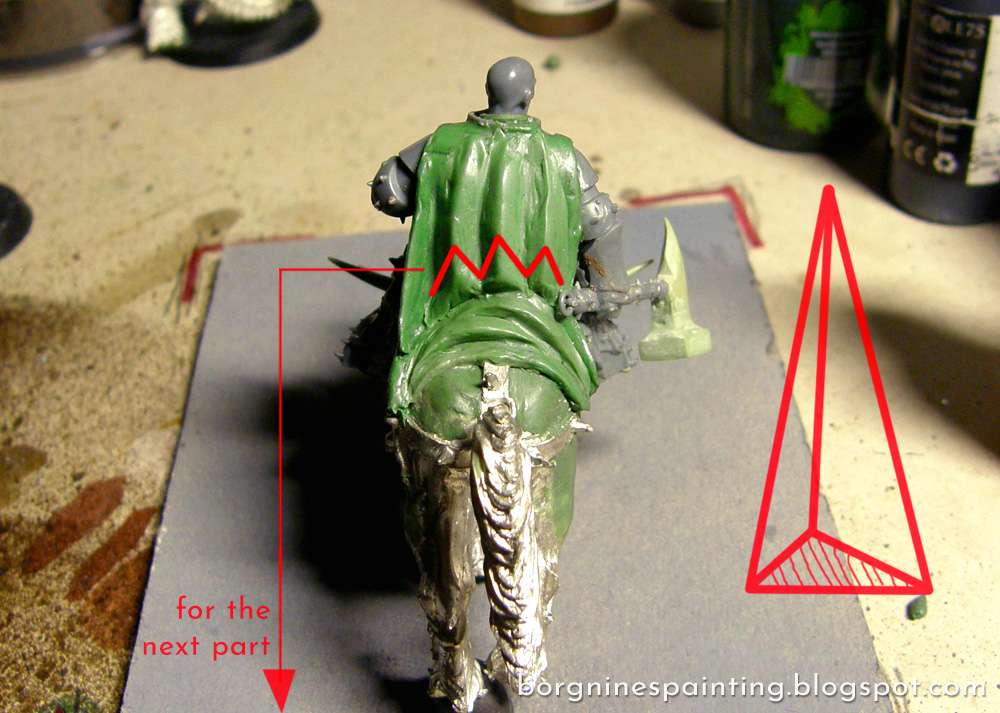
But then, I wanted to make it look like on that Chaos Lord, with the cape having three big, vertical folds that connect the shoulders with the 'pile' down below. I started it by adding three teardrop-shaped blobs on his back, like this:
Now is the hard part, smoothening those blobs together with the rest of the cape - that's a lot of greenstuff to force into rather precise shapes all at once. I was using mostly the flat, sharp clay shaper to press the blobs against the cape, establish the deep creases between them with the edge of the tool and bring out the edges on 'top'. The bottom parts of those folds should come to a pointy triangle (illustrated on the diagram on the right), while the top parts should gradually flatten to merge with the shoulders.
When the previous part was well established, I took the flat, sharp clay shaper's edge and marked extra triangles on the bottom of the folds (illustrated with a red line on the picture above) and pressed the parts below it to create an 'intermediate' part between the vertical folds and the pile below. I also used the big, round clay shaper to flatten out the top parts even more.
I wanted to cover the shoulders with some pauldrons, skulls and other details, so I needed the cape over there to be flat, but if someone's doing it cape-only, then the creases should be translated into further folds that will go over the shoulders. I added a rough sketch over the photo to illustrate how I would do it - mostly creating folds and creases in the same way as we did so far.
I wanted to cover the shoulders with some pauldrons, skulls and other details, so I needed the cape over there to be flat, but if someone's doing it cape-only, then the creases should be translated into further folds that will go over the shoulders. I added a rough sketch over the photo to illustrate how I would do it - mostly creating folds and creases in the same way as we did so far.

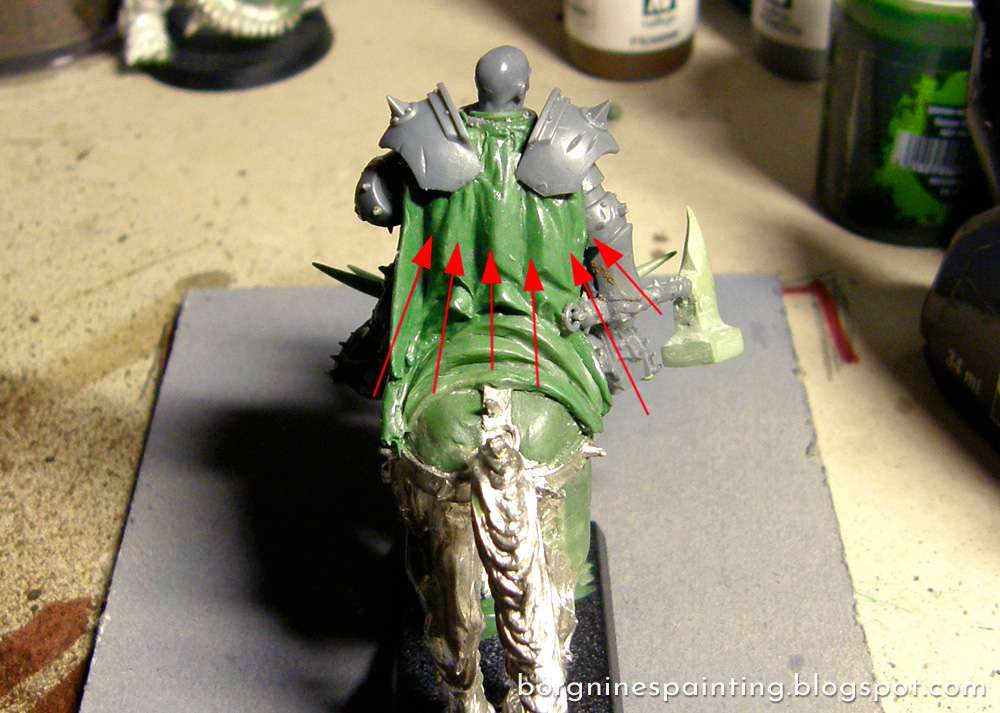
While this whole part was still at least a bit soft, it was time to add the pauldrons. I simply pressed them into the greenstuff over there and when I was satisfied with their position, I added extra creases that would be created by the pressure created by those pieces - using the edge of the pointy sculpting tool, allowing for some finer touches. Pressure applied to a small area on fabrics tends to create creases radiating from the point of pressure - like I illustrated with the arrows.
With the greenstuff partially cured, it's a good time to revisit the earlier parts with the flat, sharp clay shaper to smooth out any irregularities and sharpen the edges - not-so-fresh greenstuff is a bit better at holding an edge.
With the greenstuff partially cured, it's a good time to revisit the earlier parts with the flat, sharp clay shaper to smooth out any irregularities and sharpen the edges - not-so-fresh greenstuff is a bit better at holding an edge.
And that's basically it, ready to cover any questionable parts with fur or skulls or any extra knick-knacks. Feel free to ask any questions.
Ace work on this one!
ReplyDeleteReally helpful stuff :)
Many thanks! Glad to be of use ;)
DeleteThank you so much for this sculpting tuto !! ^^
ReplyDeleteServiteur,
You're welcome and thanks!
DeleteCuda rzeźbisz Pan z tego greenstuffu. Nie wiem, czy skorzystam z tutka, ale i tak mi się podoba :)
ReplyDeleteNo bo taki specyficzny temat, rozumiem ;) dzięki też!
Delete