

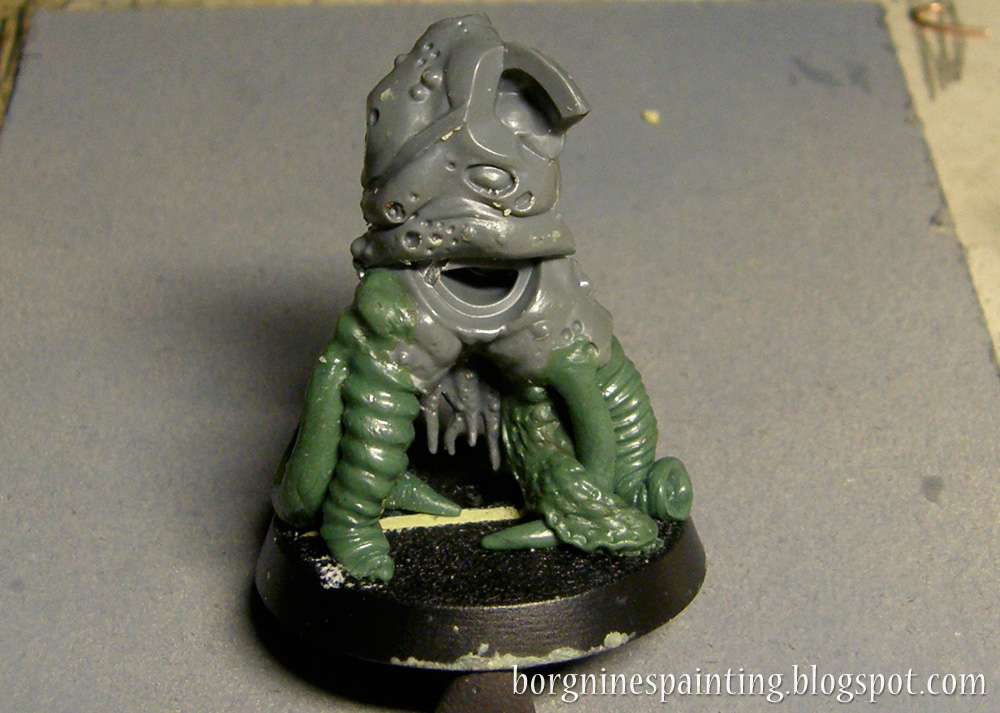
The third and last small tutorial made around my Blood Bowl Bloaters - this time about the legs of the 'Stand Firm' guy, ones made out of tentacles and worms. I will show my process and the general principles that work here - which work both here and in general when sculpting out of greenstuff. At the end of it, there are also some more concrete tips.
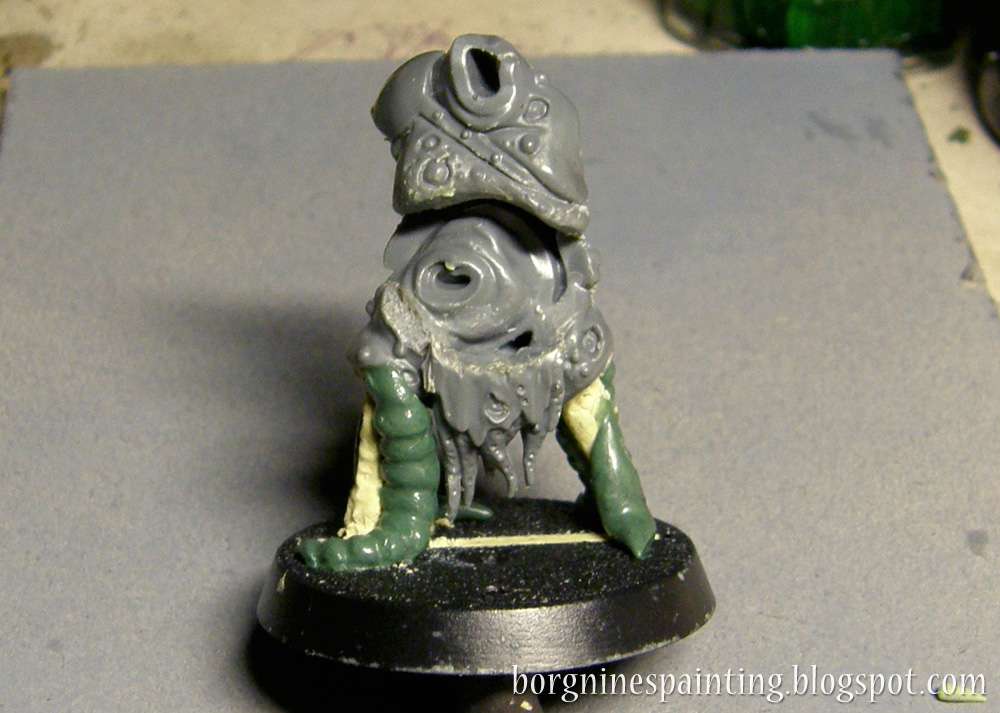
I started by putting a pin in his leg and then mounting it on a base - it's much easier to do a single connection than try to coordinate both pins so that they both stay in the right position.. When the glue was dry I covered the pin roughly with milliput - to secure the pin in place, they tend to rotate after applying too much force. While I was at it, I added a similar piece of milliput on the other leg - it would be much easier to sculpt the tentacles around something firm as the 'foundation'.
I started by putting a pin in his leg and then mounting it on a base - it's much easier to do a single connection than try to coordinate both pins so that they both stay in the right position.. When the glue was dry I covered the pin roughly with milliput - to secure the pin in place, they tend to rotate after applying too much force. While I was at it, I added a similar piece of milliput on the other leg - it would be much easier to sculpt the tentacles around something firm as the 'foundation'.

I started by adding two tentacles per leg, one in the front and one in the back. This way they were separated - I didn't want them to stick to each other before they were ready. The one on the right is a normal smooth tentacle rolled on an even surface - smoothened carefully with a big, round clay shaper after I set it up in its position.
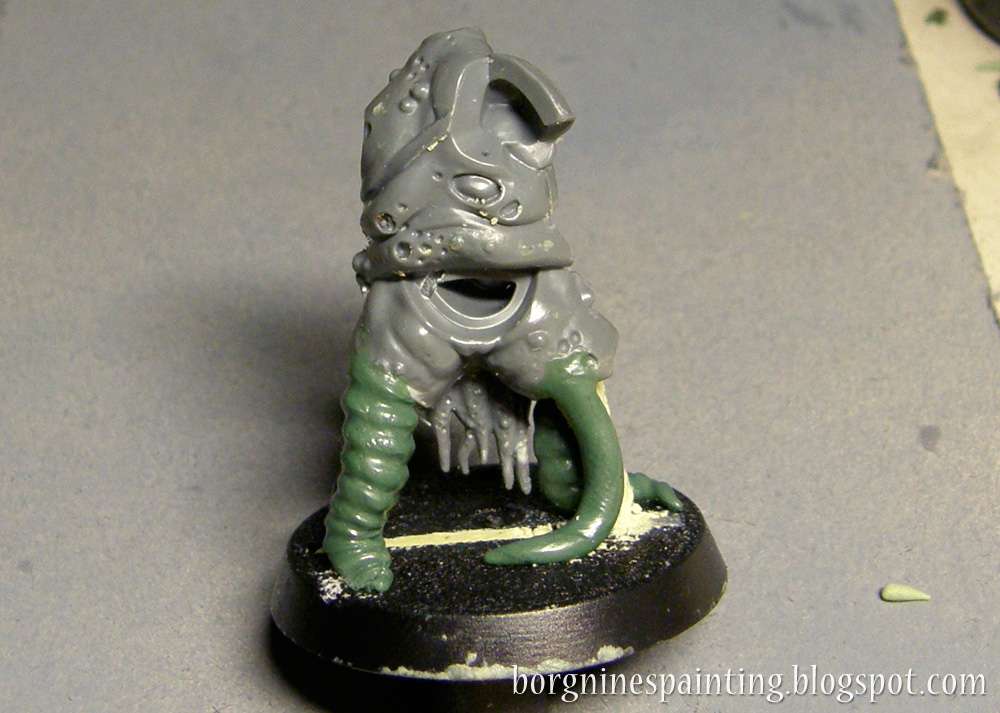
The one on the left, the segmented, 'wormy' one started the same as the other one - only after I secured it to its position I added the grooves with a small, round clay shaper. The underside of the tentacle can get flattened through all the pressing while sculpting the grooves, so when everything else was done, I refined that from underneath using the pointy sculpting tool - raising the flattened part a bit and deepening the grooves there.
The one on the left, the segmented, 'wormy' one started the same as the other one - only after I secured it to its position I added the grooves with a small, round clay shaper. The underside of the tentacle can get flattened through all the pressing while sculpting the grooves, so when everything else was done, I refined that from underneath using the pointy sculpting tool - raising the flattened part a bit and deepening the grooves there.
The same story on the backside. Now it has to cure completely before moving on.
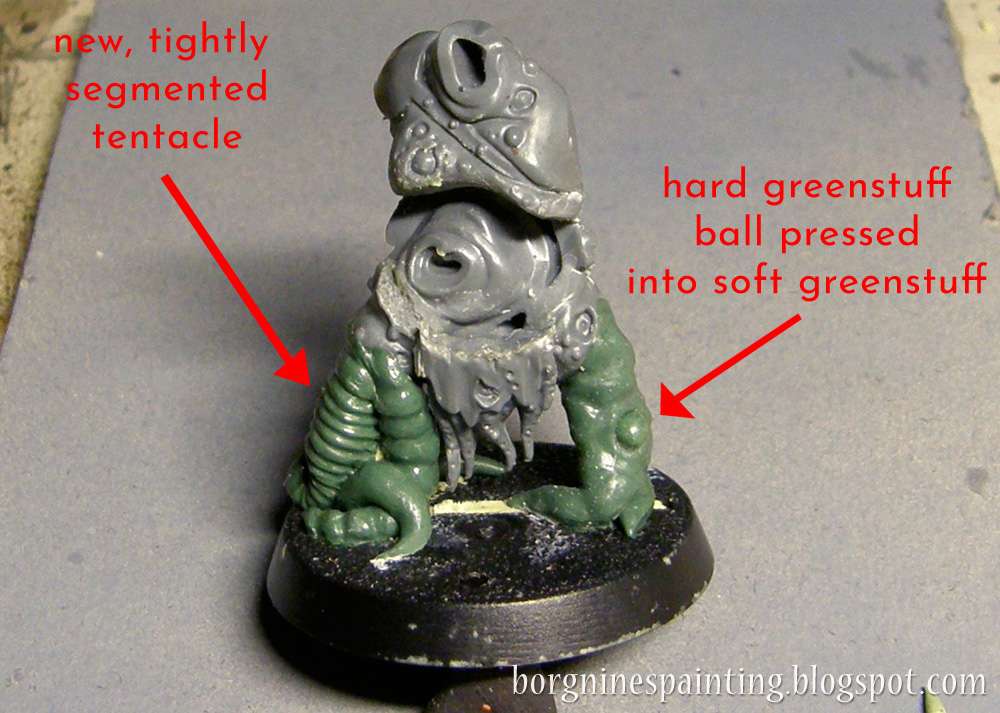
Then it's time for more tentacles. The one on the far left is a variation on the segmented tentacle showed up earlier - only this time I used only the side of the pointy sculpting tool to add many thin ridges close to each other - all the other principles remain.
The one on the left is a fleshy, nurgly tentacle - made similar to the arm that I presented in the previous tutorial. I made a normal, smooth tentacle on an even surface, connected it to the main body, pressed various indentations and pits with the small, round clay shaper and smoothened it out a bit afterward. While it was still soft I pressed a ball of hard greenstuff into it, to create this 'egg lodged in the flesh' kind of effect. It can be a boil, a botfly egg or an eye.
When that was all cured, I added an extra tentacle between two existing ones - seen on the left. I prepared a round tentacle out of greenstuff, stick it between the existing ones and secured it to the ground by reaching into the crevice with the pointy tool, pressing the new tentacle into the ground. Then I just laid the new tentacle on top of the other appendage.
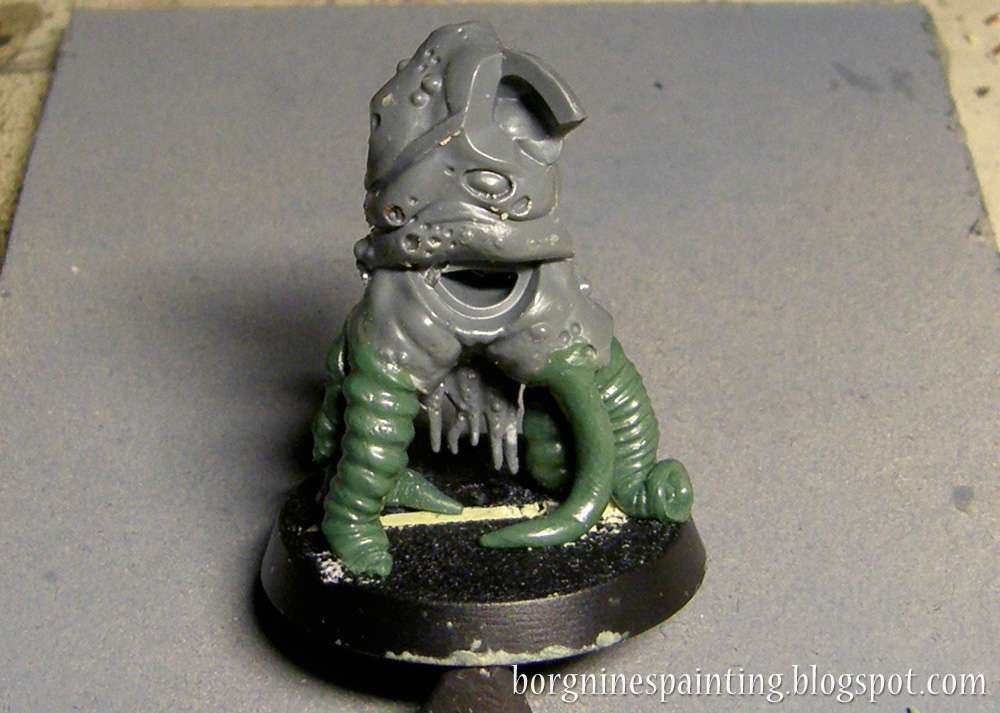
How it looks like from behind.
Now, even more tentacles. On the left, there's a new smooth tentacle with some additional flesh above (to make it mesh with the rest of the body a little better) and a slug tentacle on the right. To get this effect I prepared a tentacle with a triangular section - I made a normal, round one first and then pressed it to the table (with a piece of foil to unstick it easily) with two pinching fingers. Then I glued it between the legs and added many longish indentations on it, using the small, round clay shaper. I pressed it a little bit more close to the edge, spreading it around more, to create this 'skirt'-like effect slugs have, for a lack of a better word.
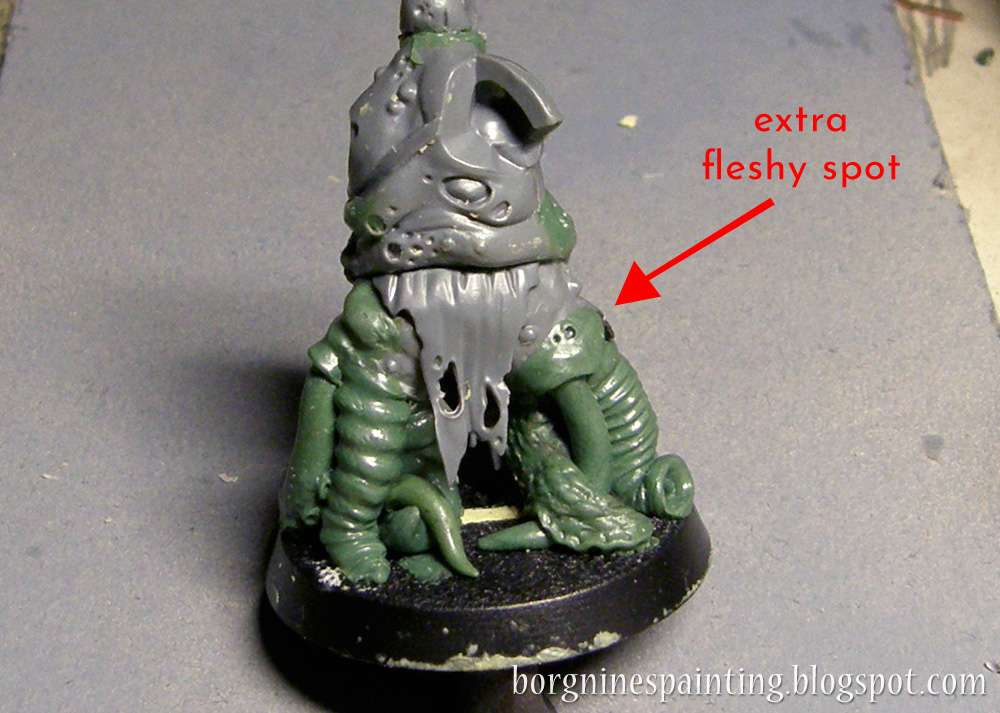
Now, when that has all cured, I added even more thin tentacles in every crack and crevice that I managed to find, to create this effect that it's a writhing mass of flesh. On the right, I added an extra fleshy fold at the spot where a tentacle joins with the body - I just pressed a blob of greenstuff over there and smoothened the connection with the body, but not with the tentacle. Now it's not yet another smooth tentacle, but one that comes from inside the body - it will stand out even more after it will get painted all slimy.
And now a small addition - short instruction how to easily make suction cups out of greenstuff, always useful when sculpting tentacles. They're not hard to do and improve the tentacles immensely. This guy here also has them, but quite underneath and hard to photo. Because of that, I did some of them separately.
The important thing to do is to sculpt them on a hard surface - I used a piece of plasticard here but cured greenstuff and the resin/plastic/metal miniature surface work well too. When I have that, I just roll some small balls of greenstuff (in whatever sizes I need them) and place them on the hard surface.
The important thing to do is to sculpt them on a hard surface - I used a piece of plasticard here but cured greenstuff and the resin/plastic/metal miniature surface work well too. When I have that, I just roll some small balls of greenstuff (in whatever sizes I need them) and place them on the hard surface.

Then, using the big, round clay shaper, I pressed their sides into the hard surface and smoothened them out, merging them with the 'ground'. They look like pimples now - which can also be useful when doing Nurgle work!
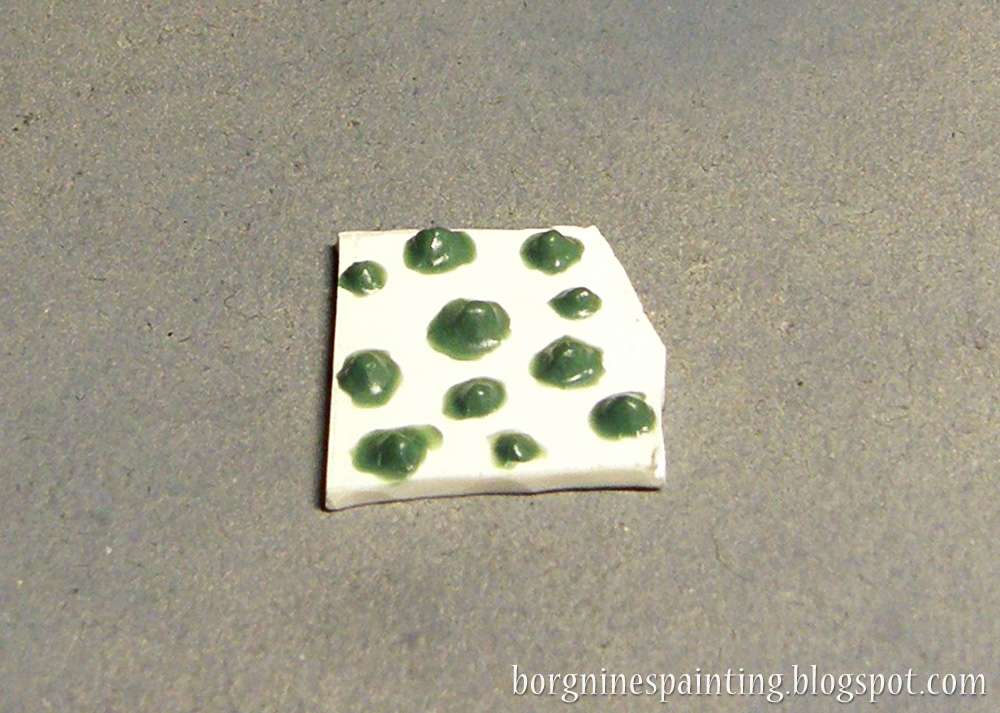
And when that's done, all that's left is to use the same big, round clay shaper to press every pimple vertically with the point of the tool to create the hole. Small clay shaper will work just as well here, as well as the non-hairy end of the brush. And that's it, ready to disgust your opponents.

This is a really good tutorial, especially with regard to making all the different sorts of tentacle. Thanks for posting it!
ReplyDeleteThank you so much, I'm glad to see that it's useful :)
DeleteZmyślny ten numer z wciskaniem kulek!
ReplyDeleteDzięki! Odkryłem go trochę przez przypadek jak myślałem, że to będzie dobry pomysł, żeby dorabiać nity i śrubki na zbroi. Nici z tego, ale za to nurglystyczne bąble jak znalazł ;)
Delete