

The Blood Bowl Rotspawn was my first big, almost completely scratchbuilt project ever, so I decided to document all - both for me and for everyone interested. It isn't meant as an instruction on how to duplicate my process, but more like an example of how I bring various techniques and tricks together to create a whole miniature - and maybe some tips would prove to be useful and/or inspiring to some people here.
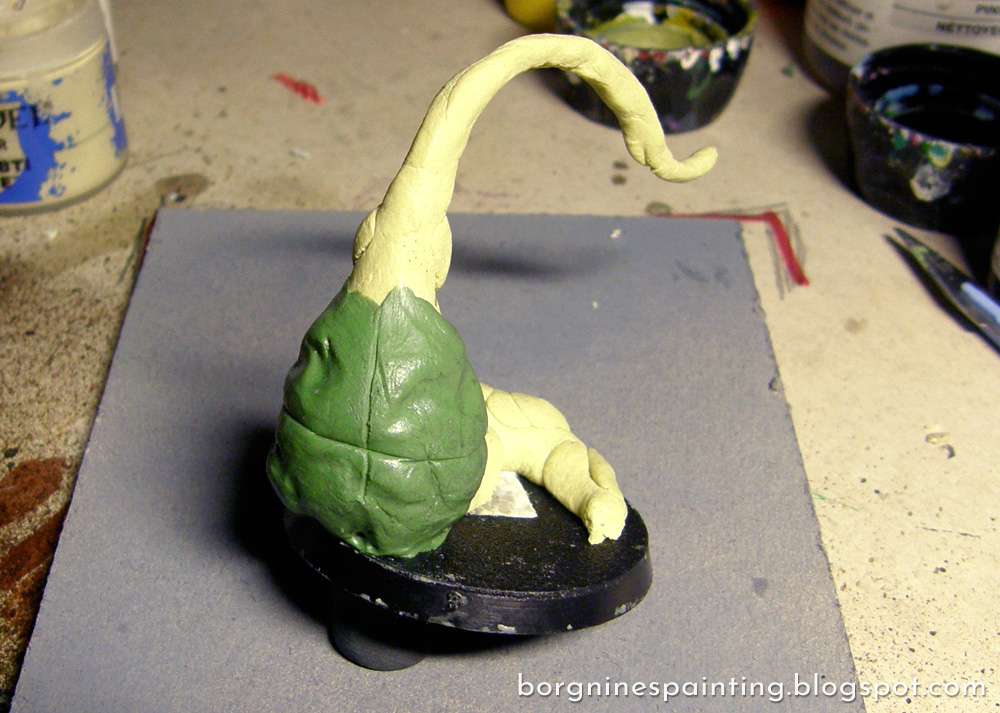
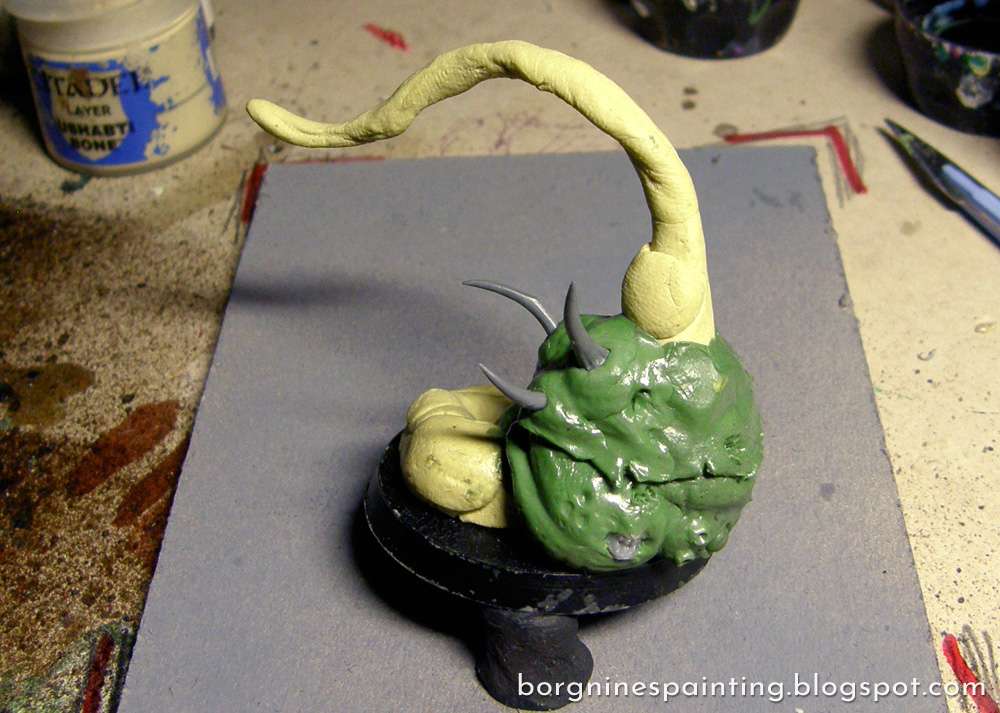
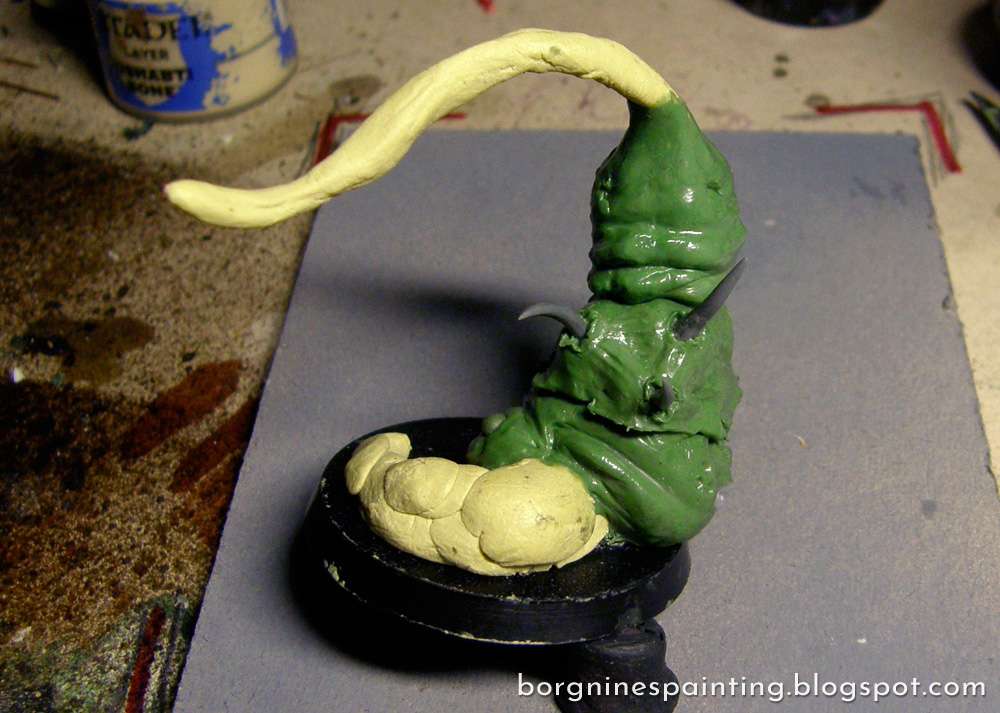
I started by sculpting a really rough sketch out of plasticine - can be seen HERE - mostly to get the size and proportions right (it's difficult to fix those halfway!). Then I bent a copper wire to follow the general shape of the main tentacle and glued it to the base in the right spot (by comparing it with the sketch) and then covered it with milliput, to fix it all in place and create some bulk on which all the proper nurgliness could be built later.
I started by sculpting a really rough sketch out of plasticine - can be seen HERE - mostly to get the size and proportions right (it's difficult to fix those halfway!). Then I bent a copper wire to follow the general shape of the main tentacle and glued it to the base in the right spot (by comparing it with the sketch) and then covered it with milliput, to fix it all in place and create some bulk on which all the proper nurgliness could be built later.

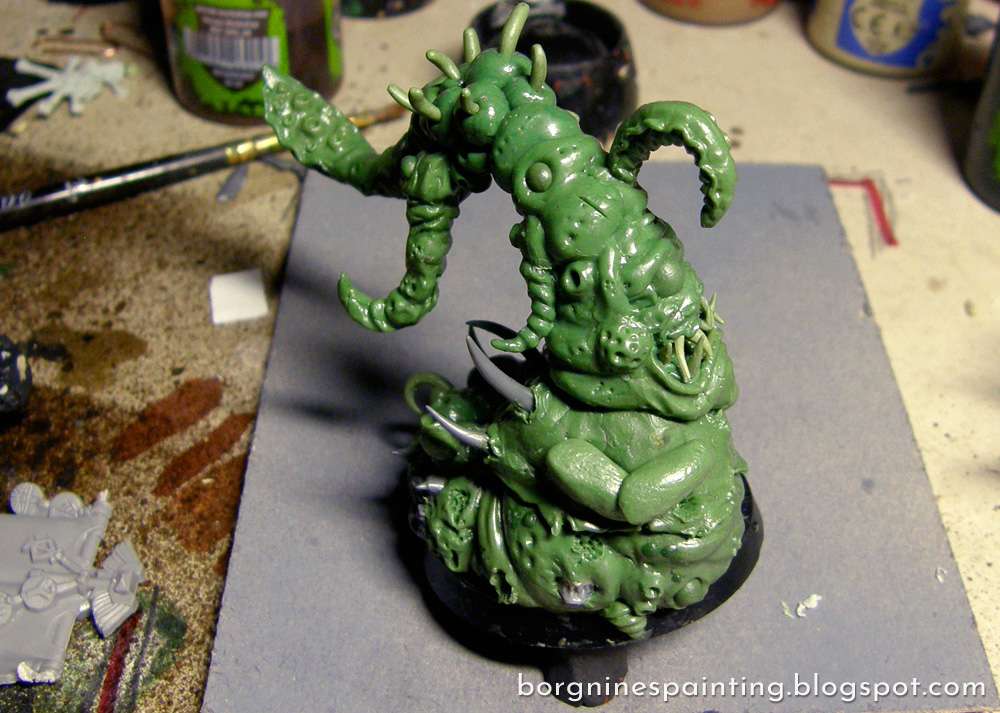
I took a big blob of greenstuff and set it up in the central spot - the belly. I marked the outline of the shirt the Rotspawn will sport and the central axis - to be used as a reference, it's easy to forget it without any concrete features sculpted and mess up things like arms.
Then I made the shirt more pronounced - by lining my scalpel's edge with the line from the previous step and pressing the flat of it against the underside.
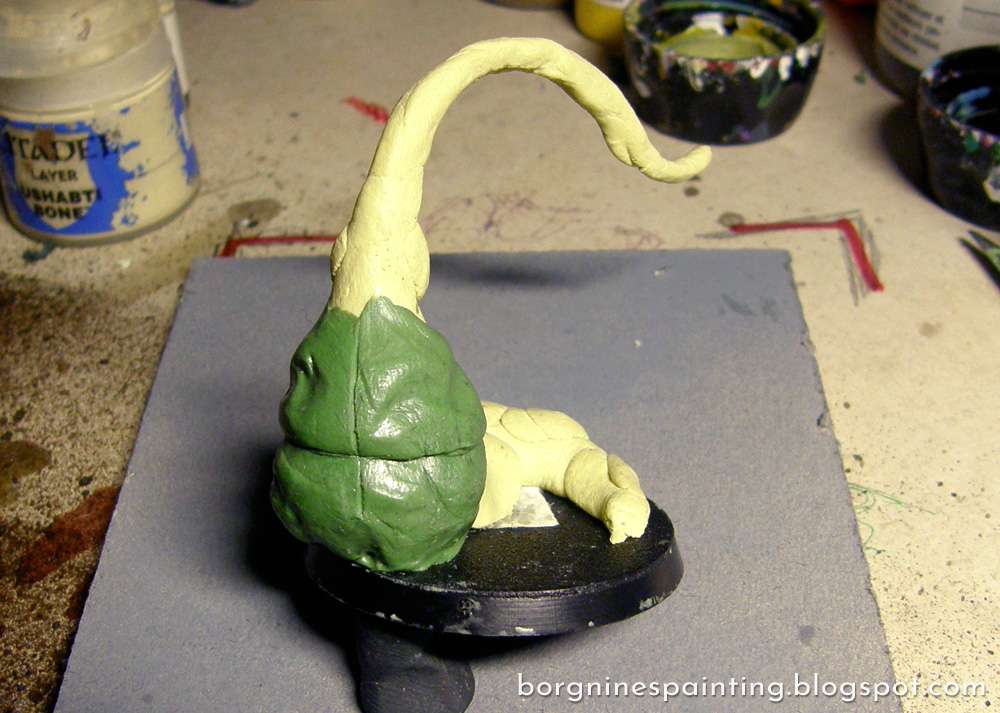
Next, I inserted the scalpel 'underneath' the shirt in several places to make it even more separated. Now, the good part - detailing - using the big, round clay shaper I sculpted some lumps and creases on the belly (smoothening it out afterwards with the round, flat clay shaper), stuck some greenstuff balls (prepared beforehand, mostly out of excess gs after each session) inside the flesh and using the pointy sculpting tool I added some holes, dots and damage on the shirt.
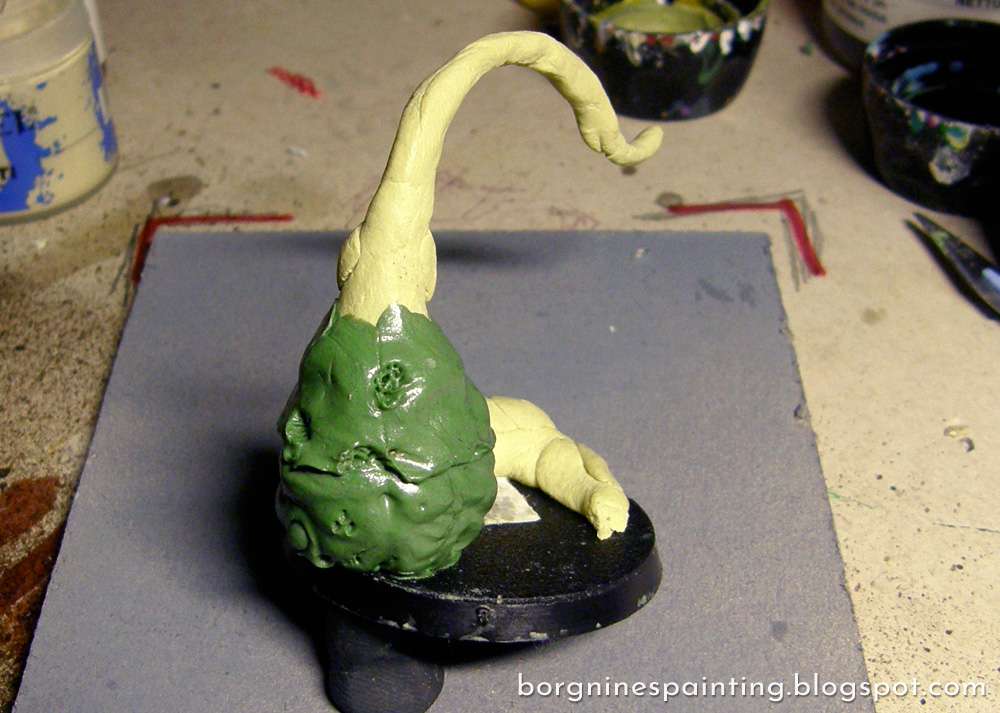
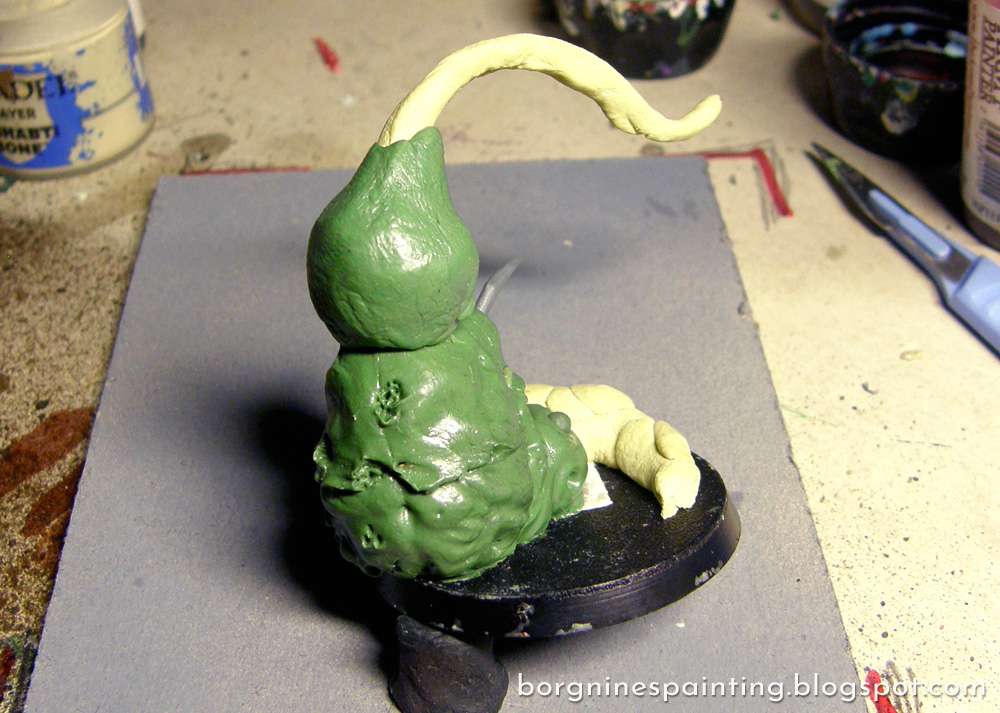
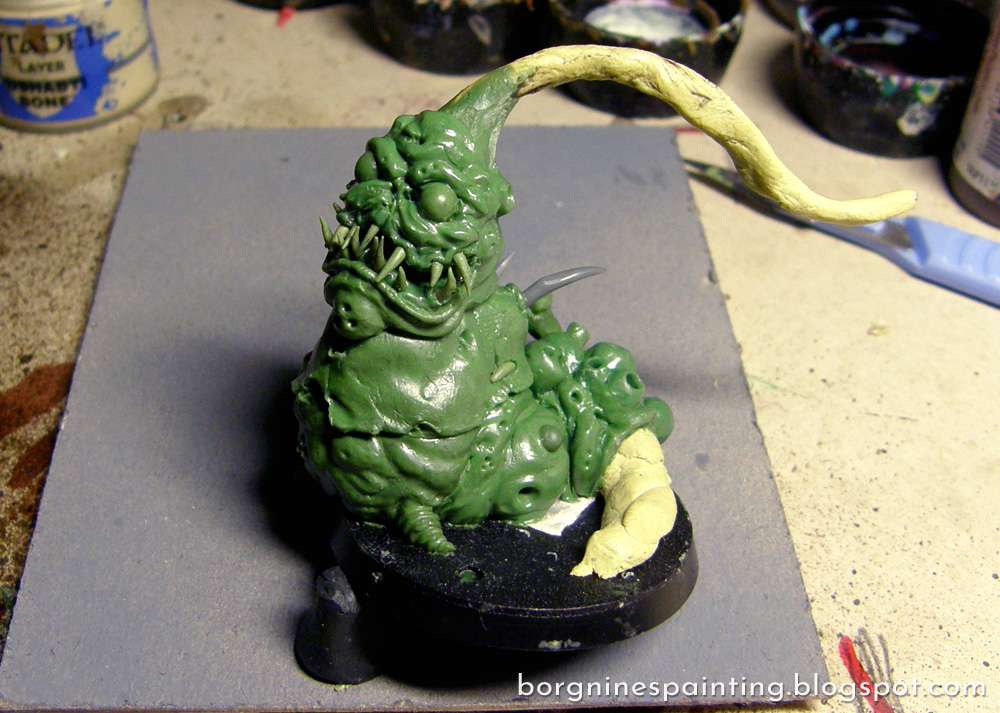
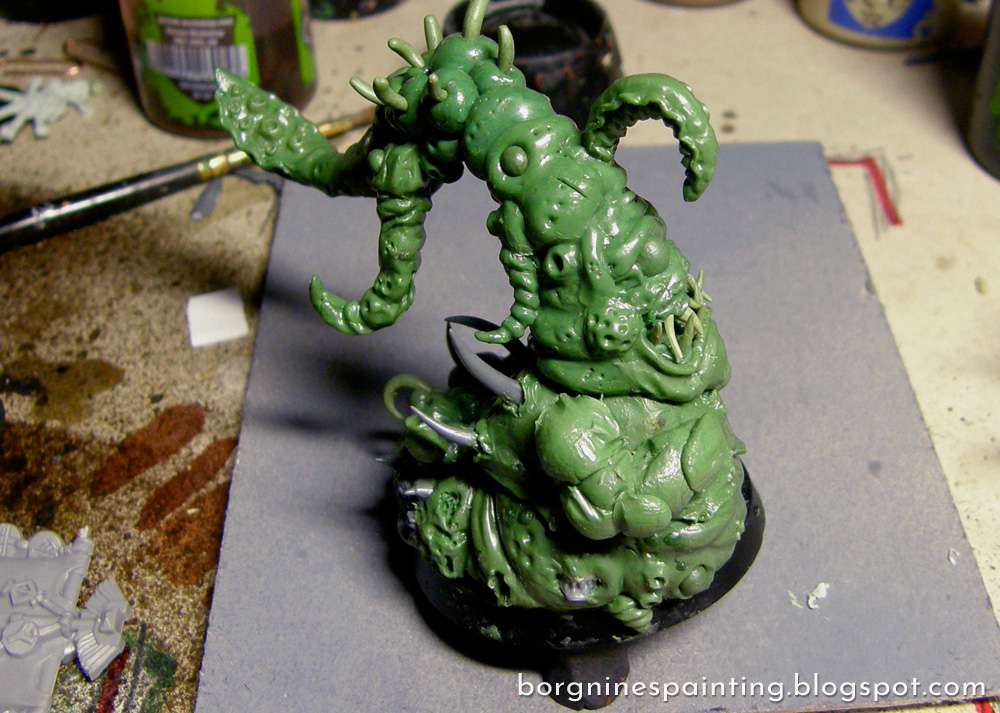
When the belly cured, it was time for the back. I wanted the back-spikes to be growing out of fleshy lumps, so I set several smaller blobs of greenstuff there to set the general shape from the beginning
Then I started joining and blending the blobs together, mostly with the trusty old, big, round clay shaper - at this step, still a bit rough. I used the side of the pointy sculpting tool to create a crease on the lower part of the flesh - anticipating that I will sculpt a lot of mass behind it - mass that will be pushing on this part, creating the fold. I also took some flat tweezers to catch and pull on the greenstuff where the edge of the shirt is to show it a bit better.

When I was satisfied with the form, I took the round, flat clay shaper to make it all smooth and nice. At this point, I also moved some of the mass to the back-lumps to make them stand out more.

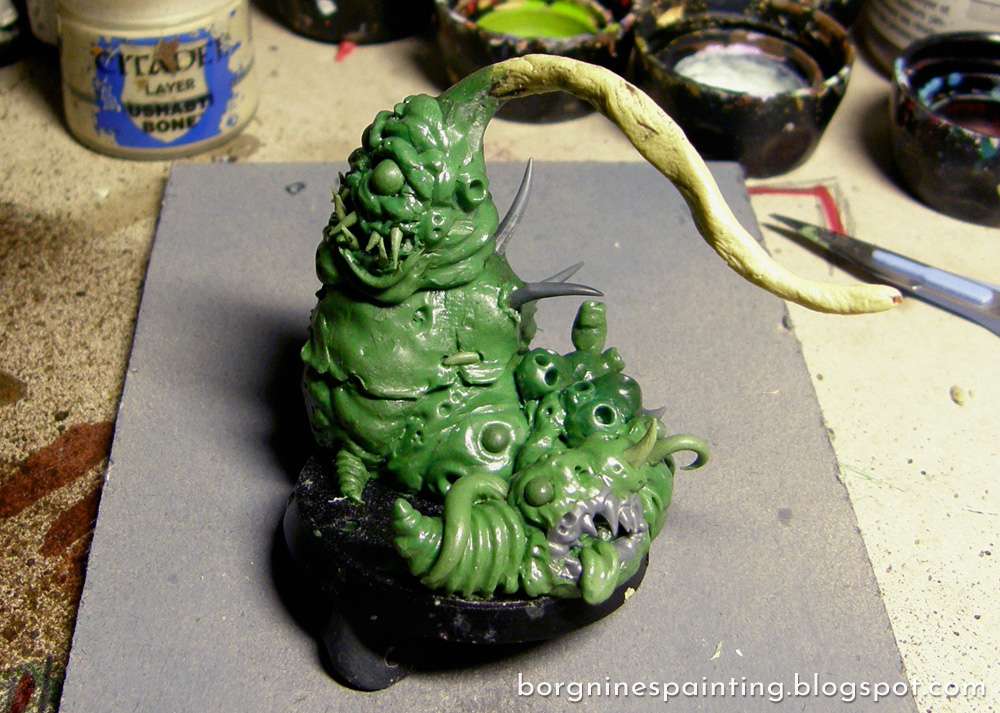
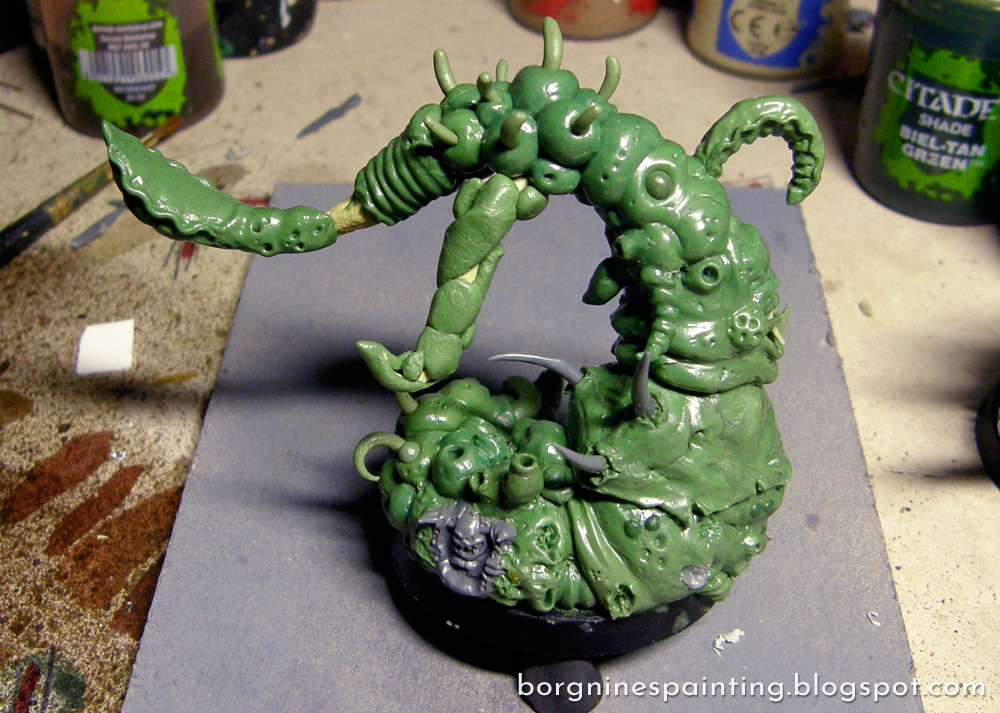
Now, when it was still soft, I added the details, including the plastic parts. First, I took three long spikes from the Putrid Blightkings kit and stuck them in the lumps on the back (I used some superglue too, greenstuff alone isn't enough to keep them in place most times). Then, I inserted a goblin mouth into the flesh below, covering it up with greenstuff a bit to merge better and finally added some holes. I also sculpted some random suction cups, visible on the right, using the same technique as I presented in the Nurgle tentacle tutorial. It's looking pretty gnarly already.
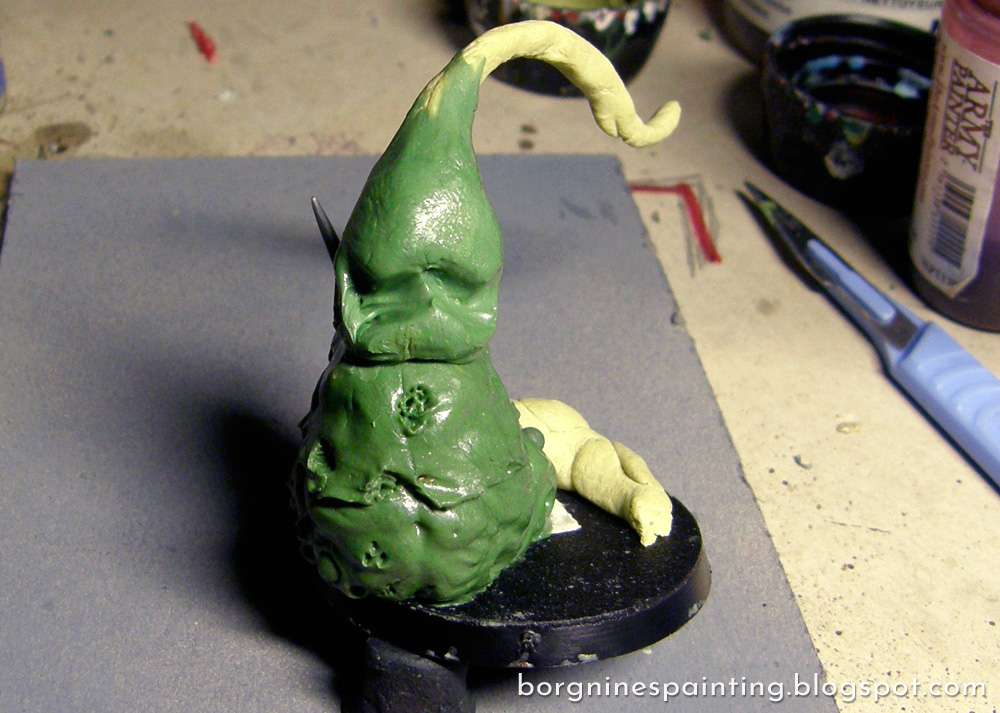
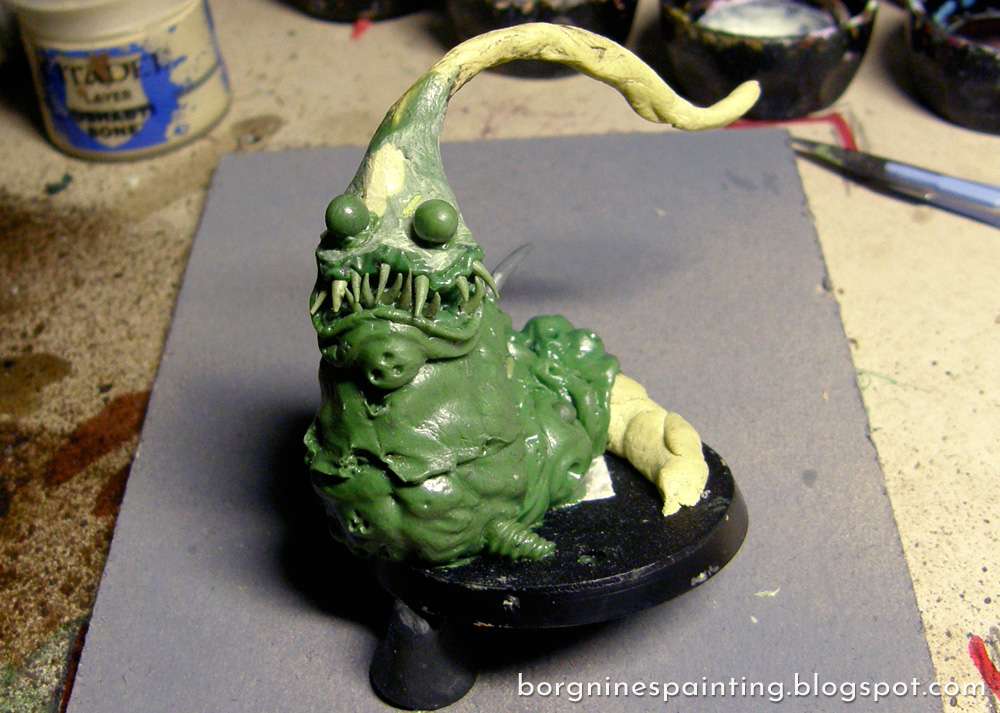
Then it's time for the face. I started by putting a big blob of greenstuff over the initial milliput base, comparing the size with the sketch.
Using the 'scythe' sculpting tool I created some creases on the back of the head, to create many fleshy folds that will be sagging and resting on the back - still rough.

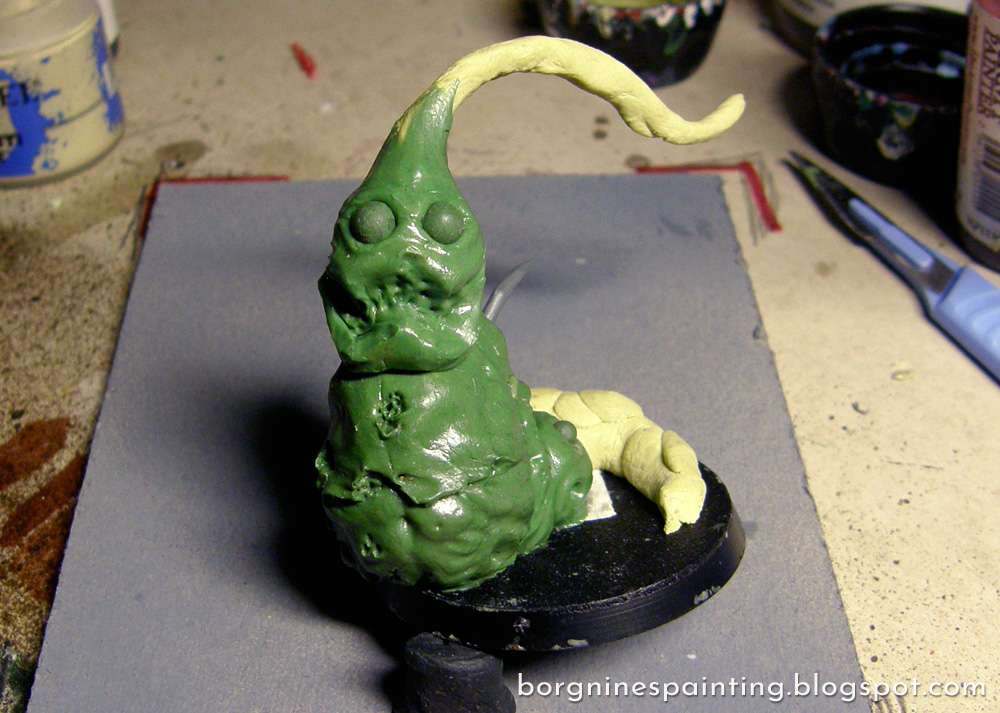
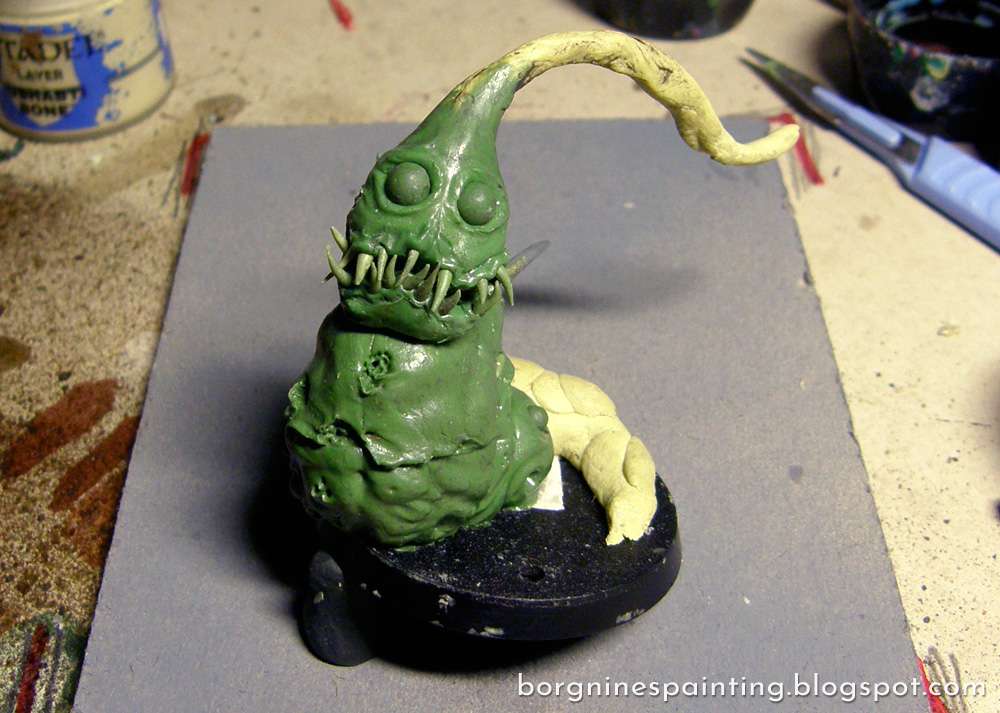
The milliput base serving as the core for the head was small compared to the greenstuff - and this is why - the more greenstuff you have over it, the deeper the holes you can make. Using a small, round clay shaper I pressed a mouth for the rotspawn, in a cutesy ":3" shape (the small one is stiffer than the big one, more useful when making deep openings like this one). I wanted to add 'gums' and stick teeth into them in a later phase, so it was important to make the mouth bigger than it was supposed to be in the end.
Next, I took two identical greenstuff balls and pressed them into the face to create eyes. With the small, round clay shaper I sculpted some creases and folds around the eyes to make them look more 'set inside'. Then, using the pointy sculpting tool I added some random mess inside the mouth - it will be mostly covered with teeth, but it's always good to have some details in the mouth, especially a Nurgle mouth. He looks weird now - but one has to think of the final effect later!
I also refined the folds on the back, adding additional creases and some holes. The top part is weirdly smooth now, but it will be covered later with all the tentacle-related flesh. You can also see here that I added some ridges on the shirt, between the back-spikes, showing the fabric being stretched by the bulging lumps and spikes.
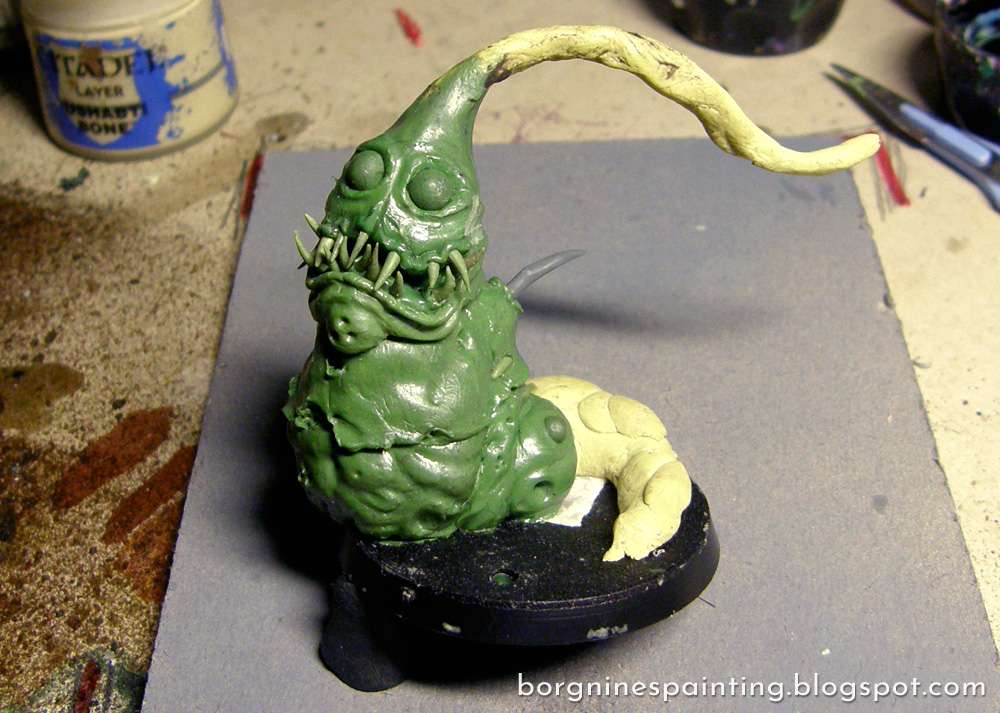
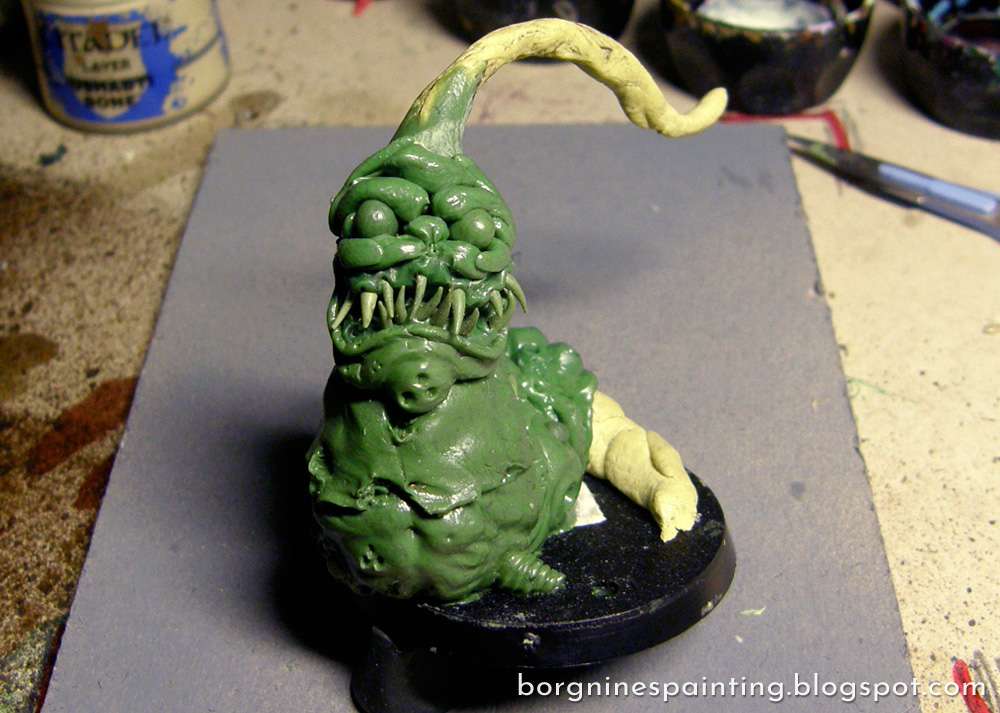
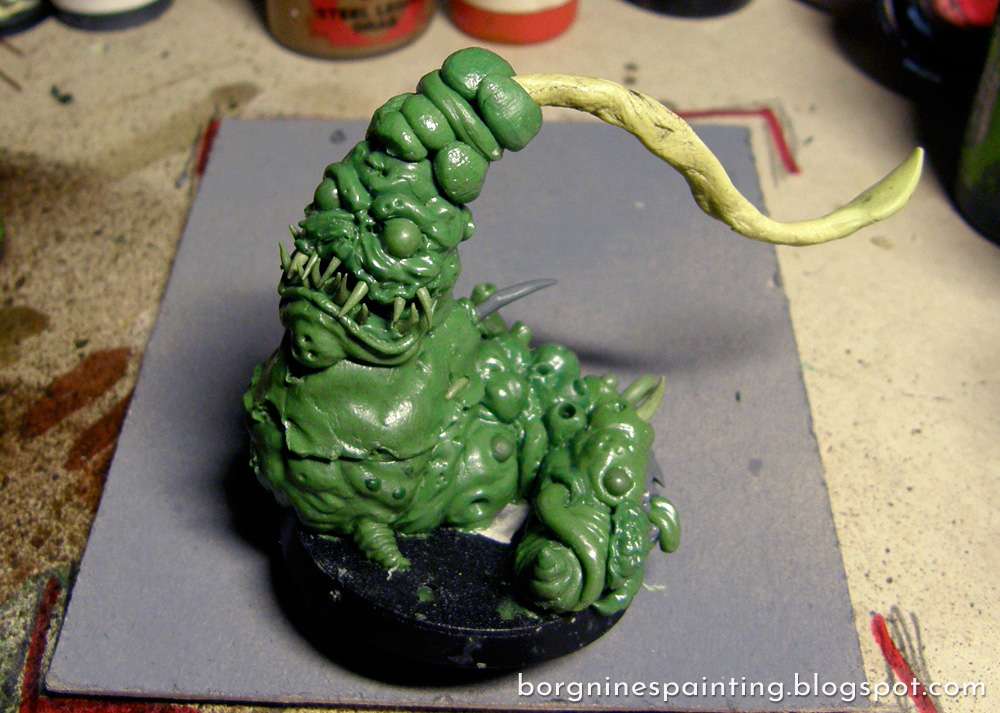
Time to make the smile nice. When the head was hard and cured, I rolled thin pieces of greenstuff and placed it along the edge of the mouth, smoothening the connection later with a small, round clay shaper, creating gums.

Beforehand, I prepared some teeth. I make them out of greenstuff/milliput mix (proportion 2:1), first rolling generally a small ball and then concentrating the rolling on one side, to taper the ball in a single direction, creating a pointy tooth. I place them on a flat, wet surface (so that they don't stick) and wait for them to cure - sometimes using whatever tool to bend them slightly in one direction, making them look more varied and a bit more believable as teeth. I add milliput to the mix here, because pieces as thin and small like this are really bendy if made out of pure greenstuff - millput keeps them nice and rigid.

Then, being careful with tweezers, I began sticking the teeth in the soft, greenstuff gums. Each time I was also dipping the flat end in a bit of super glue - to make them stick better (they still tended to fall out...). When setting them, I was alternating between the top and bottom parts, each time pointing in a slightly different direction, creating a properly chaotic, anglerfish-like appearance. I left one spot on the bottom right free to have a place for the tongue to stick out later. I also pressed small creases in the gums, above and below the teeth, to make them bulge out a bit when they connect.
I have found the chin to be too thin and too small in the previous step, so when the previous form was hard, I placed a big greenstuff roll underneath the jaw, with additional blob under that in the center. Then I smoothed and blended it all together using both the small, round clay shaper and pointy sculpting tool, adding a little bit of weight to the chin, as well as making the lips and the smile much more pronounced.
Then it was time for the next segment of the body. So far it was thick and hard-looking, now I wanted to do something looser, more articulated. To achieve that, this time I set up the greenstuff in many small pieces. I also wanted to use a Blightking bit with a Nurgling sticking out from a wound - so I glued it to the milliput base and used it as a starting point when setting up all the greenstuff.
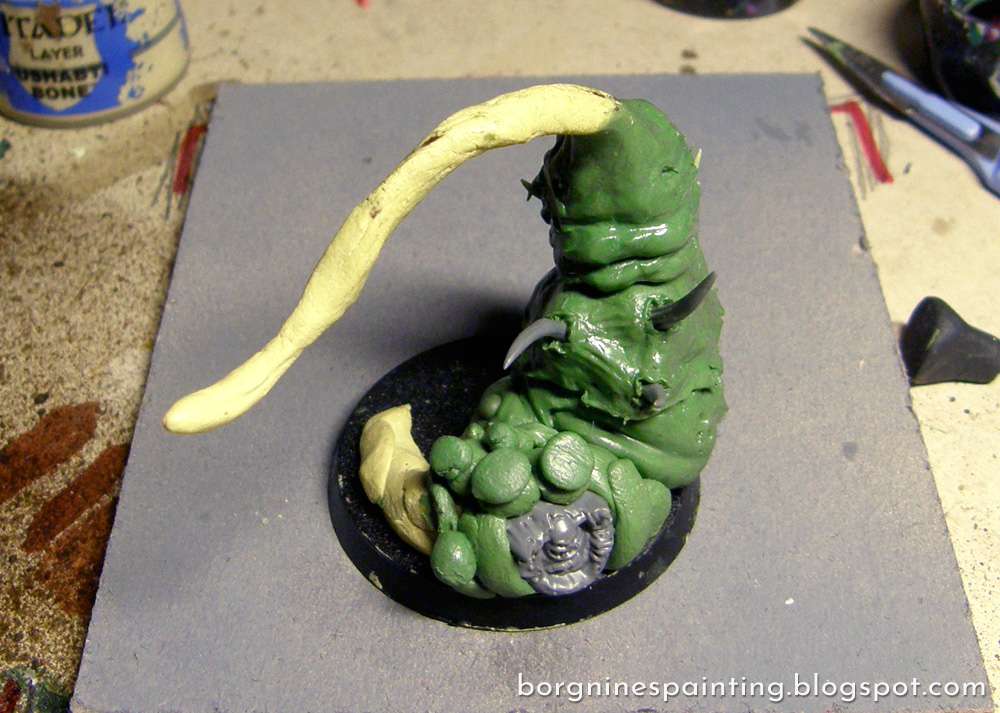
The next step was to smooth it all out and add the necessary detail. The parts around the Nurgling were sculpted like generic, misformed flesh with lots of holes and bumps, all done with the big, round clay shaper. The rest was sculpted to look round mounds or pustules - some of them with holes in them. The round, flat clay shaper was perfect to shape the greenstuff into those mounds - and when that was done, I created the holes by sticking the pointy sculpting tool in the center and then wiggling around until the hole was big enough. Pleasant stuff.

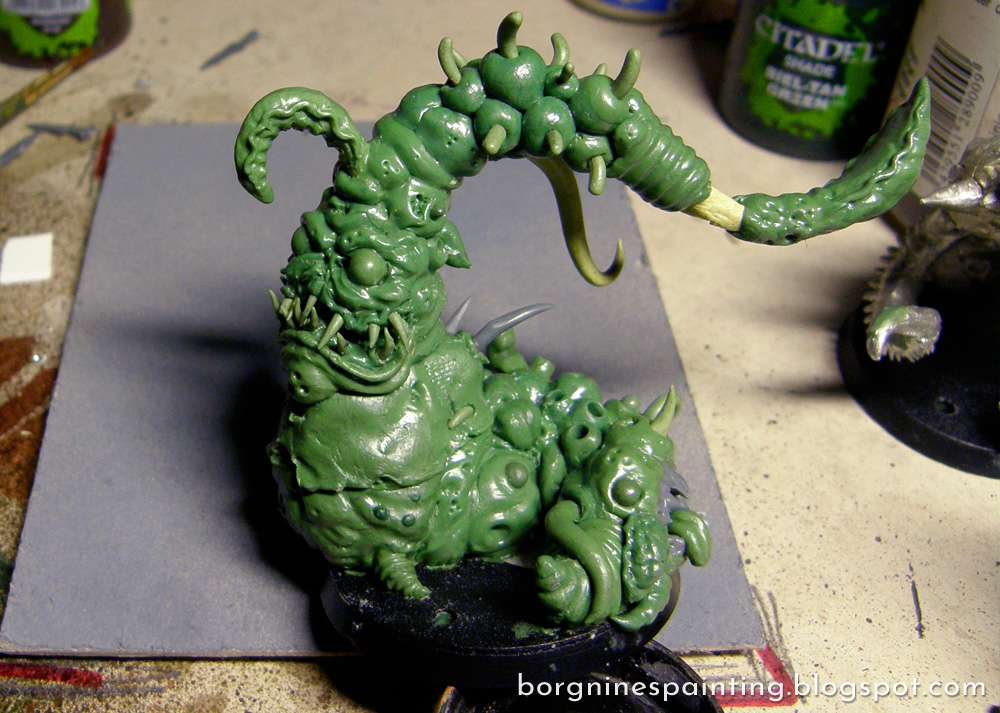
While doing that part of the body and waiting for everything to cure, I had enough time to notice that I set the eyes too high and the proportions of the face weren't as I envisioned them earlier - and it was also quite flat and boring too. So - naturally - I carved the face out and started anew. It was quite difficult to set the eyes inside the head in the right position last time, while also trying to sculpt it, so this time I glued the eyes to the cavity itself. This time they were much lower and wider apart - just as needed for a pug impression.
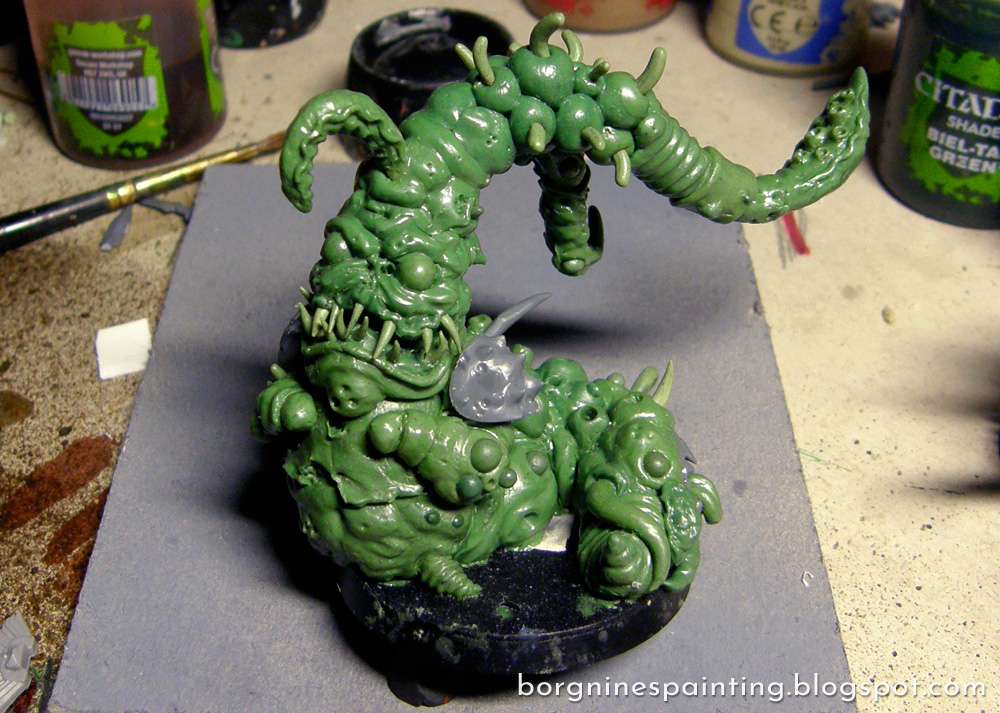
Now, with the eyes in the right place, I covered them with greenstuff flesh - small rolls and blobs all around them. I even looked at pug references while doing this, wanting to create a similar face with many, many folds.
Now I took my big, round clay shaper and a pointy sculpting tool and started pressing the greenstuff down, smoothing it out and adding little holes, creases, ridges and indentations. B sticking the pointy tool into the nose I made nostrils. All this mess made the face more expressive and sculptural - and dog-like too!
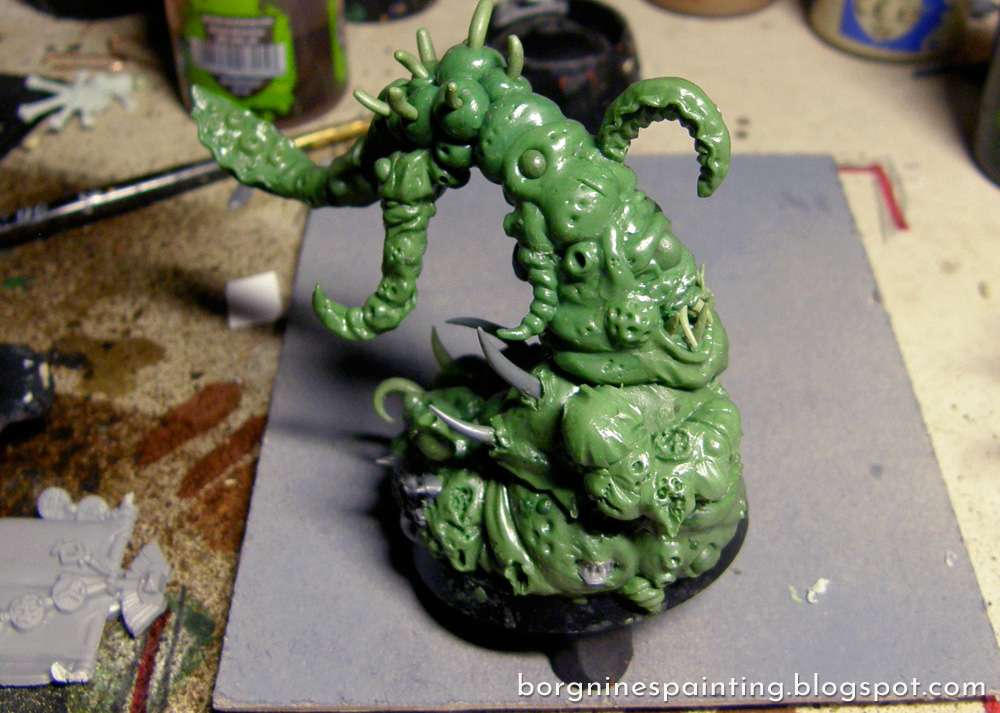
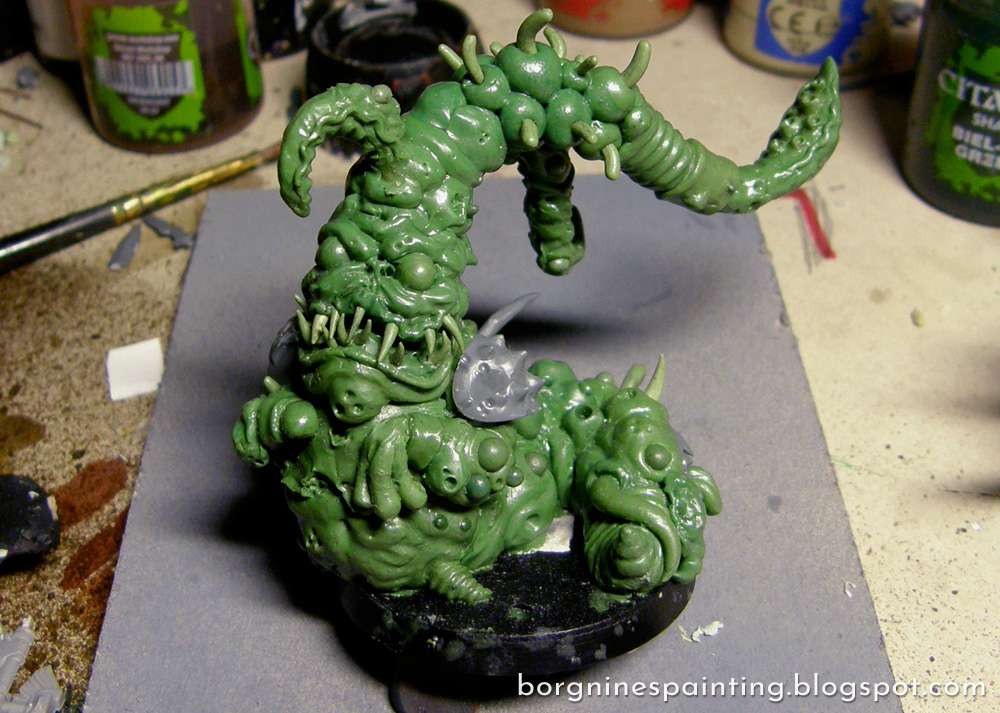
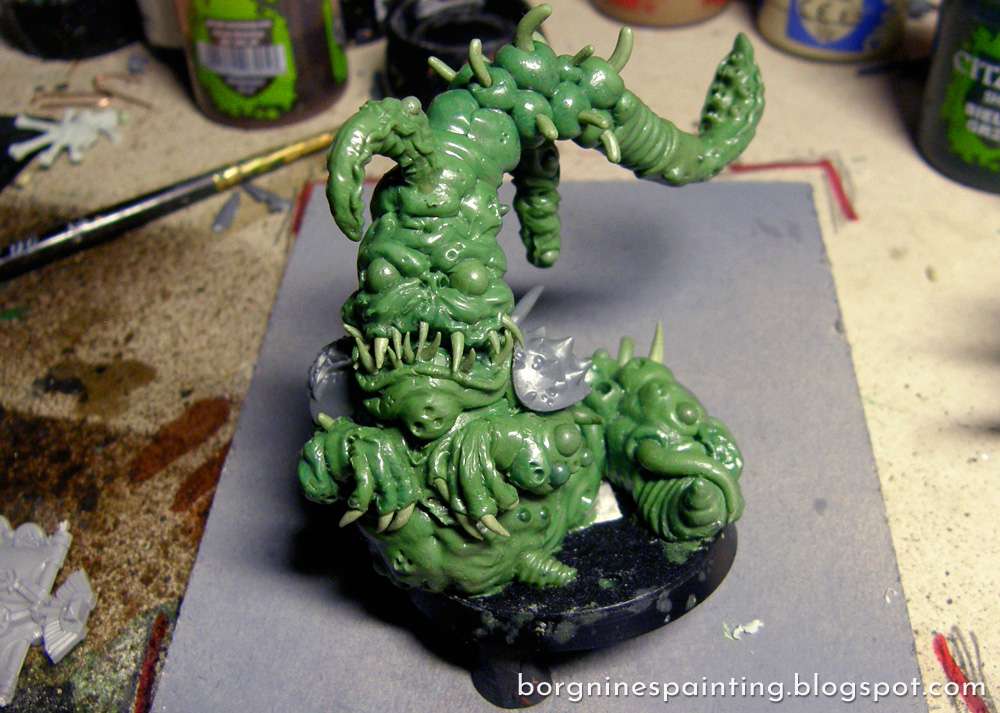
Going back to the body - it was time to finish it. I added yet another belly-piece from the Putrid Blightkings set - a toothed maw. Then, the same as before, I built a whole mess of greenstuff around it.
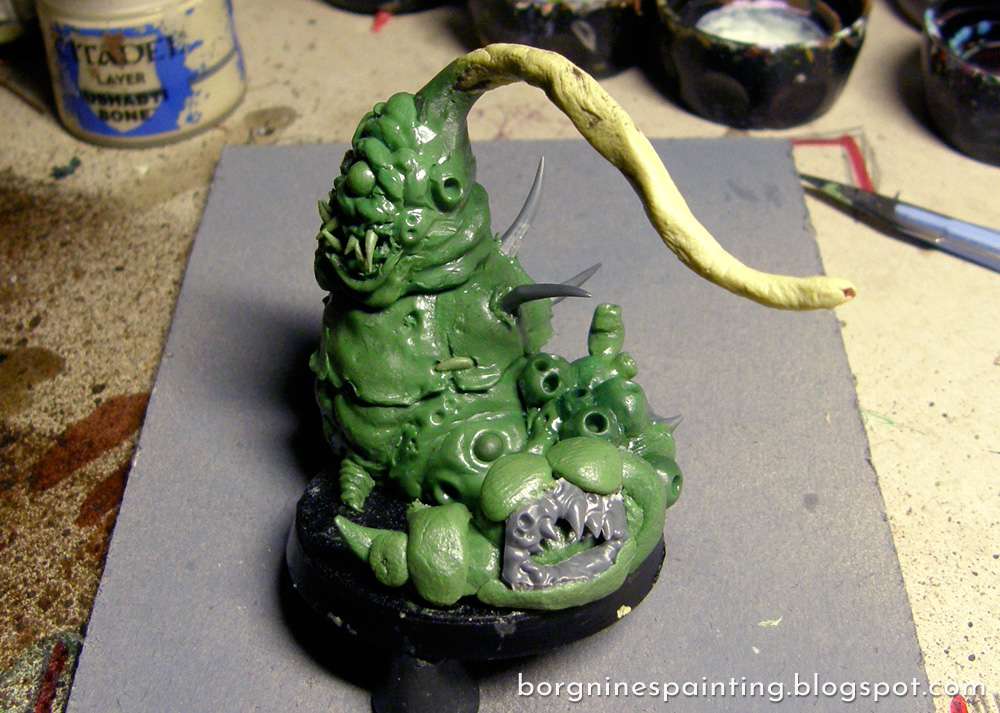
The parts around the maw were made again in the generally-rotten-and-nasty style - with some additions of balls of greenstuff and some longer, leftover teeth/claws stuck into the flesh. The final piece, the tail, was done to be ridged and segmented, reminiscent of earthworms - wiggly and playful. Then, when it was all cured, I decided that it wasn't enough, especially when compared to the over-detailed rest of the model. To remedy that I added another smooth tentacle resting on top of it - and later, more tiny appendages and tails growing from that area, to make it just a bit busier.
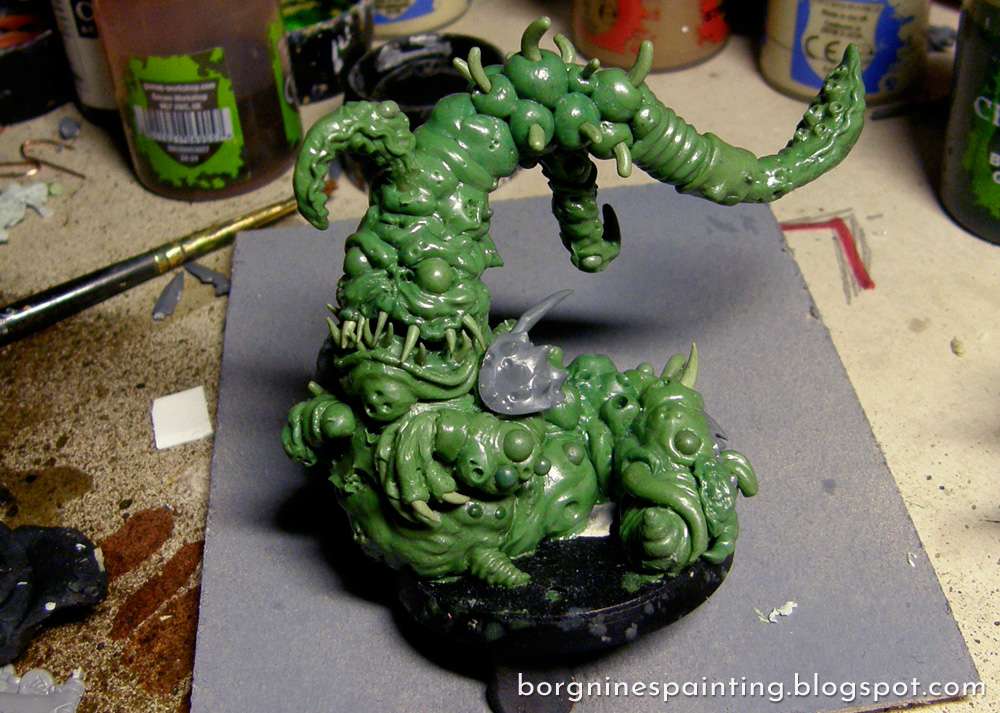
Now - back to the head/tentacle. I didn't want the tentacle to be uniform or generic, so I decided to divide it into different sections which will be done in different styles. The first one was to connect the head with the rest, so I made it in the same style, with numerous folds and blobs stacked on each other.
Then I smoothened it all out as many times before, using the round, flat clay shaper.

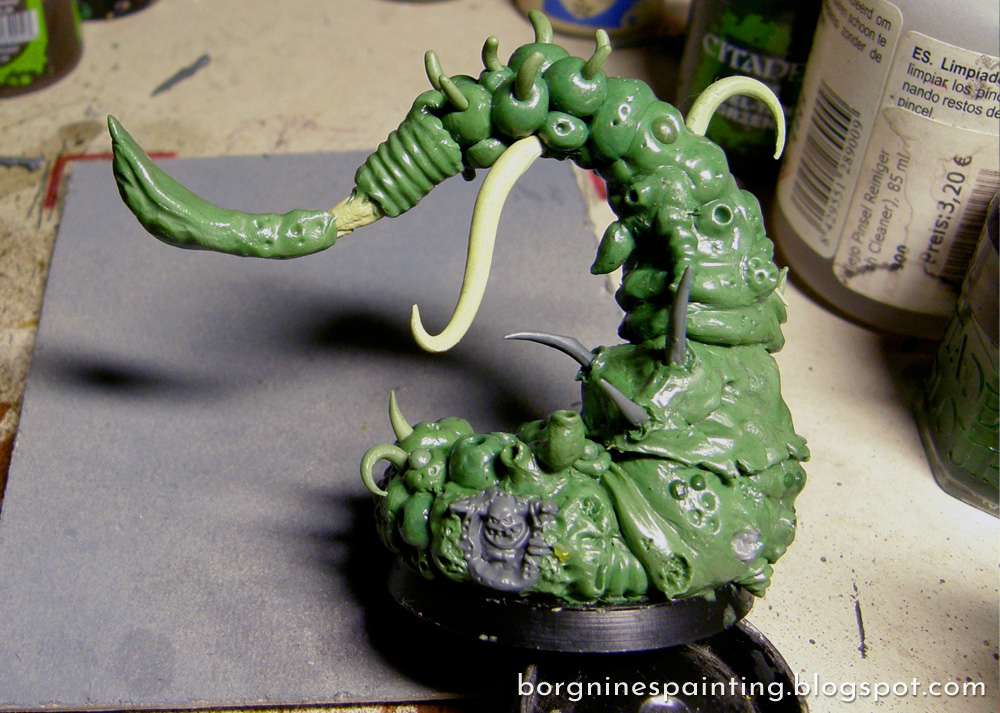
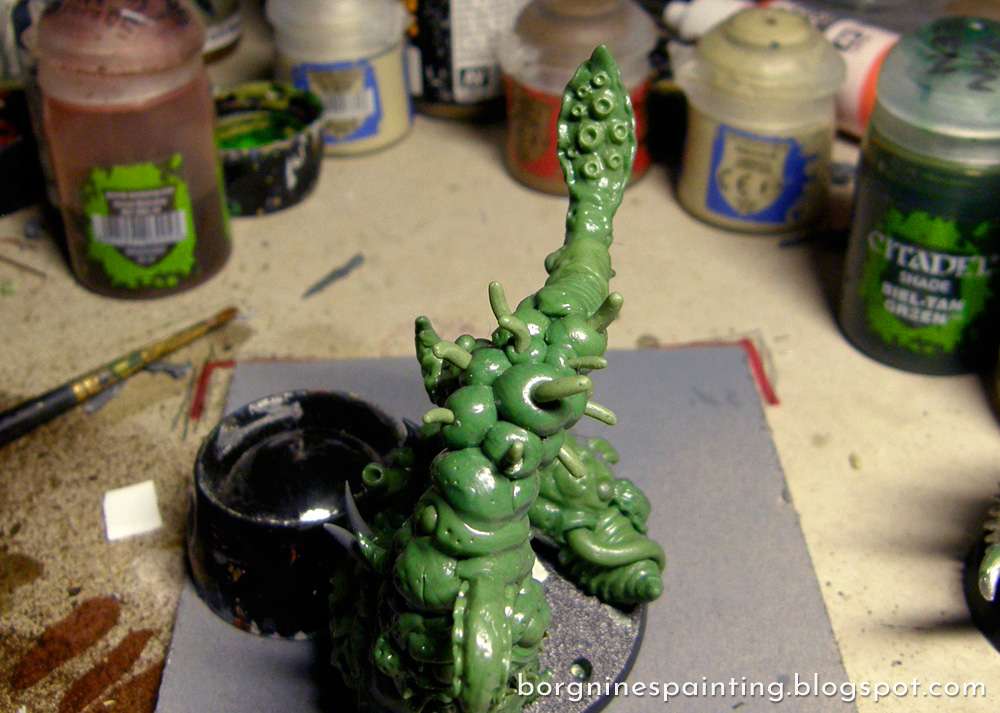
The work on the tentacle continues - this next part I envisioned as many separate, round blobs, with tiny, wriggly appendages sticking from each of them. I got inspired by one screen from Neon Genesis Evangelion I've seen on the internet a long time ago - where a similar nastiness was happening - and I couldn't find it ever since. The little wriggly ones were prepared beforehand (as the teeth earlier) and stuck inside the blobs while they were still soft. As you can see, I also added 'cores' for the smaller tentacles that grow out of the main one - they were also made earlier, out of 1:1 milliput:greenstuff mix.
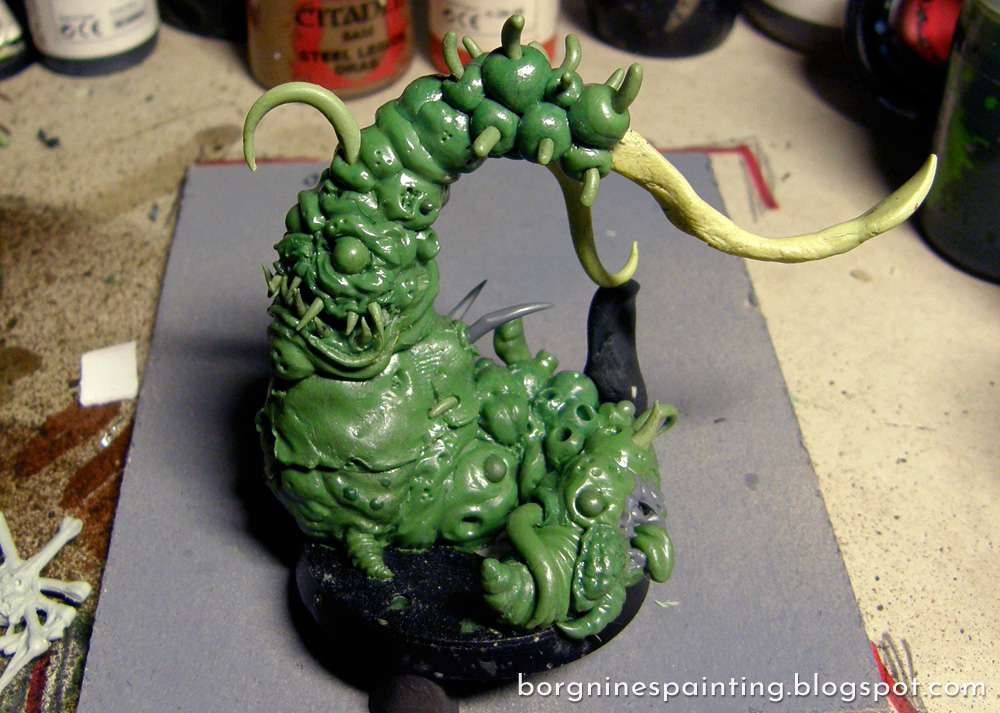
The next part - I wanted to make it segmented like an earthworm. First I had to make it smooth and cylindrical, with some blob-like forms at the beginning, to merge it with the previous part a bit at least.
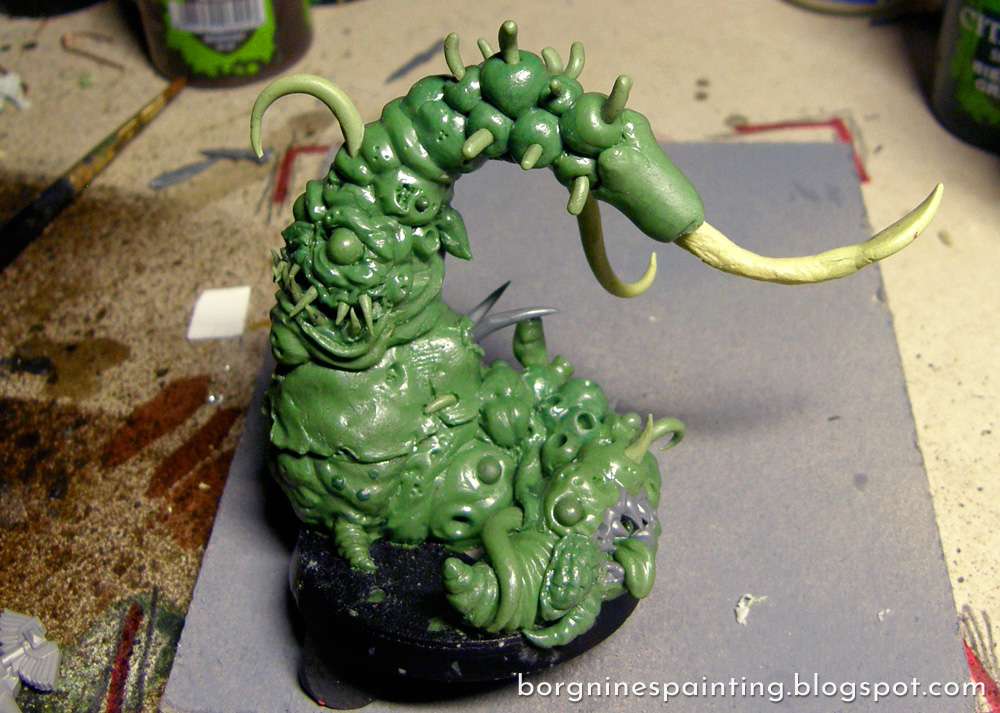
Then I went to actually sculpt the segmented pattern - using the side of the pointy sculpting tool, pressing it around the cylinder. It's important to start with very subtle indentations - some correction may be needed if the line will fail to connect and create a ring. When that was good, I pressed along the rings once again - and then again in an hour when to reinforce the shape. After that was done, I jumped to the tip of the tentacle, leaving the in-between part for later. I wanted to create a strong accent at the end, so the tentacle would end in a 'tentacular club', like on a giant squid, where the tentacle has a thicker part at the tip. I left it flat on the top (to sculpt suction cups later), squeezed a flanged edge with flat tweezers along the sides and left the bottom thick and meaty.
An hour after mixing the greenstuff, I pressed the flanged side once again with the tweezers, to make them even flatter and more pronounced. Then I took the small, round clay shaper and made it wavy and frilled, like on a cuttlefish - by pressing the flange at one point with the tip of the clay-shaper from the bottom - and then once again, close to that point, but from the top - and going like that all around the frill.

Now I went to the small tentacle in the front - like a single lock of hair. I covered the 'core' all around with greenstuff and sculpted a similar frilly edge like seen above. Not completely satisfied with that, I added some creases (with the small, round clay shaper) on the bottom part to make it look like a 'belly' of that tentacle.
Next, the side tentacle. I didn't have any outstanding theme for it, so I decided to make it generically fleshy and nurgly, placing irregular greenstuff pieces all over the 'core'.
Then I spread it around with the big, round clay shaper, added some deeper creases and holes with the pointy sculpting tool and stuck in some hard greenstuff balls into any larger mounds of flesh that were created during sculpting.

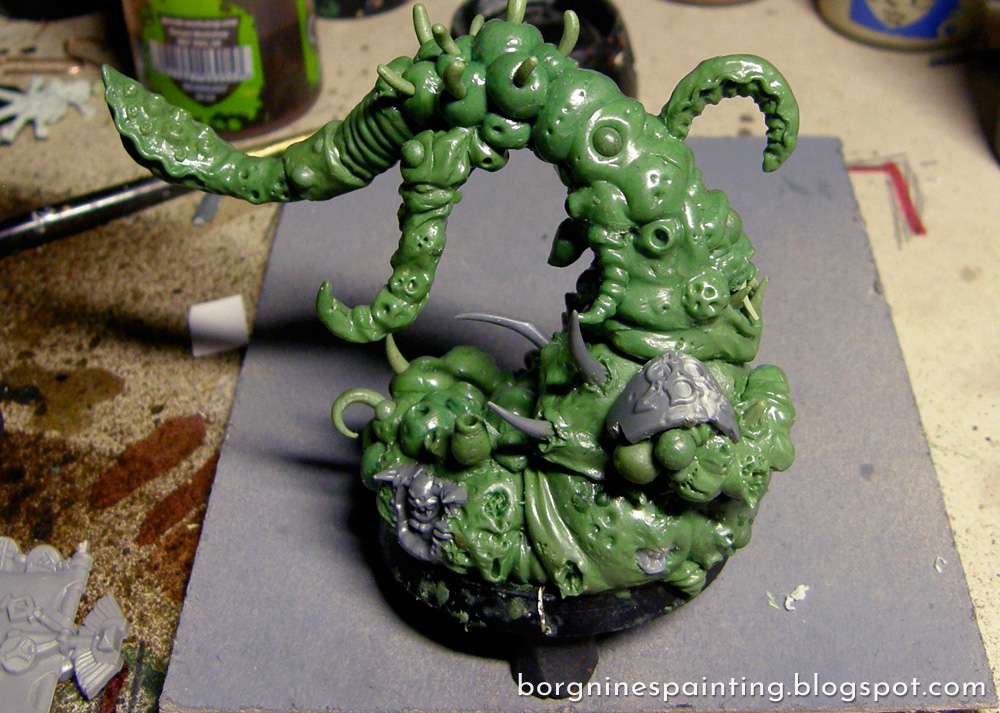
Finally, I went back to the 'break' between the ridged part of the tentacle and the tip. Continuing with the earthworm inspiration, I covered this piece with a flat 'tube', similar to the 'clitellum' found on the worms. It connects both parts of the tentacle easily and creates additional visual interest by contrast alone. Little bumps on it were added later to raise the 'sickness' level.
With everything else tentacle-related done, I added the suction cups on the tip - using the same technique as described in the Nurgle tentacle tutorial.
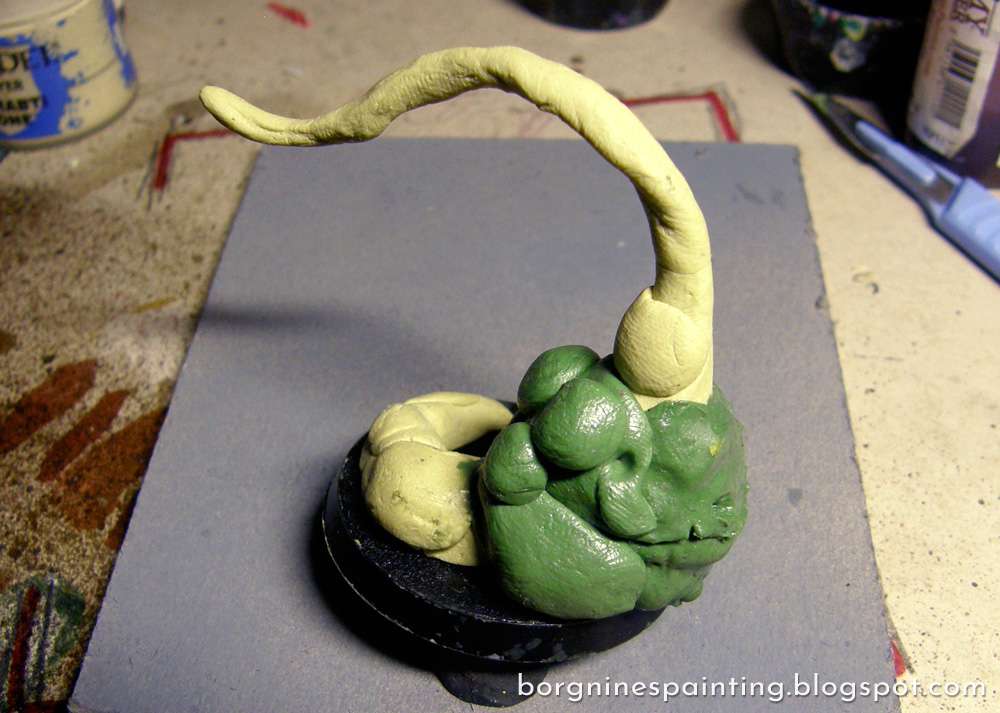
Now it's finally time for the hands. I started by drilling a hole in the spot I wanted the arm to connect with the body and glued a short, cut piece of skewer inside of it, to create a solid connection point, so that the joint won't move around too much when sculpting.

Then I placed the first blobs that show the general shape of the arm.
After about 90 minutes I started adding more greenstuff - after that time, the greenstuffed 'core' of the arm should be hard enough to be used as a foundation for next layers, but should also be malleable enough to allow last-minute fixes to the general shape of it if I noticed something during this phase.
Then, the details to the arm - holes, wounds, creases - the same as many times already on this project.
When the previous part was still soft, I added a pauldron from the Putrid Blightkings kit, because pauldrons are always nice - and it will be good to have some metal elements when painting it to look like teammates. I disliked how thin the arm looked from underneath that metal slab, so I put some extra greenstuff there and attached there some big, hard greenstuff balls over there - easy to add and they create the bulk nicely - they will be painted like loose boils, just about ready to burst.
The other hand is done the same way. Note how I left the wrists as balls - it will be easier to add hands to them later. I also sculpted some armbands them, to give the Rotspawn some common elements with the rest of the team. First, I marked the edges with a scalpel and then pressed and shaped them with the big, round clay shaper.
Now, the fingers. I rolled them separately on a flat, wet surface and then glued them to the 'wrists'.
When I was satisfied with their position, I added claws to them - prepared beforehand in the same way as teeth. Sticking them inside fingers changed their pose a bit, but it was relatively easy to correct it by catching the claws with the tweezers - they were hard, so safe to grab - and connected with the fingers - allowing for some indirect control. When I was satisfied with that, I added some extra wrinkles and details on the fingers themselves.
The same thing on the other hand.
When the fingers were cured and hard, I added additional greenstuff over the top-half of them - because earlier they connected directly to the wrist - and now I wanted to make a palm for them. Using the small, round clay shaper and the pointy sculpting tool, I sculpted the knuckles and some nurgly details on the hands, finishing the work on them. With that done, I could finally add the tongue - sculpted in a general shape on a flat surface, glued to the inside of the mouth and then shaped a bit with the small, round clay shaper again.
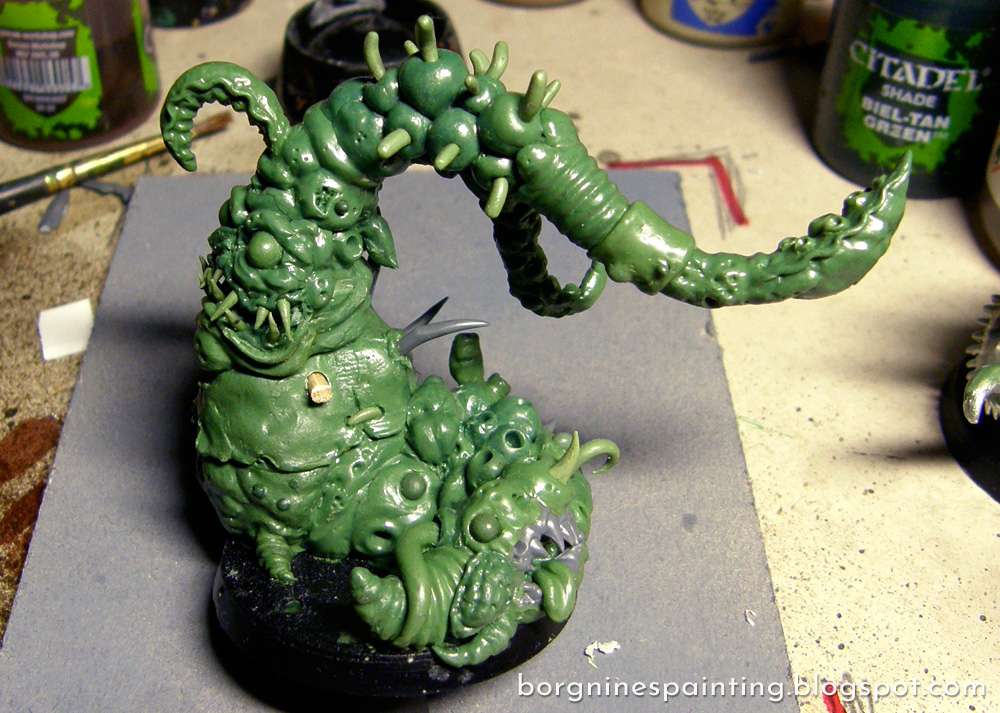
With all the normal greenstuff work finally finished, I went over the model with some liquid greenstuff. I mix with Glass Varnish to create a half-liquid mass that's (relatively) resistant to scraping and able to create some volume. Using that, I went over the round blobs in the middle of the tentacle, filling the gaps between them - keeping their deep appearance without actually leaving holes to the milliput 'core' itself.
With all the normal greenstuff work finally finished, I went over the model with some liquid greenstuff. I mix with Glass Varnish to create a half-liquid mass that's (relatively) resistant to scraping and able to create some volume. Using that, I went over the round blobs in the middle of the tentacle, filling the gaps between them - keeping their deep appearance without actually leaving holes to the milliput 'core' itself.

And that was it - I hope that at least someone managed to the end - it is my longest post BY FAR. I also hope that maybe someone will find it useful and/or inspiring to try working in greenstuff some more. Feel free to ask any questions.
Absolutely brilliant. Thanks very much for posting this - it's way better than I could do but hopefully I can pick up a few tips!
ReplyDeleteThat makes me glad and makes all the editing and writing worth it! :) I really hope that it helps at least a bit, thanks!
DeleteDzięki za opublikowanie poradnika. :)
ReplyDeleteI ja dziękuję za czytanie / przeglądanie ;)
DeleteMatko, ależ to trzeba mieć cierpliwość. Na tak ambitne projekty się u mnie nie zanosi, ale może myk z zębami i milliputowym szkieletem uda się w przewidywalnej przyszłości wykorzystać. Bardzo ciekawy tutorial.
ReplyDeleteCierpliwości na szczęście mam pod dostatkiem ;P Cieszę się, że coś może się okaże przydatnym, dzięki!
Delete