

Shortly after I posted my Faceless Stormcasts, I got asked about the recipe for their armor and to make a tutorial about it. It was still pretty fresh in my memory and I even wrote down all the steps, so I thought 'why not?' - this will be yet another of many rust tutorials available on the internet. I know it's relatively long, but I think that all the steps are important and affect the final result - and it is probably actually simpler than the number of steps would suggest.
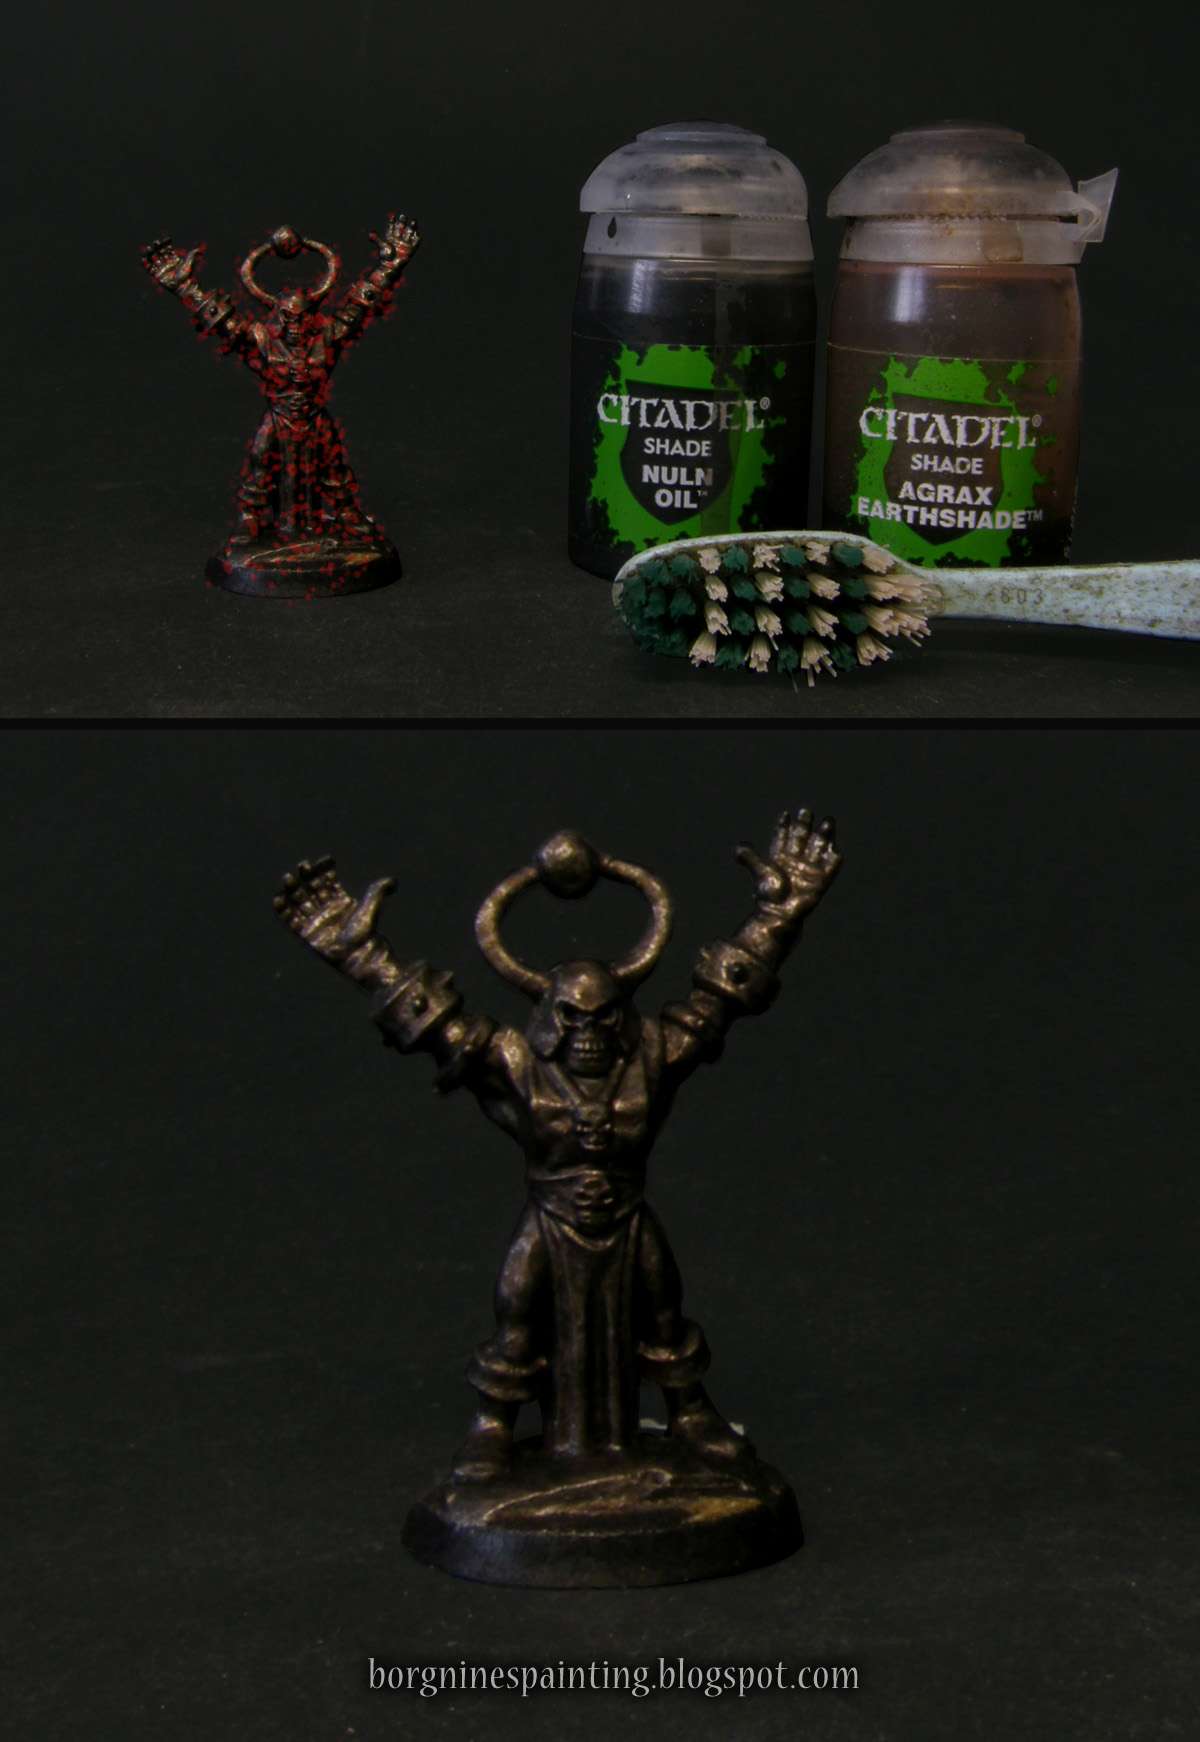
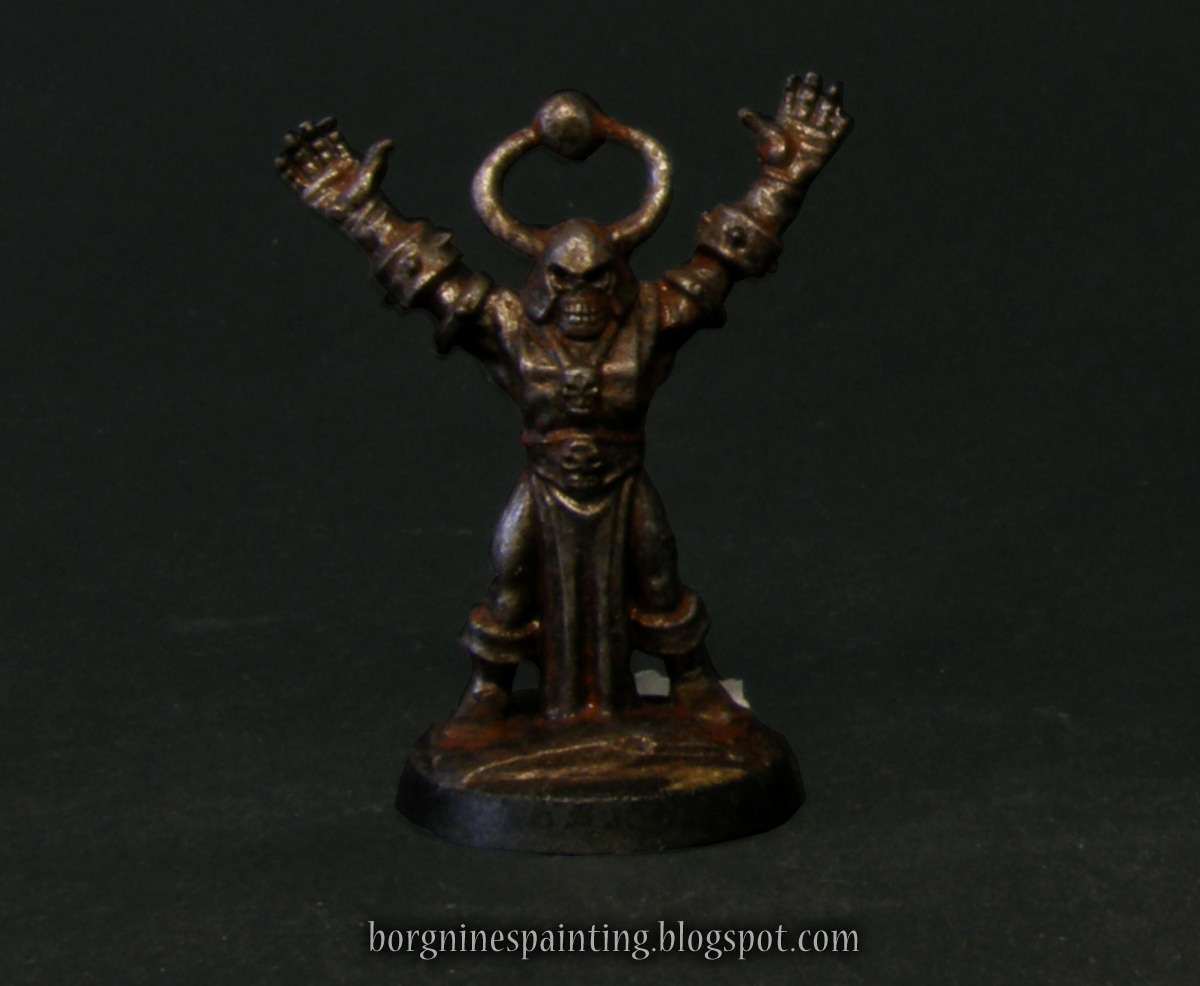
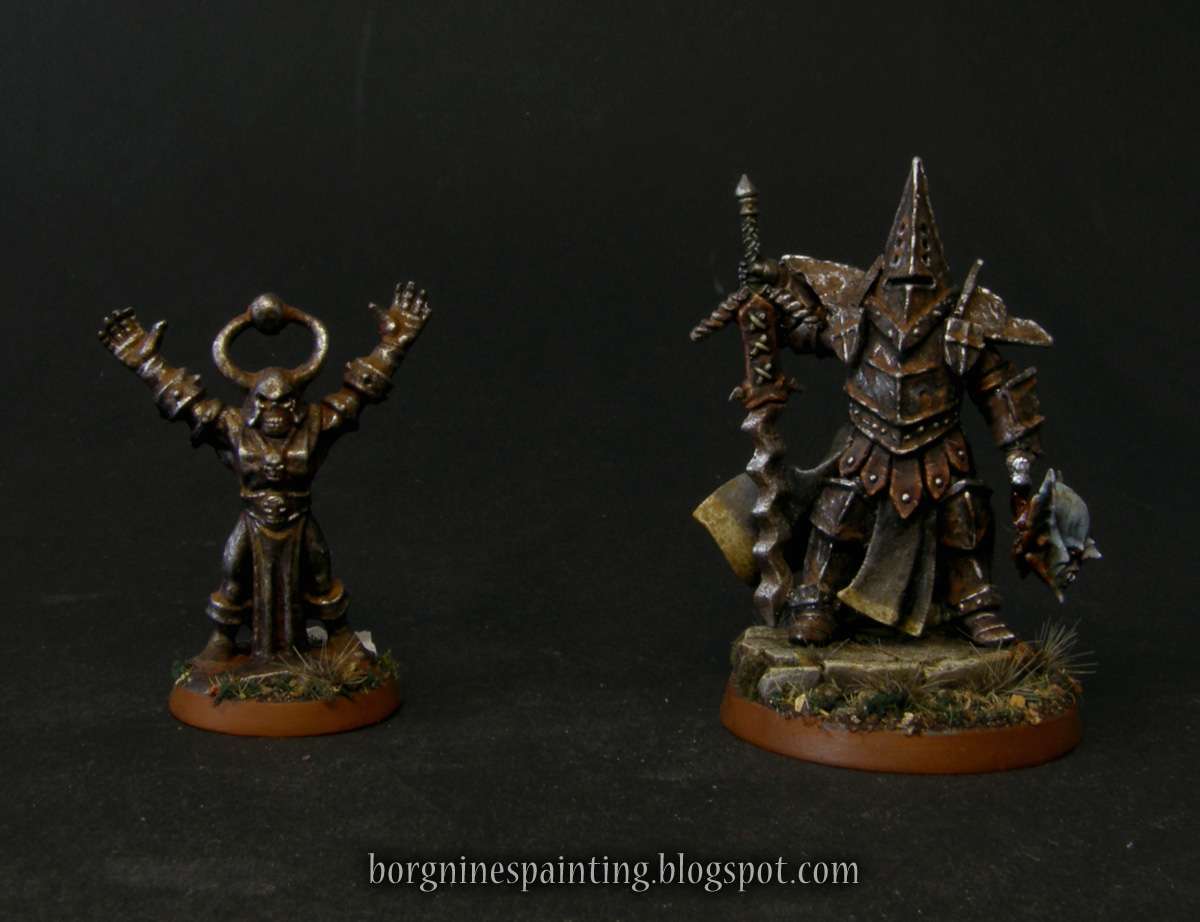
The photo with the effect that I was trying to recreate can be seen above, on the left picture - the whole thing is supposed to be dark and messy, with some significant rusting, while keeping the overall metallic look.
The miniature used in this tutorial was an old Chaos Sorcerer from Warhammer Quest. I got him a long time ago and I didn't really have any use for him before, so I decided to turn him into a statue here, seeing that his pose is static enough for this purpose.
I started by painting a base of wetblended Boltgun Metal from GW (which is known today as Leadbelcher), Warplock Bronze and some matte black. The blending itself was quick and messy, no need to be smooth with it. The parts that can be seen from above were painted dark silver, bronze was used on the undersides and then black added to the most recessed and covered places. Making it lighter from above and darker on the undersides helps to create the illusion of light coming from above. This arrangement is shown on the picture below.
Note: almost all pictures here are linked to their bigger versions.

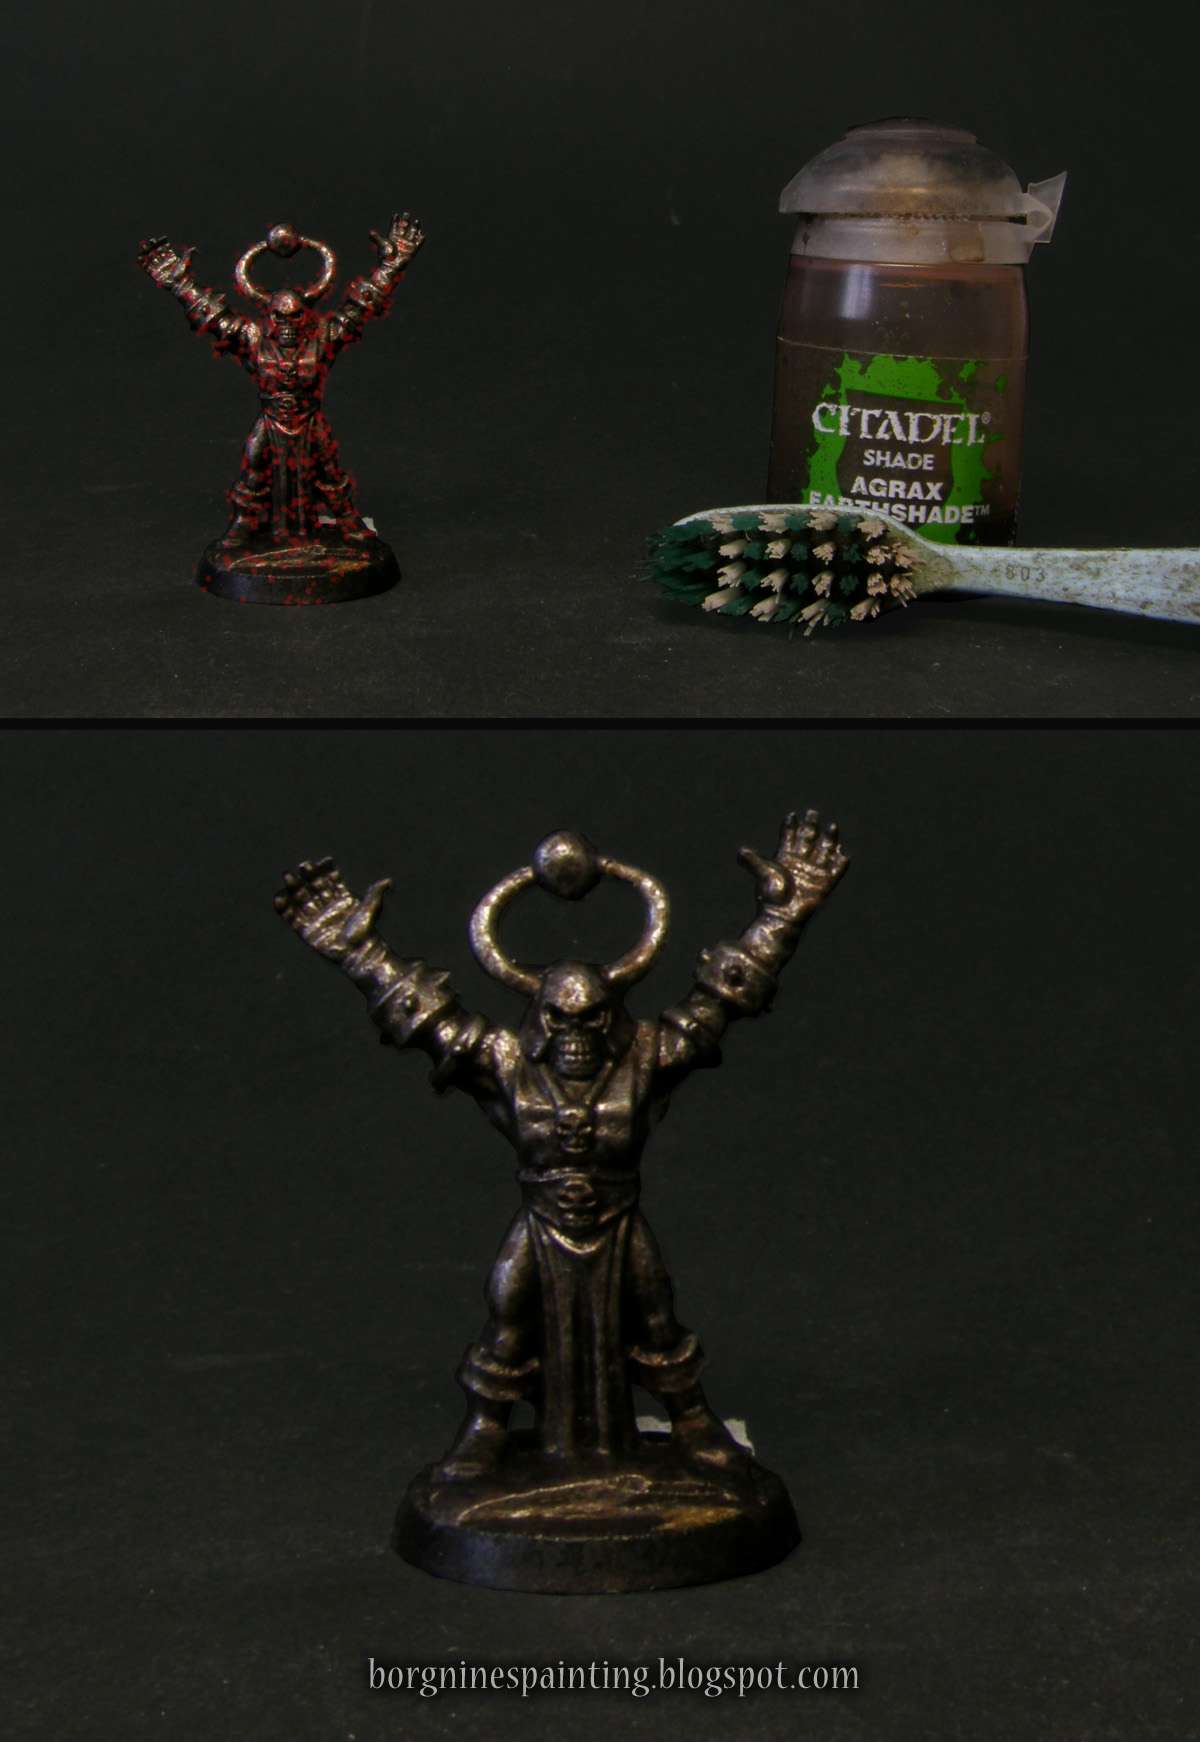
Next step is sprinkling with a toothbrush - a method that I have been using for years and which always gives some great messy randomness to miniatures. For anyone unfamiliar with it - I do it by putting the brush in the wash, wiping the excess on the inside edges of the pot (it shouldn't be dripping!) and then flicking the finger on the bristles while pointing them at the miniature - it will spray the mini with random droplets of the shade. Explained much better in a picture below (note how the direction of the sprinkle goes slightly below the direction of the brush's bristles):

Also, note that a brush with stiff bristles can be used for this task as well - it's smaller, so it's better used when you need some more control and precision.
It's always good to do the first sprinkle at something else than the miniature, to test if the amount is good - sometimes it's too wet and sometimes it doesn't even fly off the toothbrush. Obviously, this method is very messy and it's good to have something behind the mini to protect your workplace from becoming all splattered with paint. Here is my setup:
It's always good to do the first sprinkle at something else than the miniature, to test if the amount is good - sometimes it's too wet and sometimes it doesn't even fly off the toothbrush. Obviously, this method is very messy and it's good to have something behind the mini to protect your workplace from becoming all splattered with paint. Here is my setup:

Here is how it looks after sprinkling first with Nuln Oil, letting it dry and then sprinkling it again, with Agrax Earthshade (red dots on the picture above simulate the sprinkling).
Now is the time to bring back some of the metallics. I do this by stippling the areas marked red (generally all the exposed areas, especially the ones that can be seen from above the mini - once again, simulating the light with brighter areas on the mini). Stippling is like drybrush, only instead of brushing the mini, you hit it's surface vertically from above and the brush has slightly more paint in it than your typical drybrush. I use for this a synthetic brush with the top part of the bristles cut off, making it flat and perfect for this task.

To avoid making it all too clean I sprinkled the mini once again, this time only with Agrax Earthshade.
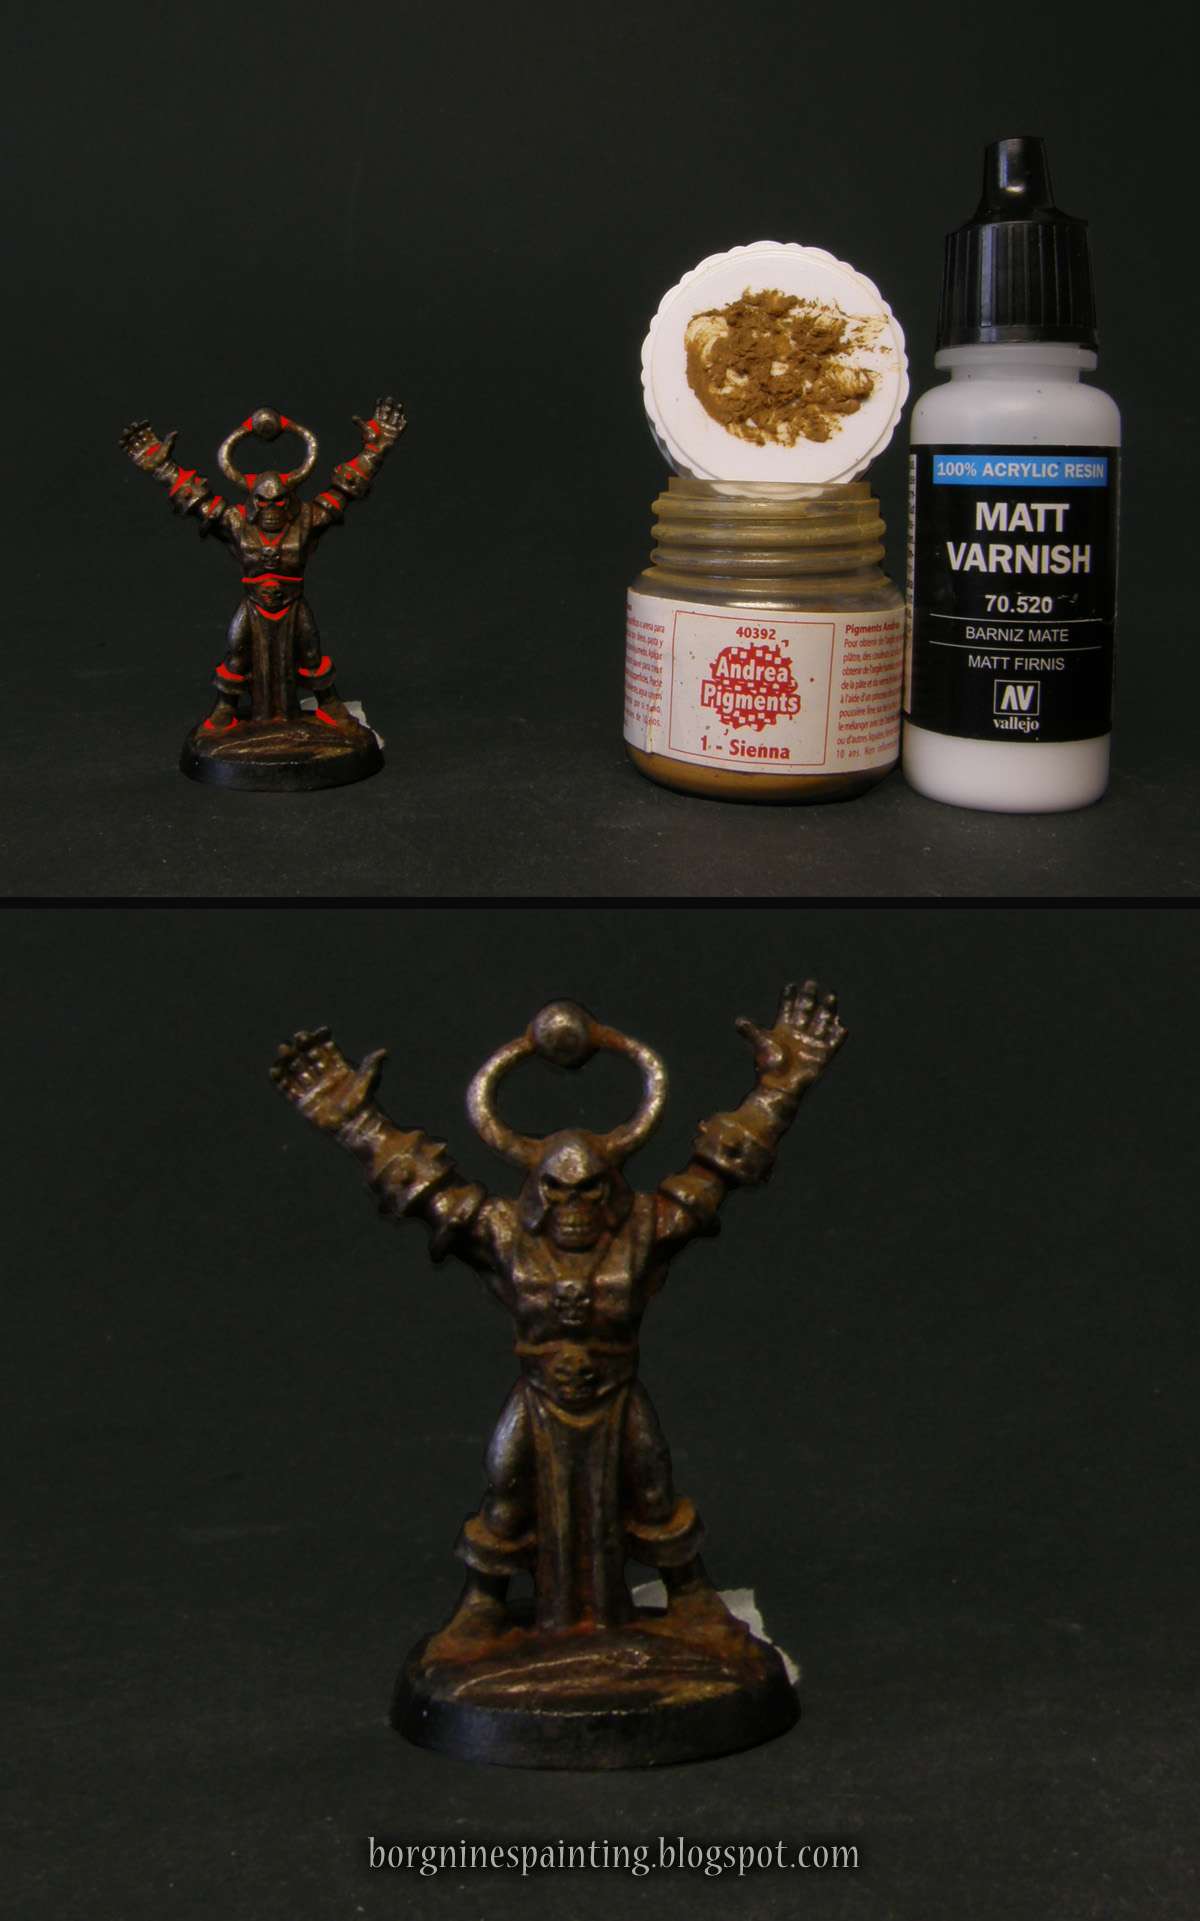
Now it's time for some rust! For this, I am using two pigments - one for old rust that's gathered on most of the areas and is very weathered and another for much fresher rust. First one is Burnt Sienna - I am using Vallejo, but other companies' pigments should work the same. I mix it in 1:2 proportion with Vallejo Matt Varnish (needs to be shaken really, really good, can come out glossy if unshaken). After mixing I take an old and tiny brush and put it in large(ish) blobs in all the recesses. Seen below, only around the head:
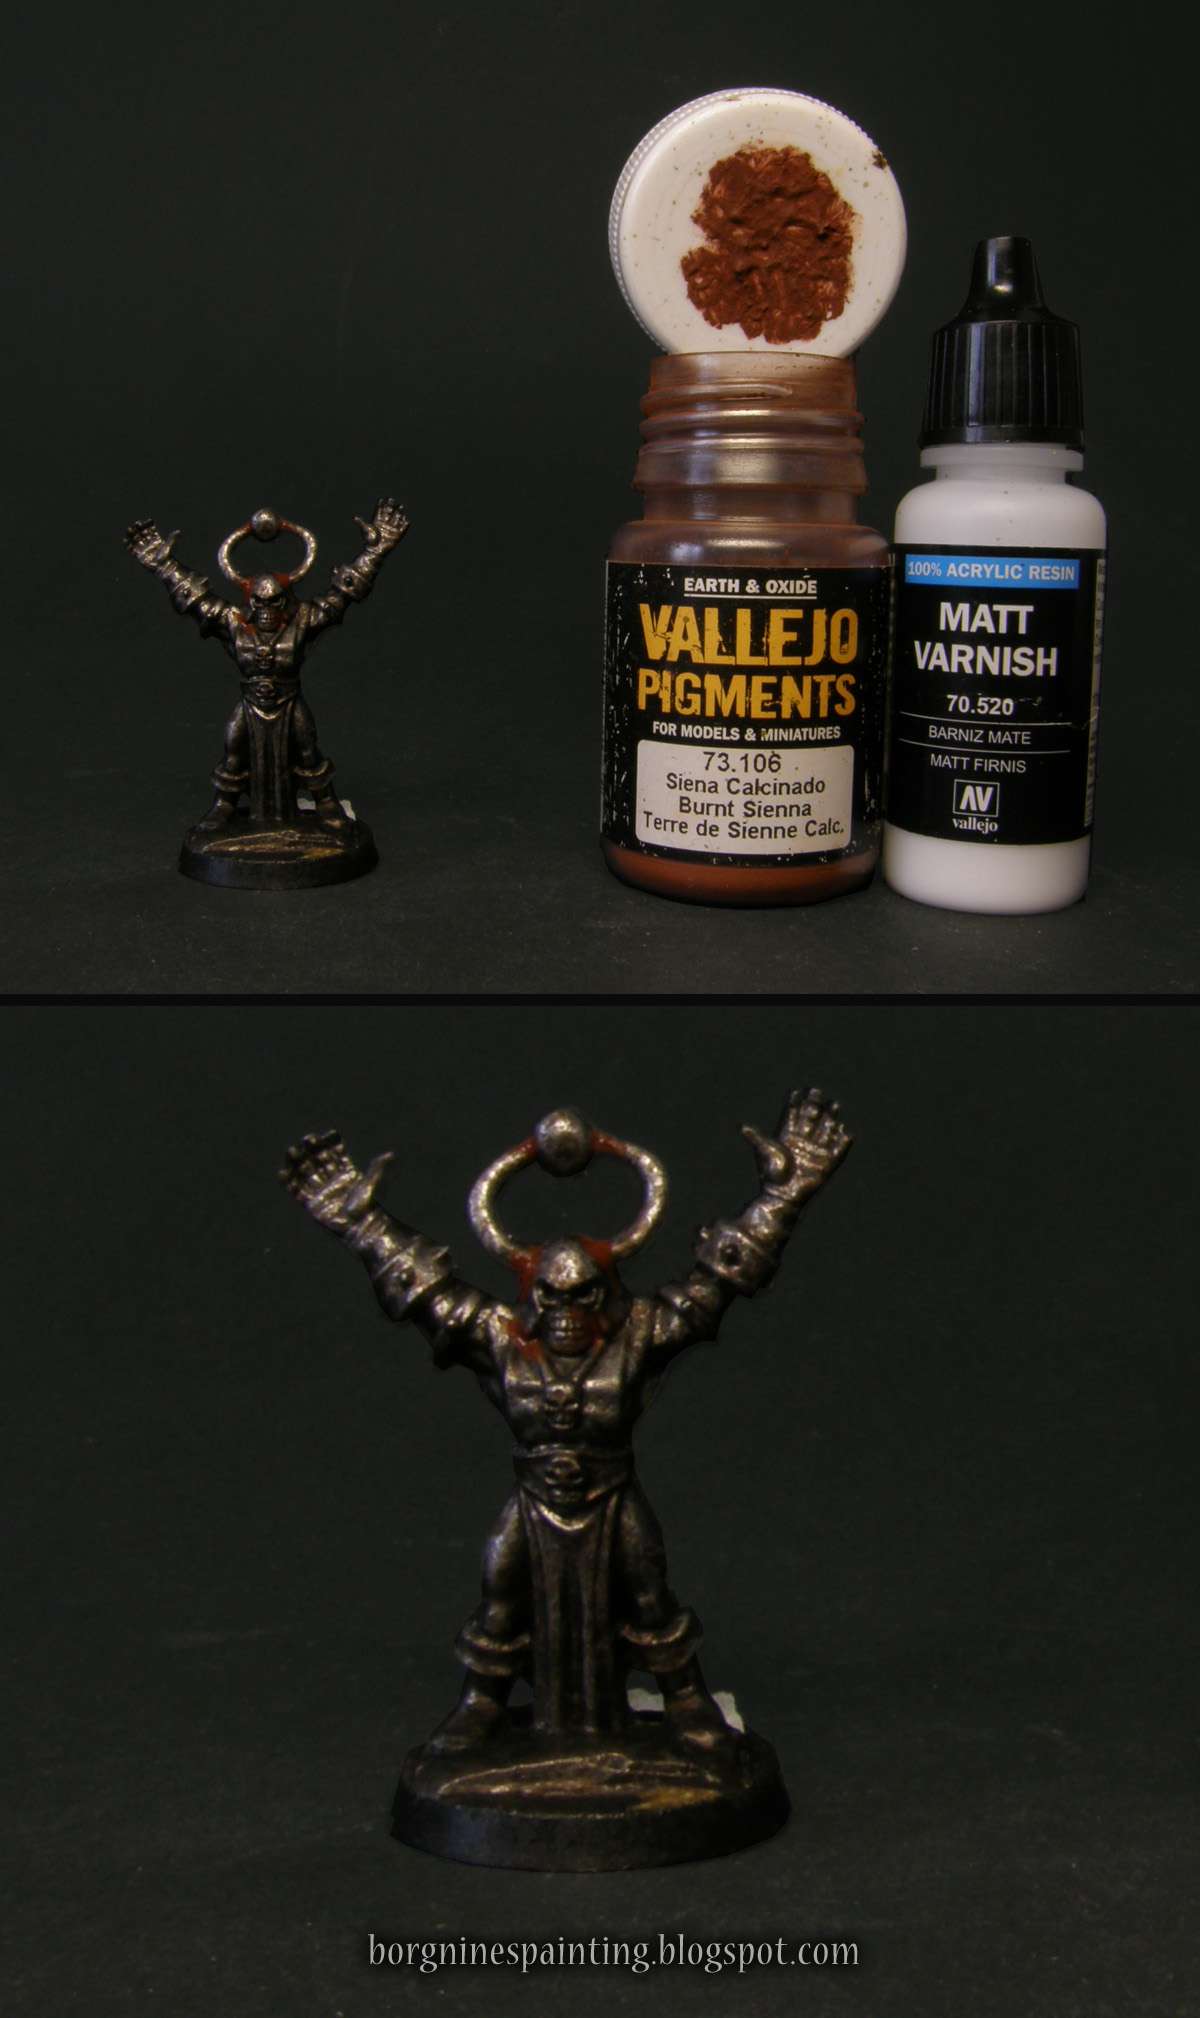
After around half a minute after that, I take a larger brush, take in lots of water in it and then messily brush around the pigment. Most of it would stay in the recess, but the rest should be spread around, creating a dirty, weathered effect. Seen below, only around the head:
Then, the process should be repeated on the whole mini. It can be done in one take, especially on a small mini like that (I wanted to show the principle first), but on larger minis, the pigment can dry before you start applying water to it, so plan your painting accordingly.
The amount of rust used in this step is up to you, depending on how rusted you would like your miniature. First time I tried making this tutorial I overdid it and the sorcerer wasn't similar at all to the Faceless - so next time I did it much subtler.
The amount of rust used in this step is up to you, depending on how rusted you would like your miniature. First time I tried making this tutorial I overdid it and the sorcerer wasn't similar at all to the Faceless - so next time I did it much subtler.
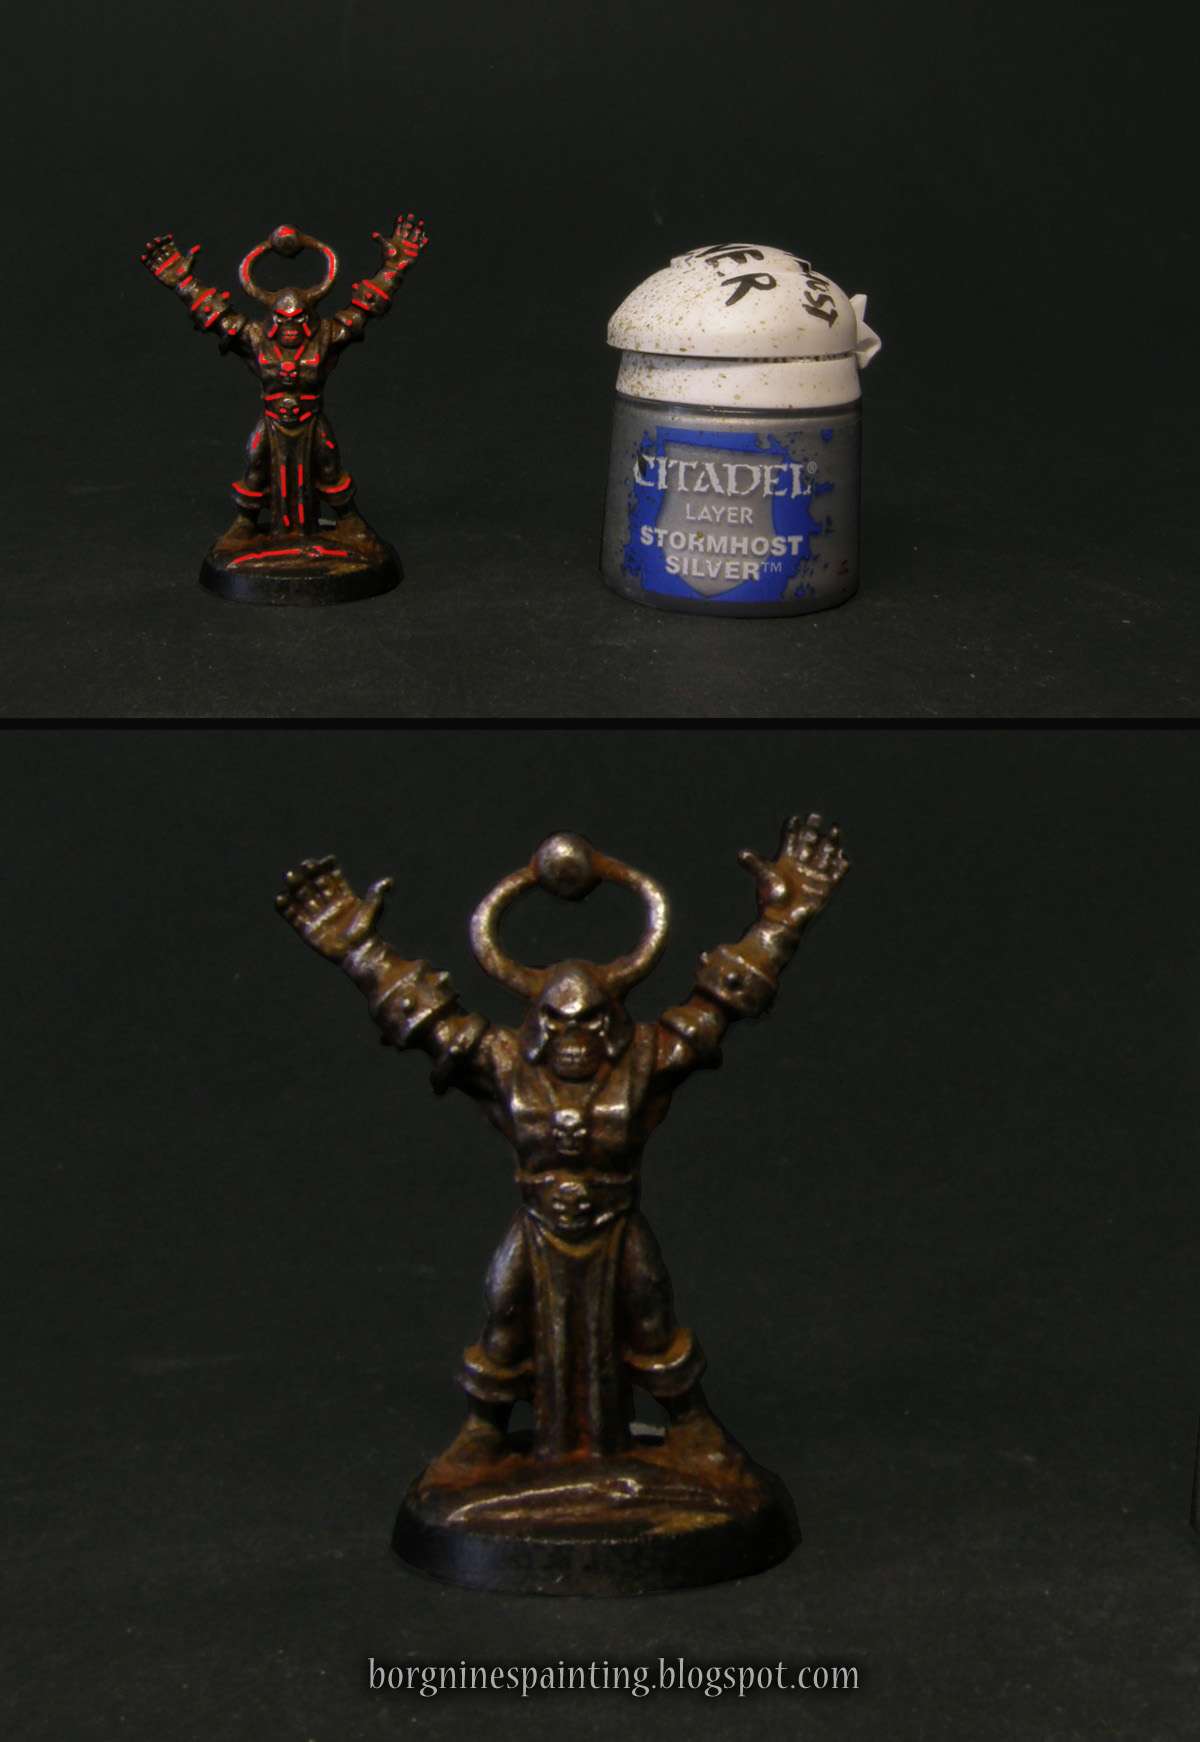
When the first layer of rust is dry, it's time for the next layer. Here I used a Sienna pigment, which is lighter and much more yellow. The technique and proportions are the same as before, only this time you shouldn't spread is as much with water, only a little bit. The trick here is to apply it to areas on the mini where the water would gather the most - so all the recess parts that are not on the undersides - I marked those areas with red on the picture below.
Now, the highlights. I used Stormhost Silver, but any other bright silver can be used instead - and because of how bright it is, it should be used sparingly. I applied it as an edge highlight on the most raised areas or as tiny dots on the rivets and other pointy details. As before, shown below in red how I used it:
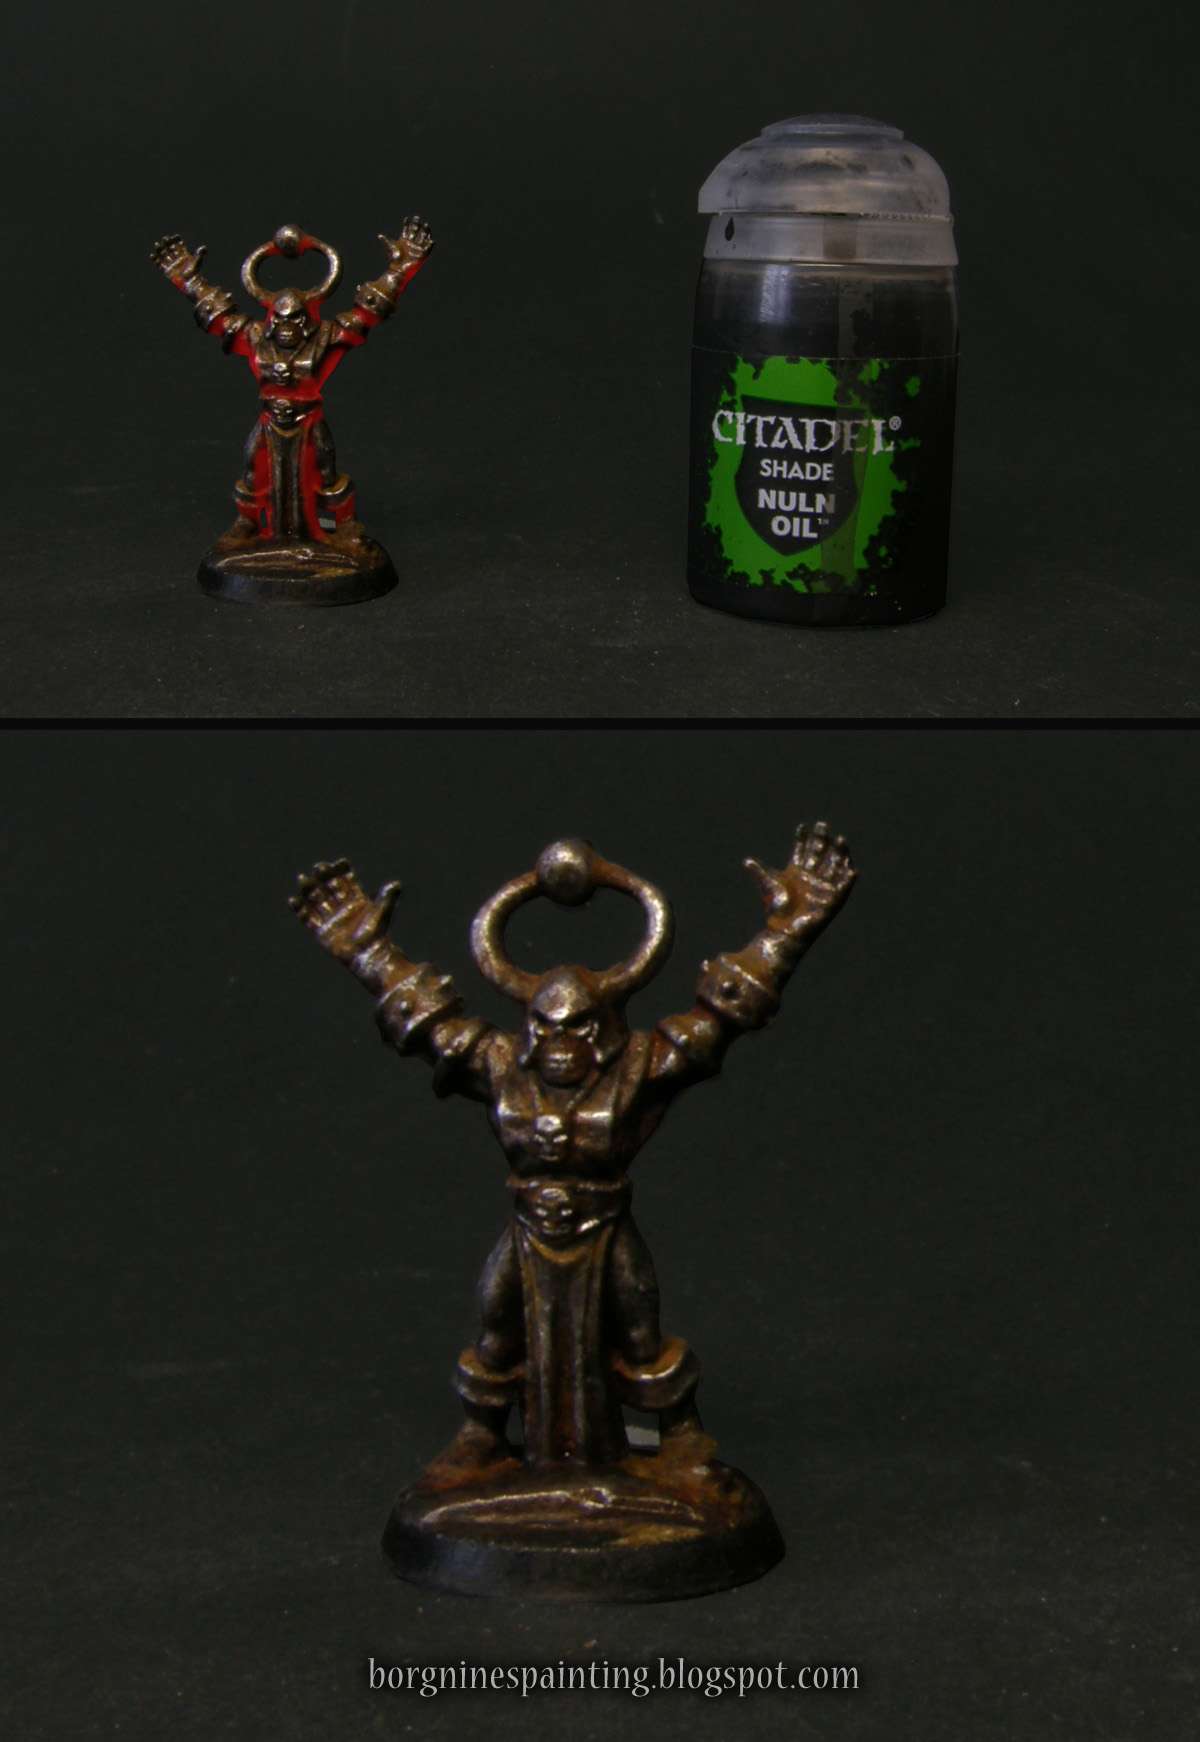
Because the pigments can flatten the miniature a bit, the final step is to deepen the shaded areas with some Nuln Oil. I applied it on all the undersides of the mini, shown below in red. The trick is to wipe the excess of the wash from the brush (it shouldn't be full and dripping) and brush it towards the darkest, most recessed area (wet paint tends to be the thickest where you take the brush off the mini). This should create a gradient, with a much smoother effect.
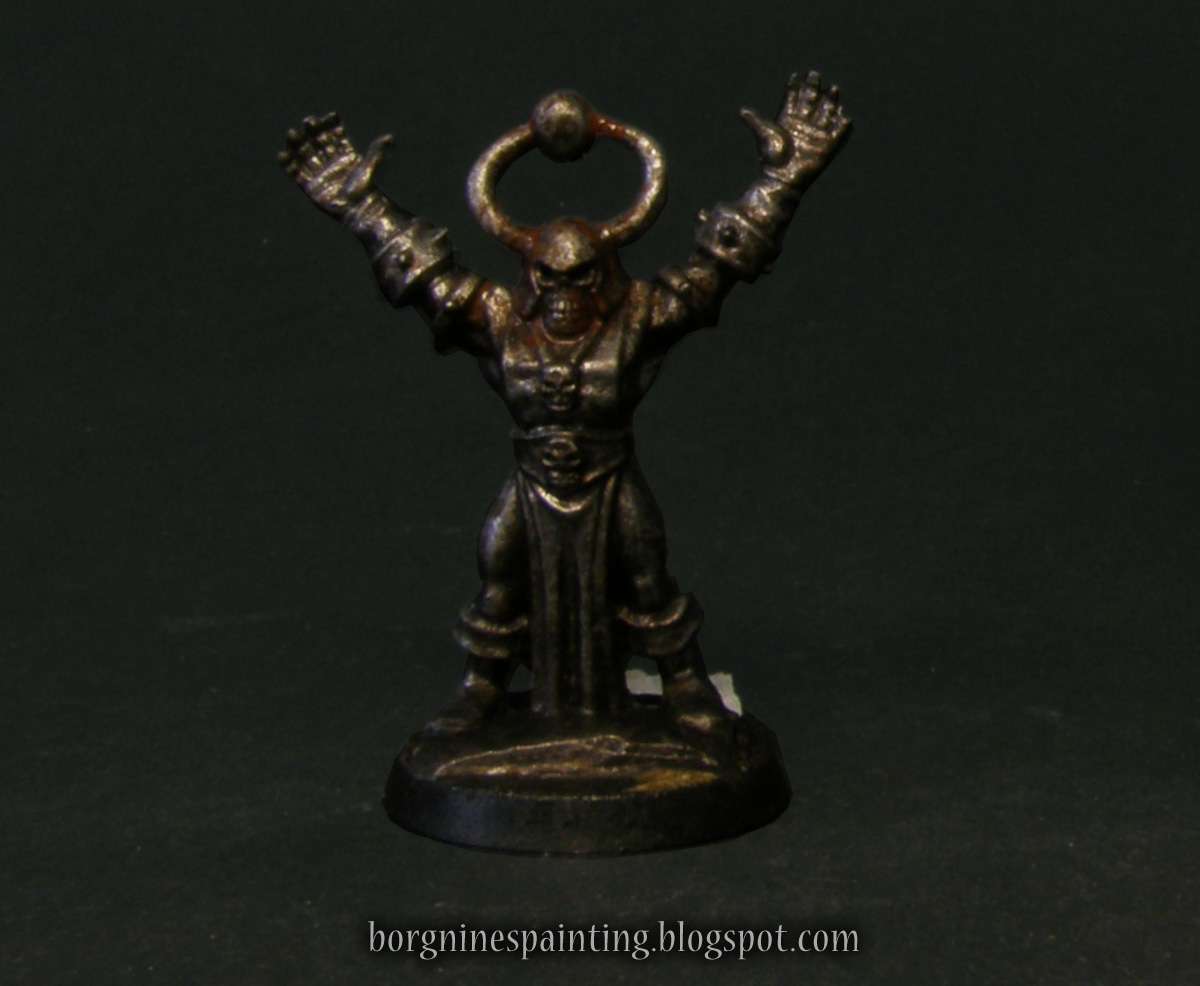
And that's it, the rusted statue is ready. I based him and set him beside the Crusader from the warband that started this whole rusted scheme. This brave chaos sorcerer will be used as a marker in my games - and if I ever need him in some more responsible role, I will just strip him and repaint him.
Pigment robi robotę. Dzięki za poradnik, efekt jaki uzyskałeś jest świetny!
ReplyDeleteSzacuneczek za formę tutoriala (wyjaśnienie technik, rysunki poglądowe i zdjęcia produktów), jak i za uzyskany efekt :)
ReplyDeleteDzięki! Cieszę się, że taka nievideowa forma jeszcze funkcjonuje i się spodobała ;)
DeleteI have that Matte Varnish and pigment, I may have to try it, tonight. Or do I have gloss varnish, I might have gloss....
ReplyDelete